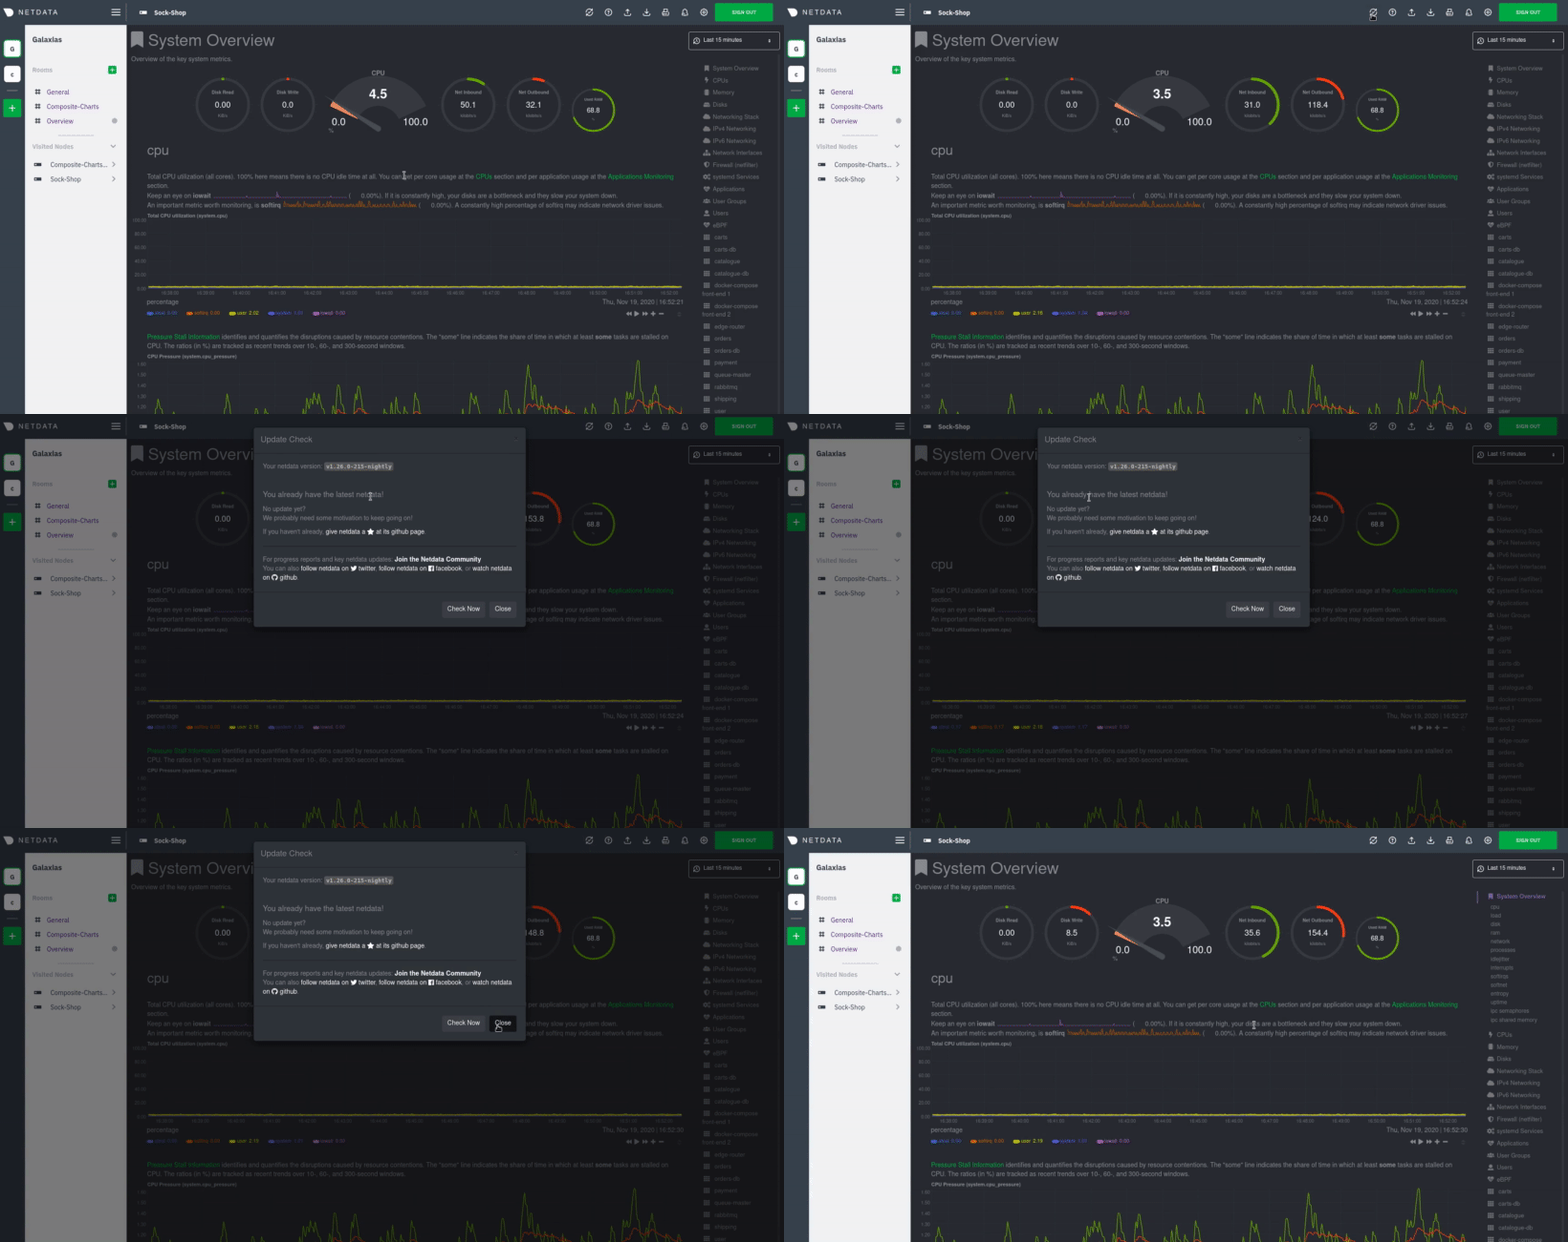
By default, the Netdata Agent automatically updates with the latest nightly version. If you opted out of automatic updates, you need to update your Netdata Agent to the latest nightly or stable version.
💡 Looking to reinstall the Netdata Agent to enable a feature, update an Agent that cannot update automatically, or troubleshoot an error during the installation process? See our reinstallation doc for reinstallation steps.
Before you update the Netdata Agent, check to see if your Netdata Agent is already up-to-date by clicking on the update icon in the local Agent dashboard's top navigation. This modal informs you whether your Agent needs an update or not.
If you are not sure where your Netdata config directory is, see the configuration doc. In
most installations, this is /etc/netdata.
Use cd to navigate to the Netdata config directory, then use ls -a to look for a file called .environment.
- If the
.environmentfile does not exist, reinstall with your package manager. - If the
.environmentfile does exist, check its contents withless .environment.- If
IS_NETDATA_STATIC_BINARYis"yes", update using the pre-built static binary. - In all other cases, update using the one-line installer script.
- If
Next, use the appropriate method to update the Netdata Agent:
- One-line installer script (
kickstart.sh) .debor.rpmpackages- Pre-built static binary for 64-bit systems (
kickstart-static64.sh) - Docker
- macOS
- Manual installation from Git
If you installed Netdata using our one-line automatic installation script, run it again to update Netdata. Any custom
settings present in your Netdata configuration directory (typically at /etc/netdata) persists during this process.
This script will automatically run the update script that was installed as part of the initial install (even if you disabled automatic updates) and preserve the existing install options you specified.
If you installed Netdata using an installation prefix, you will need to add an --install option specifying
that prefix to this command to make sure it finds Netdata.
bash <(curl -Ss https://my-netdata.io/kickstart.sh)❗ If the above command fails, you can reinstall Netdata to get the latest version. This also preserves your configuration in
netdata.confor other files.
If you installed Netdata with .deb or .rpm packages, use your
distribution's package manager to update Netdata. Any custom settings present in your Netdata configuration directory
(typically at /etc/netdata) persists during this process.
Your package manager grabs a new package from our hosted repository, updates the Netdata Agent, and restarts it.
apt-get install netdata     # Ubuntu/Debian
dnf install netdata         # Fedora/RHEL
yum install netdata         # CentOS
zypper in netdata           # openSUSE
You may need to escalate privileges using
sudo.
If you installed Netdata using the pre-built static binary, run the kickstart-static64.sh script again to update
Netdata. Any custom settings present in your Netdata configuration directory (typically at /etc/netdata) persists
during this process.
This script will automatically run the update script that was installed as part of the initial install (even if you disabled automatic updates) and preserve the existing install options you specified.
bash <(curl -Ss https://my-netdata.io/kickstart-static64.sh)❗ If the above command fails, you can reinstall Netdata to get the latest version. This also preserves your configuration in
netdata.confor other files.
Docker-based installations do not update automatically. To update an Netdata Agent running in a Docker container, you must pull the latest image from Docker Hub, stop and remove the container, and re-create it using the latest image.
First, pull the latest version of the image.
docker pull netdata/netdata:latestNext, to stop and remove any containers using the netdata/netdata image. Replace netdata if you changed it from the
default.
docker stop netdata
docker rm netdata
You can now re-create your Netdata container using the docker command or a docker-compose.yml file. See our Docker
installation instructions for details.
If you installed Netdata on your macOS system using Homebrew, you can explicitly request an update:
brew upgrade netdataHomebrew downloads the latest Netdata via the formulae, ensures all dependencies are met, and updates Netdata via reinstallation.
If you installed Netdata manually from Git, you can run that installer again to update your agent. First, run our automatic requirements installer, which works on many Linux distributions, to ensure your system has the dependencies necessary for new features.
bash <(curl -sSL https://raw.githubusercontent.com/netdata/netdata/master/packaging/installer/install-required-packages.sh)Navigate to the directory where you first cloned the Netdata repository, pull the latest source code, and run
netdata-install.sh again. This process compiles Netdata with the latest source code and updates it via reinstallation.
cd /path/to/netdata/git
git pull origin master
sudo ./netdata-installer.sh
⚠️ If you installed Netdata with any optional parameters, such as--no-updatesto disable automatic updates, and want to retain those settings, you need to set them again during this process.
