-
Notifications
You must be signed in to change notification settings - Fork 57
Heroku Deployment Guide
Welcome to the Reservations Heroku deployment guide. Please select which of the following methods you're using to deploy to Heroku: Heroku button or Heroku toolbelt / CLI.
Deploying to Heroku with the Heroku button is quick, easy, and a great way to get an instance of Reservations up and running quickly. The steps for a fully-functioning deployment are as follows:
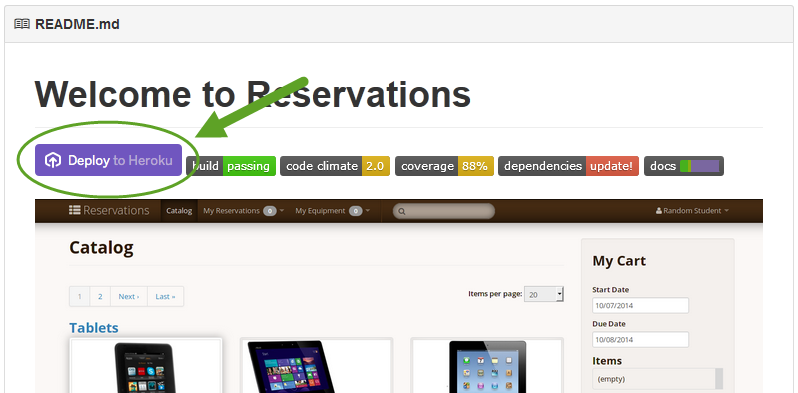
- Click on the "Deploy to Heroku" button in the README
- Create a Heroku account or sign in to your existing account
- Enter an application name (this must be unique across all users of Heroku)
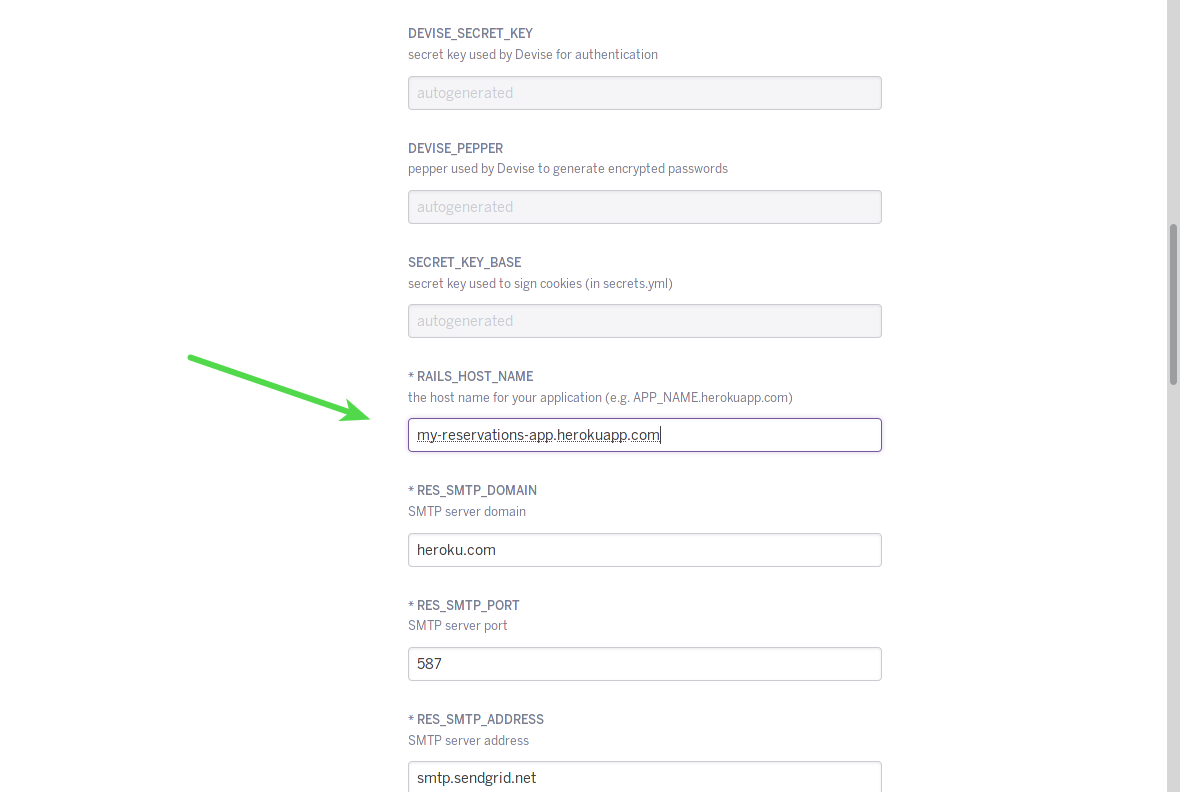
- Enter the instance hostname for the
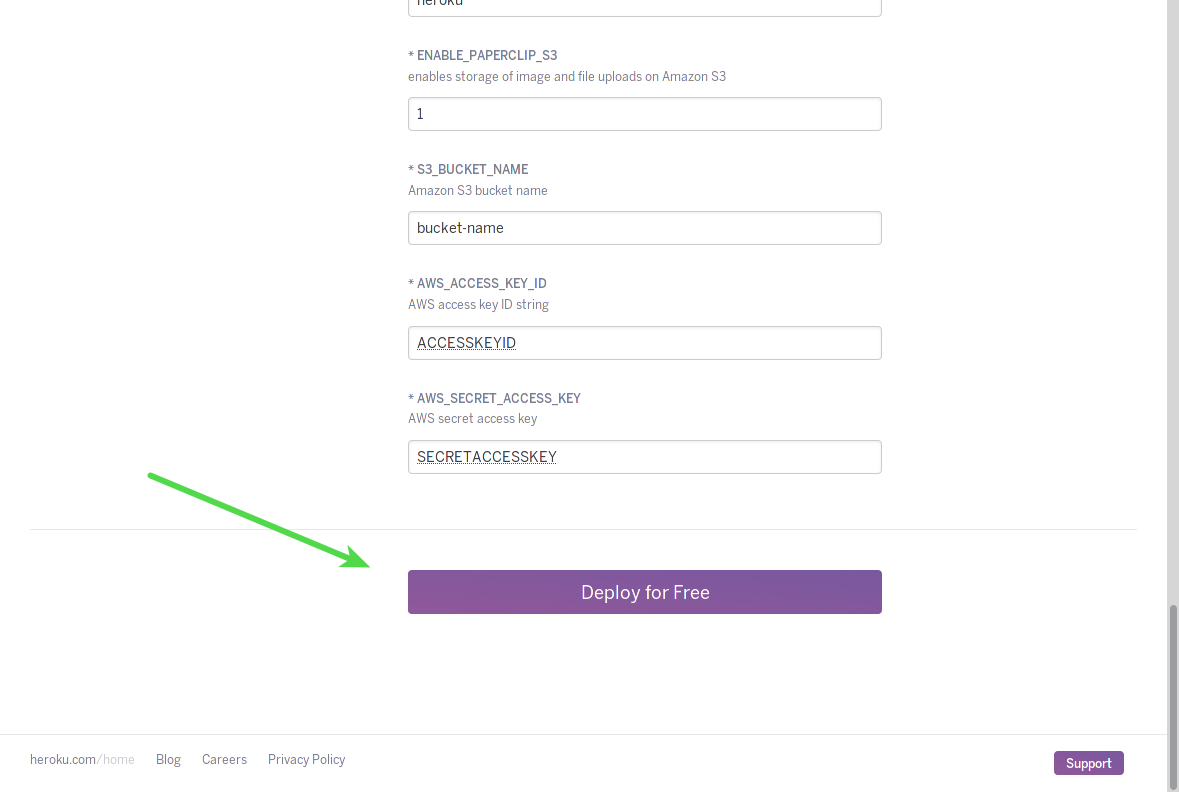
RAILS_HOST_NAMEconfig setting - Click the "Deploy for Free" button
- When deployment is finished, click on the "Make your first edit" link
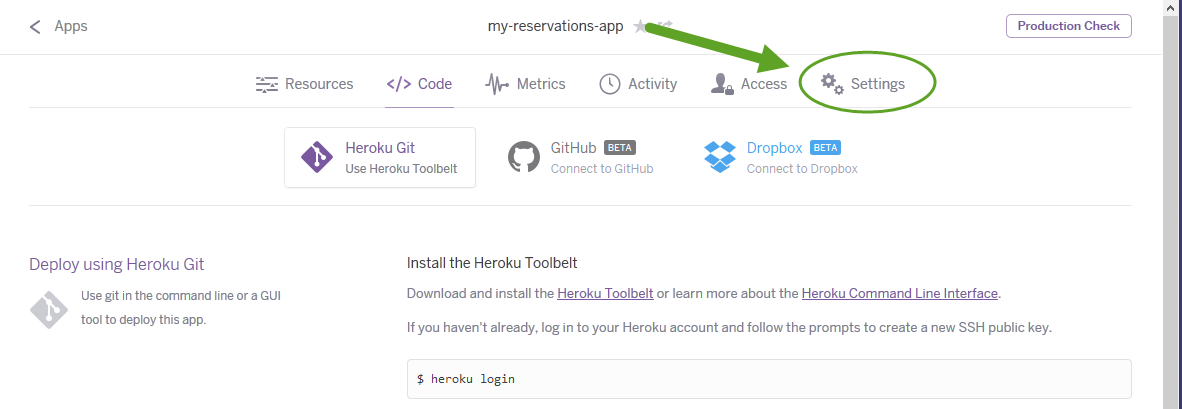
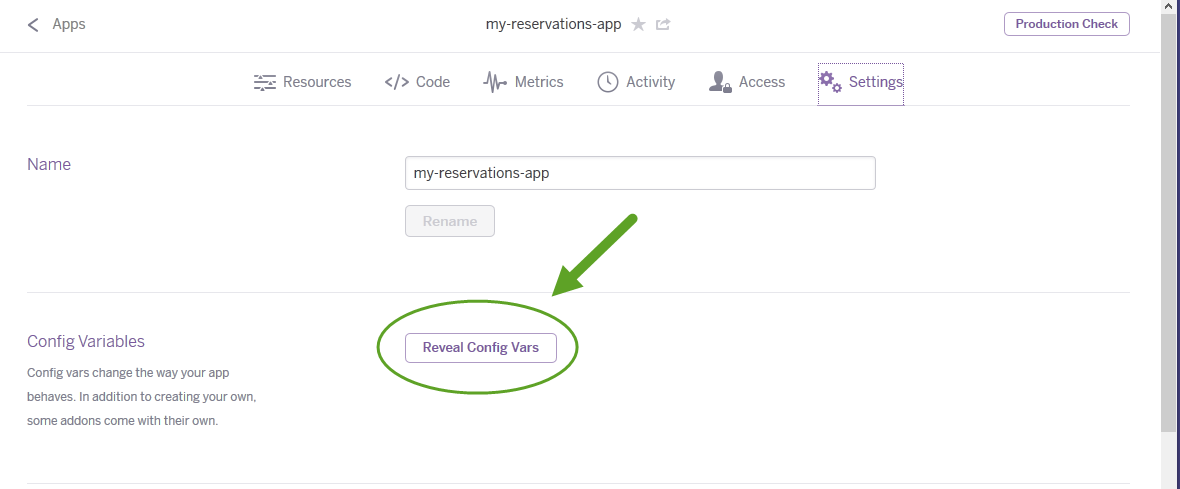
- Click on the "Settings" link
- Click on the "Reveal Config Vars" button
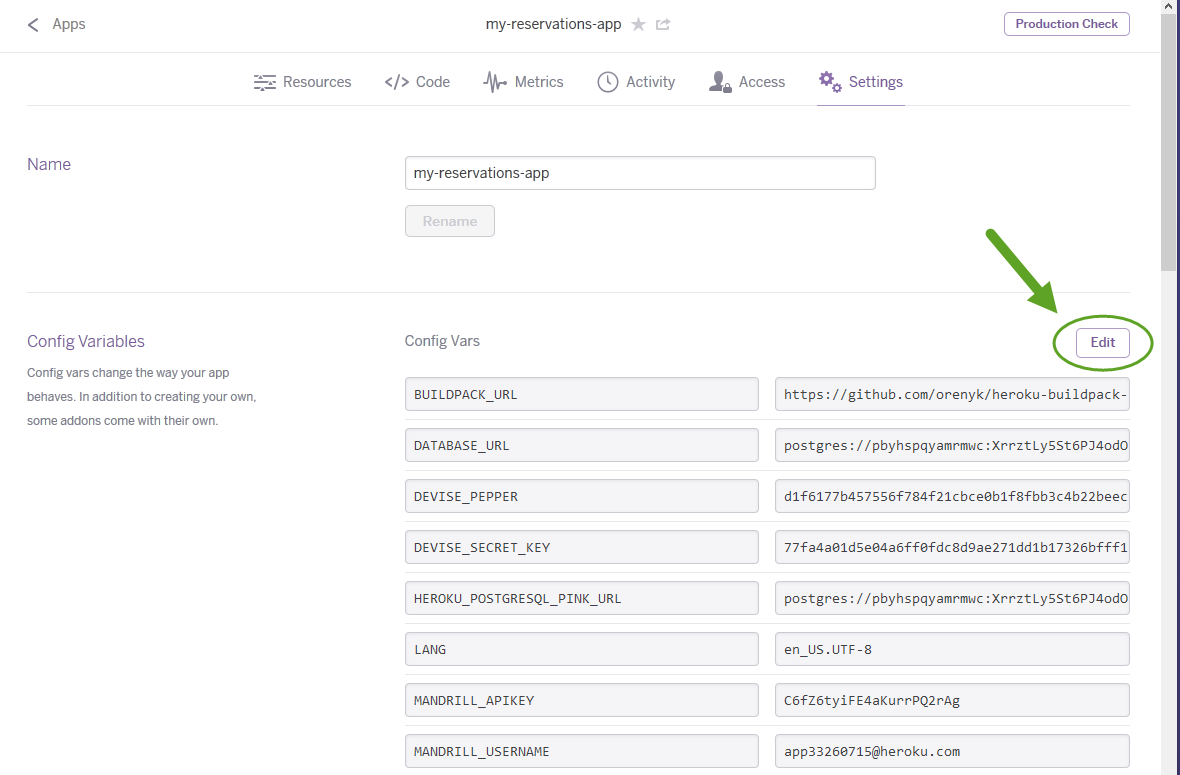
- Click on the "Edit" button
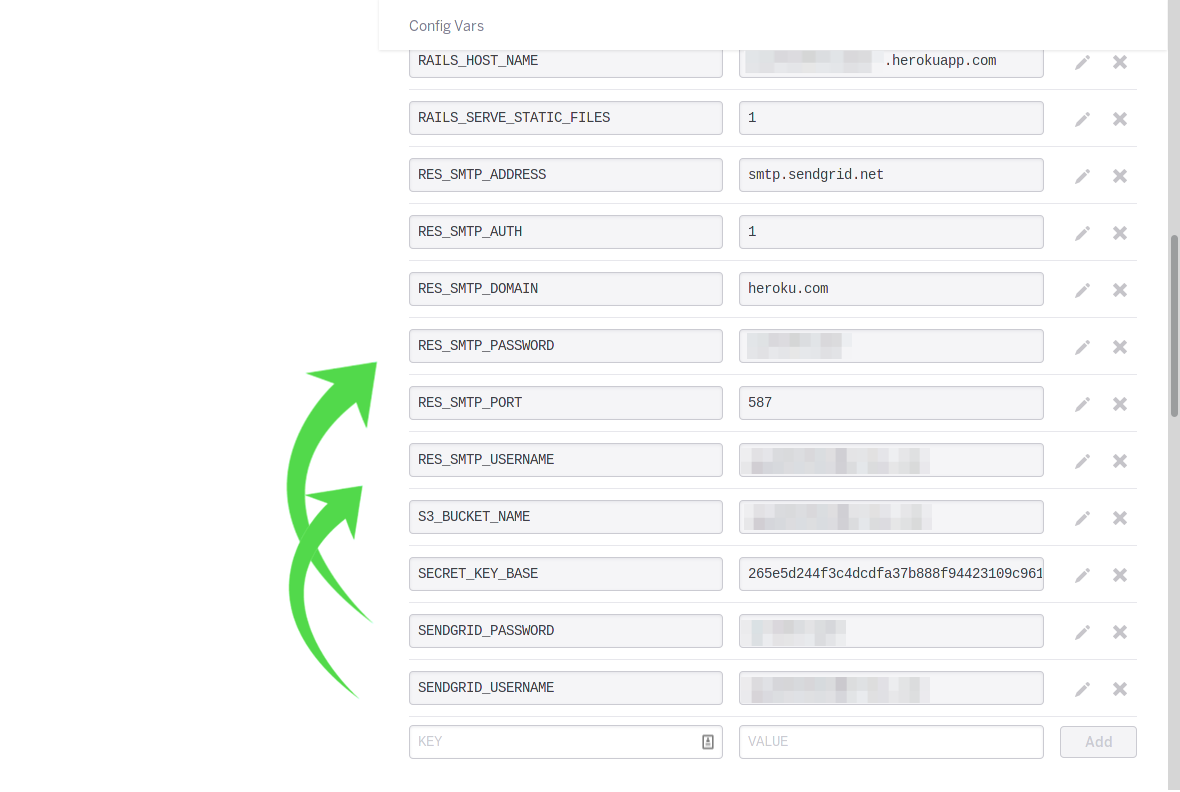
- Copy the
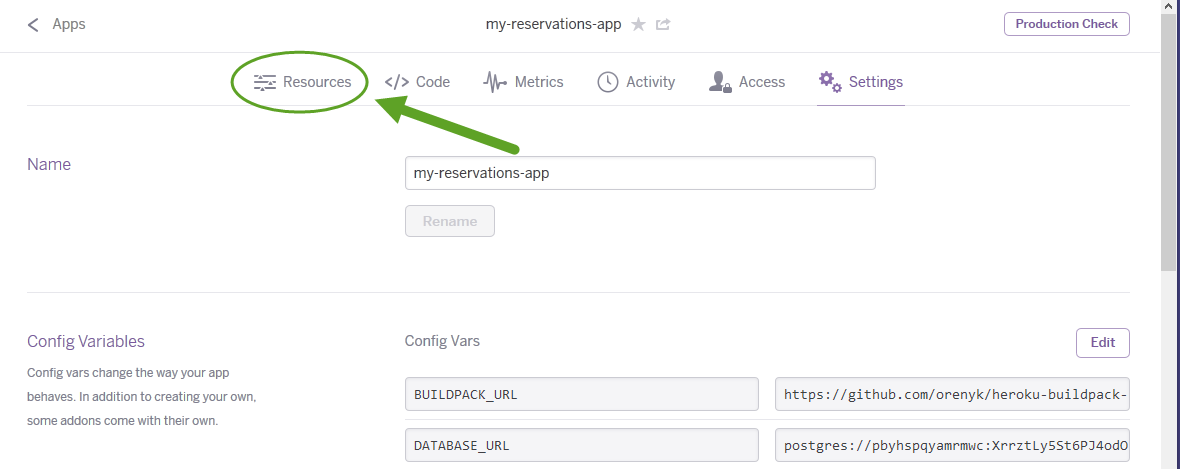
MANDRILL_APIKEYvar into theRES_SMTP_PASSWORDvar and theMANDRILL_USERNAMEvar into theRES_SMTP_USERNAMEvar and click the "Save" button - Click on the "Resources" link
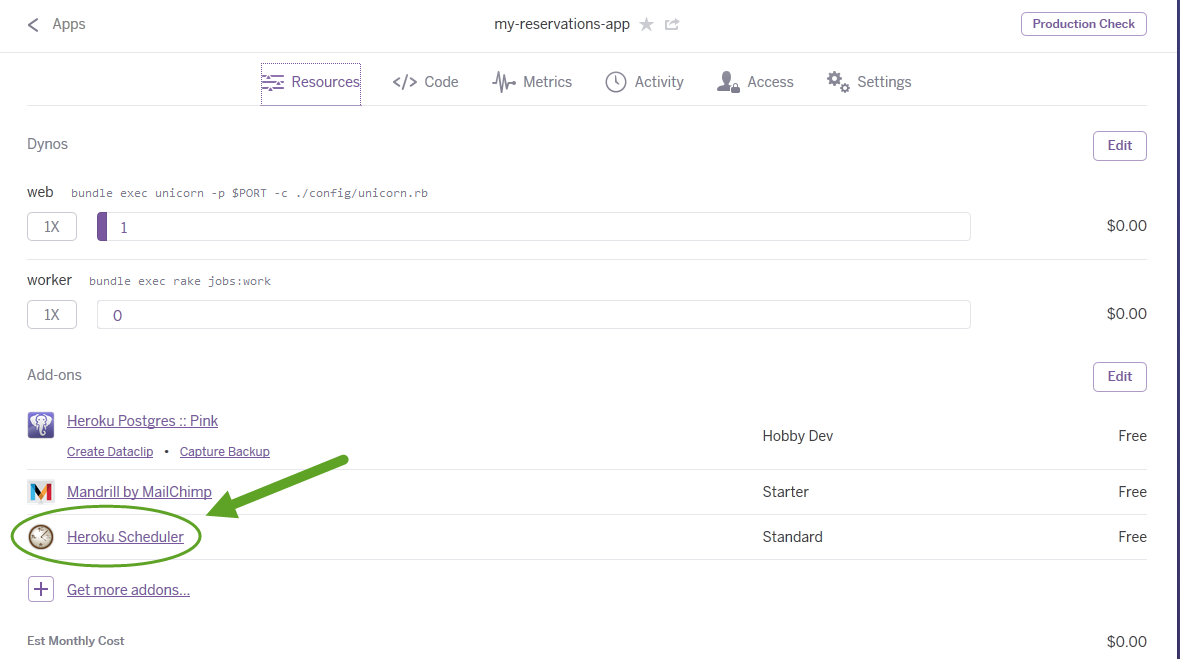
- Click on the "Scheduler" add-on link
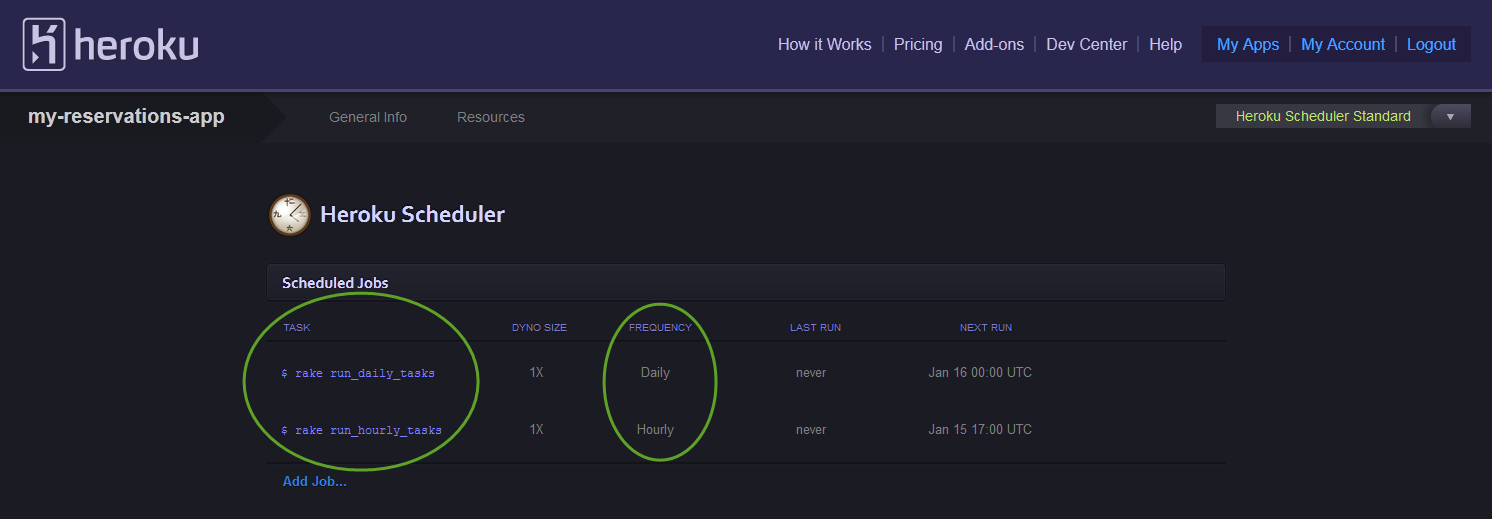
- Schedule hourly (
rake run_hourly_tasks) and daily (rake run_daily_tasks) rake tasks
- Note that these jobs will consume Heroku resources and can result in your application costing you money. For more information see here.
- Visit your instance (
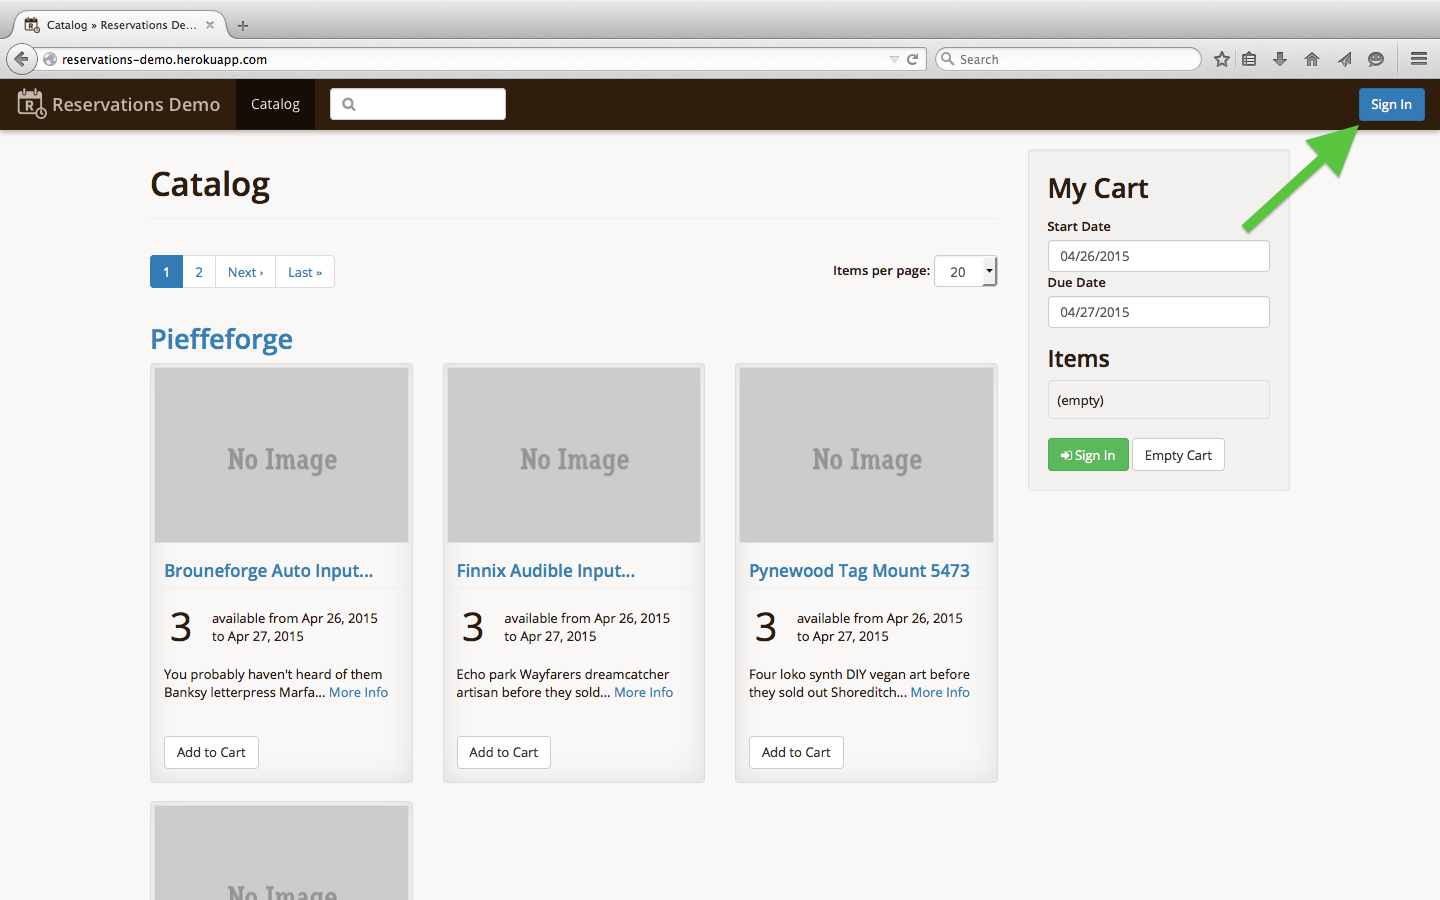
http://my-reservations-app.herokuapp.com) - Click on the "Sign In" link on the top-right corner
- Log in with the email
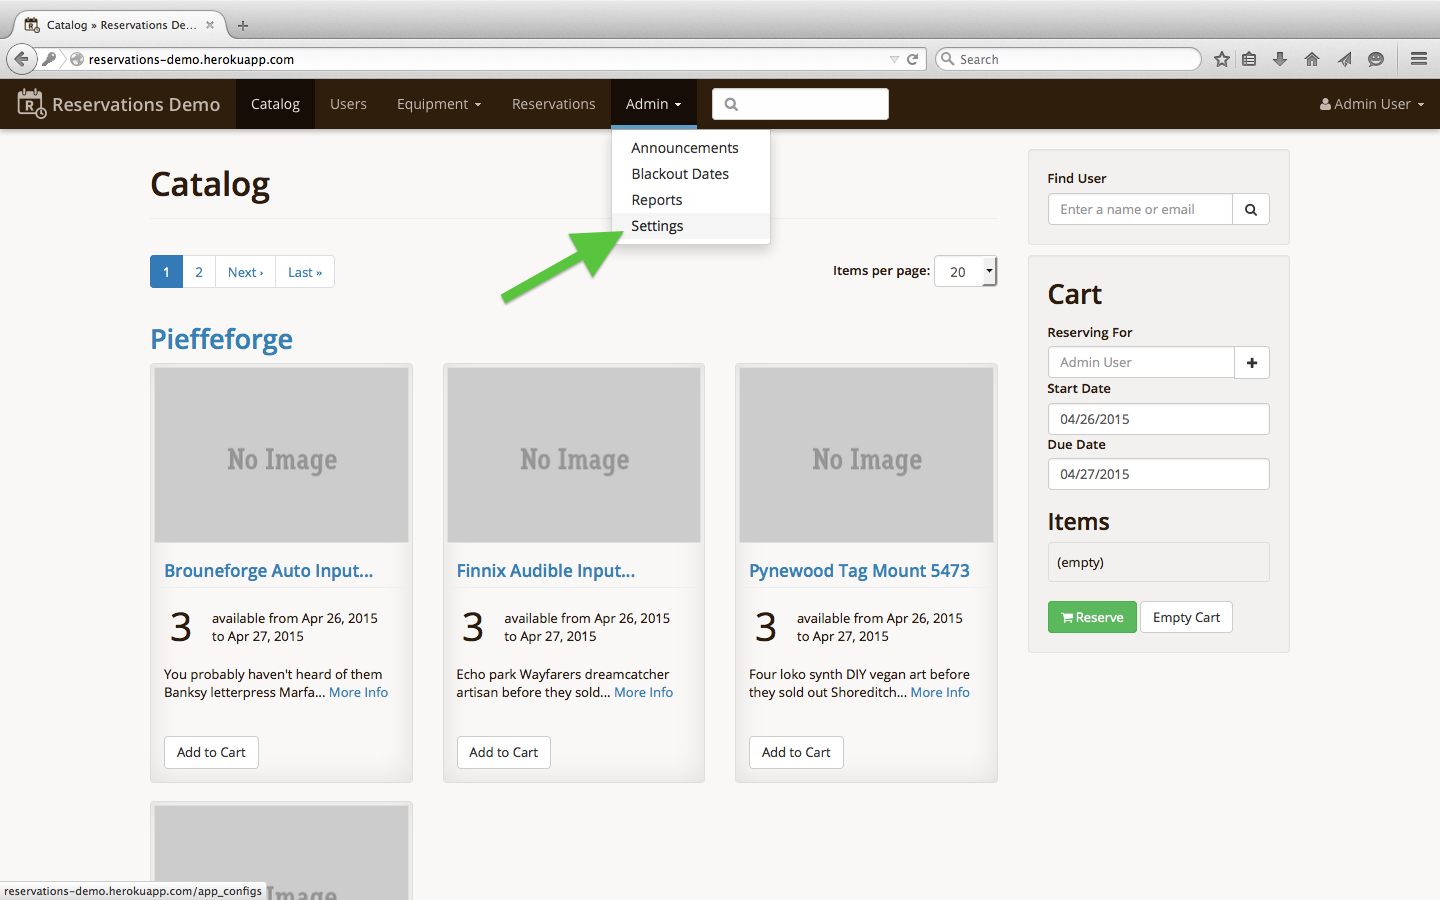
email@email.comand passwordpassw0rd - Visit the application settings
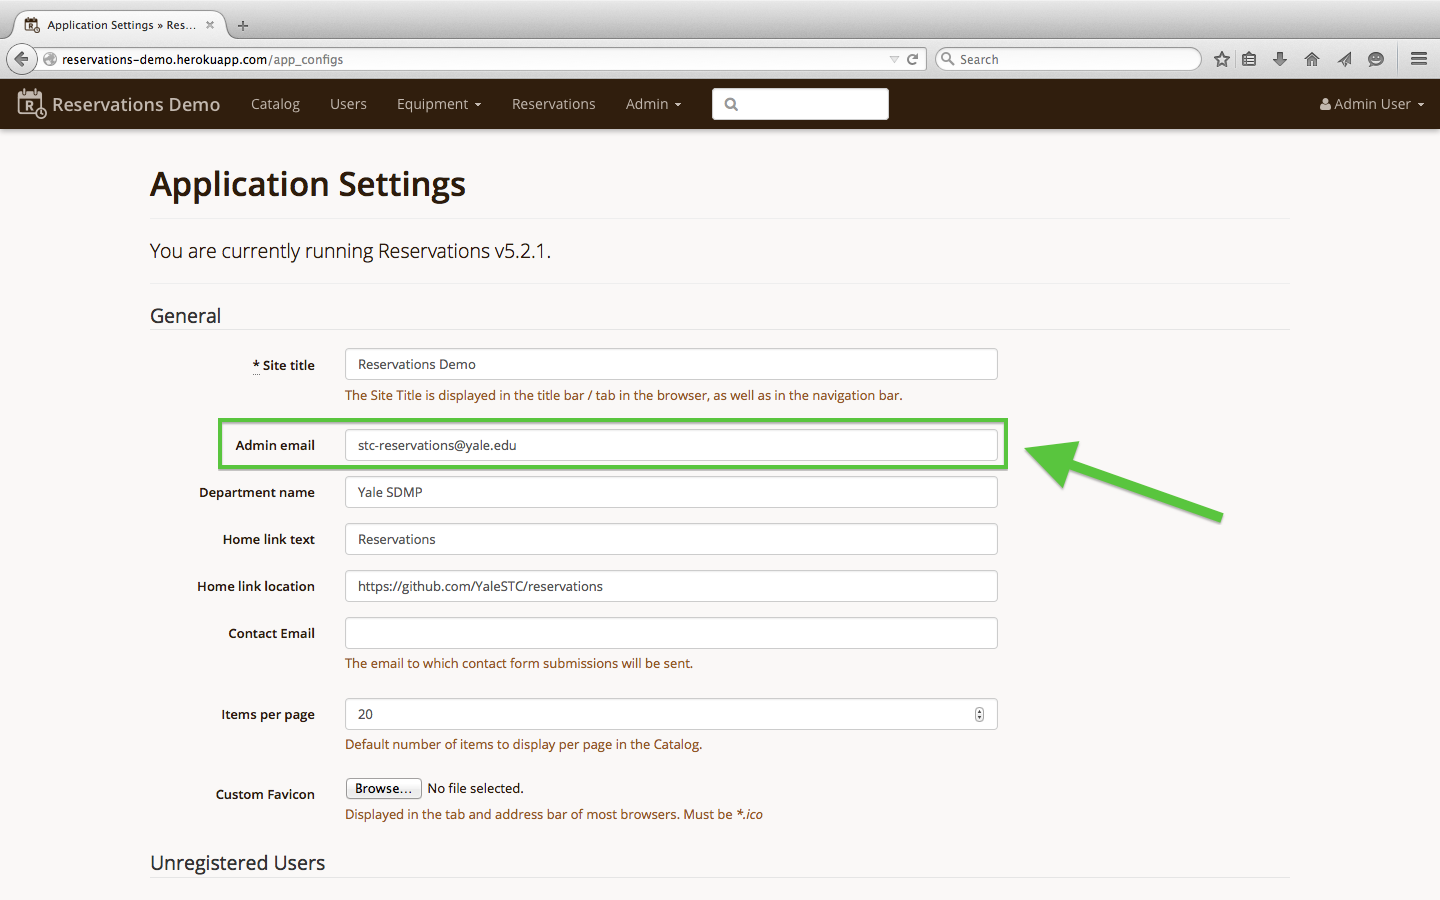
- Edit the settings to your liking and click on the "Update Settings" button on the bottom of the page; make sure to change the "Admin email" setting to your e-mail address so you receive notifications [screenshot - edit_admin_email.png]
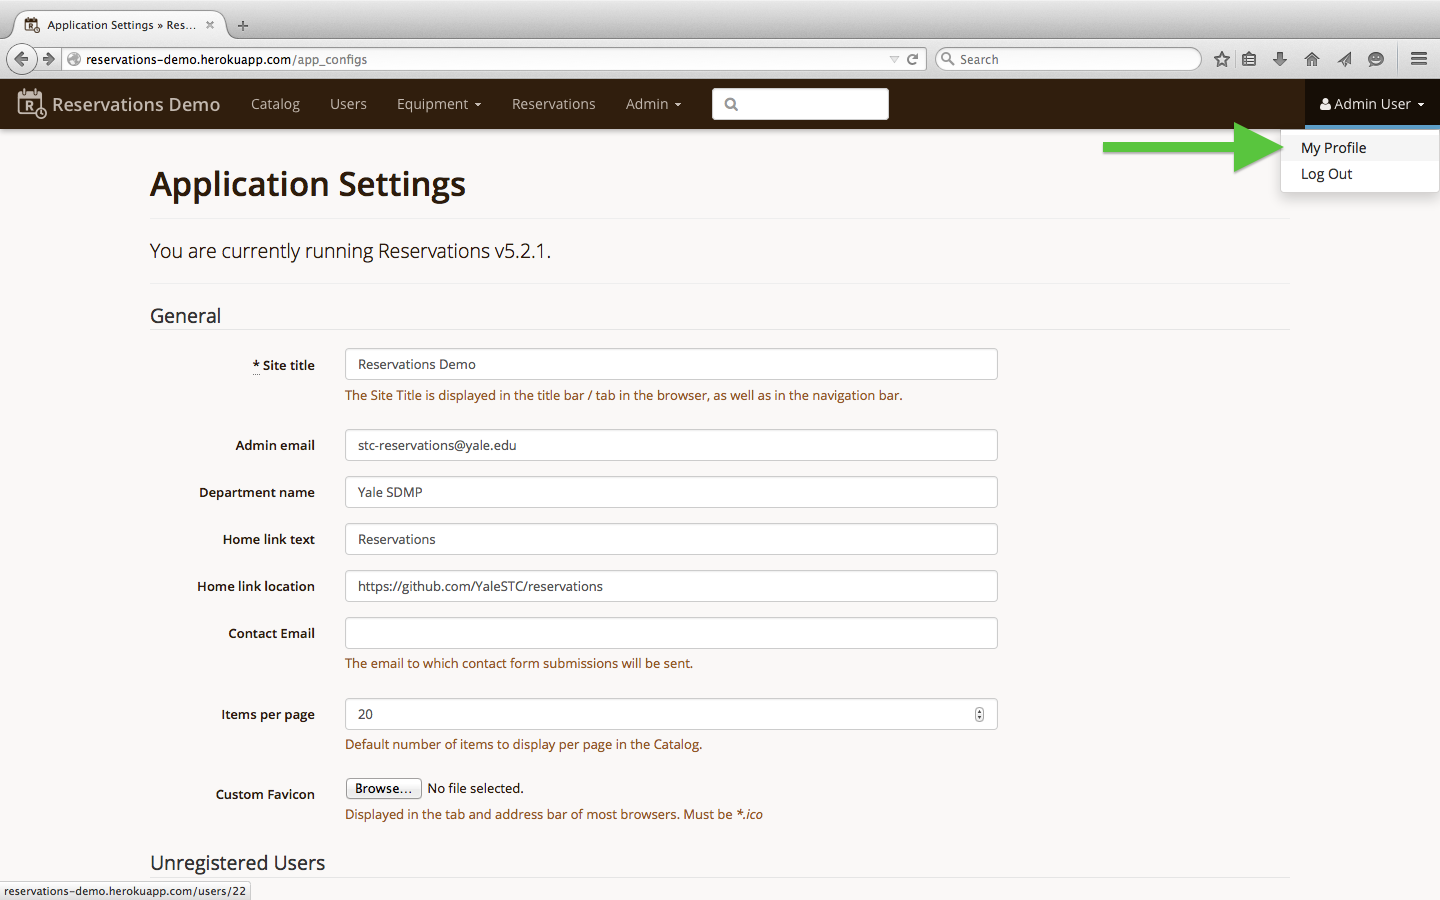
- Visit your user profile
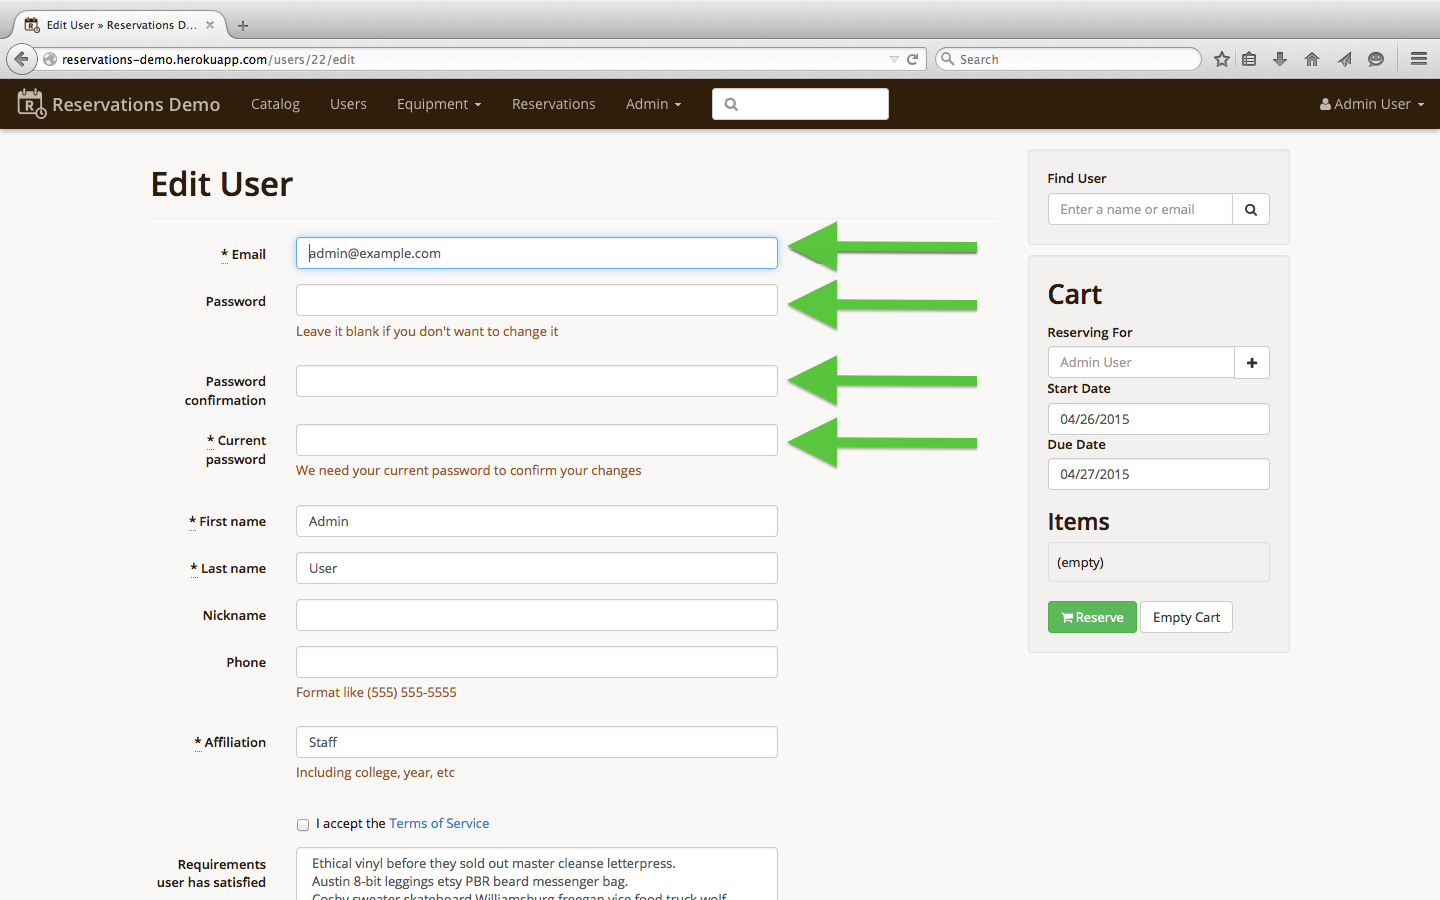
- Click on the "Edit Information" button on the bottom of the page and edit your profile as desired; make sure to change your "Email" and "Password" at a minimum
-
Visit our documentation site for instructions on how to use your new app!
-
If you want to clear the database and start fresh, you should run the following from the command line with the Heroku remote set up properly (see here for more info):
heroku run rake db:drop heroku run rake db:create heroku run rake db:schema:load heroku run rake app:setup
Follow the instructions to set up your user profile and application settings and continue from there!

# Heroku Toolbelt

If you've got a local copy of Reservations and want to deploy it to Heroku, here are the steps you'll need to follow to install and configure your new instance of the app!

### Initialize Heroku app
1. Make sure you've installed the [Heroku Toolbelt](https://toolbelt.heroku.com/)
2. Authenticate using your Heroku credentials
heroku login
3. From within the `reservations` directory, create your app
heroku create [APP_NAME]
(note that `APP_NAME` is optional)
4. Set the custom buildpack (see [here](https://devcenter.heroku.com/articles/buildpacks#using-a-custom-buildpack) for more info)
heroku config:set BUILDPACK_URL=https://github.com/orenyk/heroku-buildpack-ruby
### Install add-ons
1. Install the postgresql add-on for your database
heroku addons:add heroku-postgresql
1. Install the mandrill add-on for e-mail
heroku addons:add mandrill
2. Install the scheduler add-on for cron jobs
heroku addons:add scheduler:standard
### Set config variables and cron jobs
For more information about the various configuration parameters, see [this page](https://github.com/YaleSTC/reservations/wiki/Configuration).

1. Generate all the secret keys / tokens
heroku config:set DEVISE_SECRET_KEY="$(bundle exec rake secret)" heroku config:set DEVISE_PEPPER="$(bundle exec rake secret)" heroku config:set SECRET_KEY_BASE="$(bundle exec rake secret)"
2. Configure the e-mail settings
heroku config:set RES_SMTP_DOMAIN=heroku.com heroku config:set RES_SMTP_ADDRESS=smtp.mandrillapp.com heroku config:set RES_SMTP_PORT=587 heroku config:set RES_SMTP_AUTH=1 heroku config:set RES_SMTP_USERNAME="$(heroku config:get MANDRILL_APIKEY)" heroku config:set RES_SMTP_PASSWORD="$(heroku config:get MANDRILL_USERNAME)"
3. Configure the hostname for e-mail links
heroku config:set RAILS_HOST_NAME=$(heroku info -s | grep web_url | cut -d/ -f3)
4. Enable static asset serving
heroku config:set SERVE_STATIC=1
5. Set up cron jobs through the Heroku website
1. Visit your application dashboard (`https://dashboard.heroku.com/apps/[APP_NAME]/resources`)
2. Click on the scheduler add-on
[](http://yalestc.github.io/reservations/images/heroku/click_scheduler.png)
3. Schedule hourly (`rake run_hourly_tasks`) and daily (`rake run_daily_tasks`) rake tasks
[](http://yalestc.github.io/reservations/images/heroku/configure_scheduler.png)
* Note that these jobs will consume Heroku resources and can result in your application costing you money.
6. (Optional) Set up CAS authentication
heroku config:set CAS_AUTH=1 heroku config:set CAS_BASE_URL=https://[YOUR.CAS.URL]
### Push code to heroku
git push heroku [branch_name:]master
(note that you can push a different branch from `master` to Heroku, but you must push it to the `master` branch *on* Heroku)


### Initialize your application settings
1. Load the database schema
heroku run rake db:schema:load
2. Run the following command to go through the application setup script. Follow the prompts to set up your user account and the application settings
heroku run rake app:setup
3. (Optional) Seed your database with dummy data
rake db:seed
### Have fun!
* Visit our [documentation site](http://yalestc.github.io/reservations) for instructions on how to use your new app!
