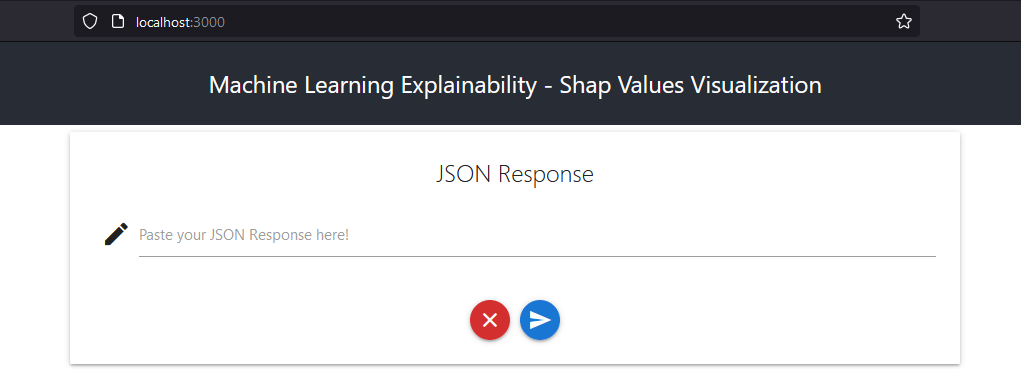
First, donwload and run the application, following the next commands on a Terminal.
$ git clone git@github.com:drakearch/shap-visualizer.git
$ cd shap-visualizer
$ npm install
$ npm start
Compiled successfully!

You can now view shap-visualizer in the browser.

  Local:            http://localhost:3000
  On Your Network:  http://192.168.1.2:3000

Note that the development build is not optimized.
To create a production build, use npm run build.
Once the application is running, it can be accessed from any browser at http://localhost:3000
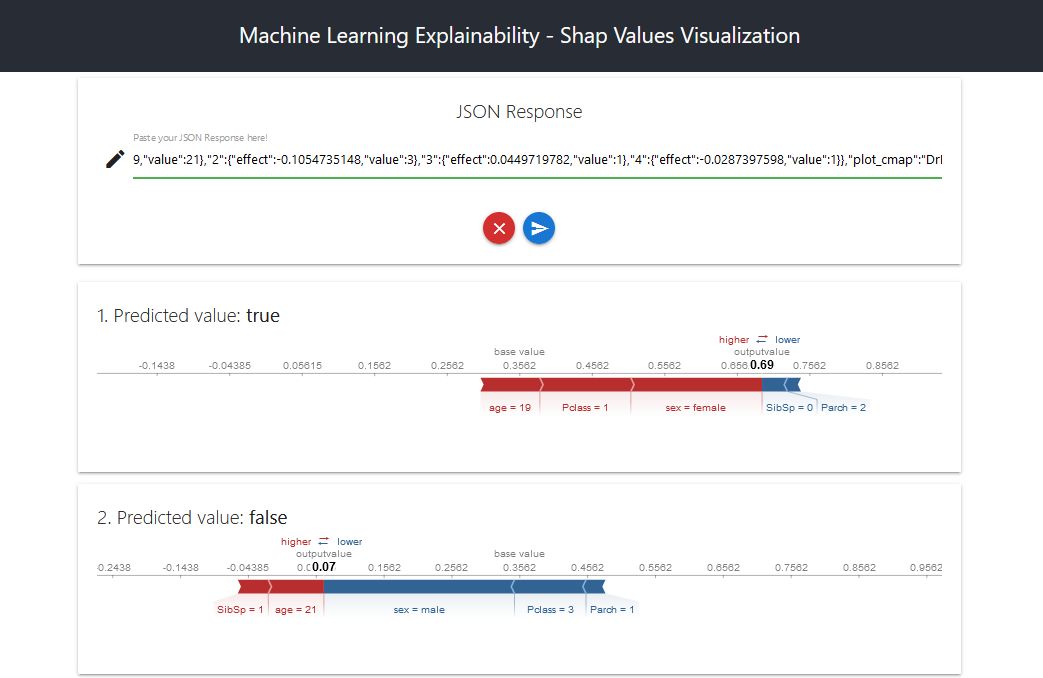
Paste a JSON Response from a prediction-explainability service on the input text. Then, click the blue send button to display the visualizations.
The json object must follow the following structure, where data is a list of n shap_values, and shap_values are structured in the same way as in the python shap library.
{
    "$schema": "http://json-schema.org/draft-04/schema#",
    "type": "object",
    "properties": {
        "data": {
            "type": "array",
            "items": {
                "type": "object",
                "properties": {
                    "shap_property_1": "shap_value_1"
                }
            }
        }
    }
}The graphics shown in the previous figure were generated with the following JSON object:
{
    "data": [
        {
            "outNames": [
                "output value"
            ],
            "baseValue": 0.35615269560349,
            "outValue": 0.69068413080349,
            "link": "identity",
            "featureNames": [
                "sex",
                "age",
                "Pclass",
                "SibSp",
                "Parch"
            ],
            "features": {
                "0": {
                    "effect": 0.1808387865,
                    "value": "female"
                },
                "1": {
                    "effect": 0.0819308719,
                    "value": 19
                },
                "2": {
                    "effect": 0.1254735148,
                    "value": 1
                },
                "3": {
                    "effect": -0.0349719782,
                    "value": 0
                },
                "4": {
                    "effect": -0.0187397598,
                    "value": 2
                }
            },
            "plot_cmap": "DrDb",
            "labelMargin": 20
        },
        {
            "outNames": [
                "output value"
            ],
            "baseValue": 0.35615269560349,
            "outValue": 0.06800348460349,
            "link": "identity",
            "featureNames": [
                "sex",
                "age",
                "Pclass",
                "SibSp",
                "Parch"
            ],
            "features": {
                "0": {
                    "effect": -0.2808387865,
                    "value": "male"
                },
                "1": {
                    "effect": 0.0819308719,
                    "value": 21
                },
                "2": {
                    "effect": -0.1054735148,
                    "value": 3
                },
                "3": {
                    "effect": 0.0449719782,
                    "value": 1
                },
                "4": {
                    "effect": -0.0287397598,
                    "value": 1
                }
            },
            "plot_cmap": "DrDb",
            "labelMargin": 20
        }
    ]
}First, you have to load the javascript file from this address into your html: https://cdn.jsdelivr.net/gh/drakessn/shared@master/shap/0.33.0/js/bundle.js
<script type="text/javascript" src="https://cdn.jsdelivr.net/gh/drakessn/shared@master/shap/0.33.0/js/bundle.js"></script>Then, you must include the following code snippet, where you want to view it. An example with react would be to create the following component:
import React, { Component } from 'react'

class ShapCard extends Component {

	loadShapForceVisualizer() {
		const s = document.createElement('script');
		s.type = 'text/javascript';
		s.async = true;
		s.innerHTML = "if (window.SHAP) SHAP.ReactDom.render(SHAP.React.createElement(SHAP.AdditiveForceVisualizer, "+ JSON.stringify(this.props.explain) + "), document.getElementById('"+this.props.uuid+"'));";
		document.body.appendChild(s);
	}

	componentDidMount() {
		this.loadShapForceVisualizer()
	}

	componentDidUpdate() {
		this.loadShapForceVisualizer()
	}

	render() {
		return (
			<div id={this.props.uuid}></div>
		)
	}
}

export default ShapCard
Where this.props.uuid is an identifier and this.props.explain is the JSON object we talked about before. The most important part is running the following script to refresh the visualizations:
s.innerHTML = "if (window.SHAP) SHAP.ReactDom.render(SHAP.React.createElement(SHAP.AdditiveForceVisualizer, "+ JSON.stringify(this.props.explain) + "), document.getElementById('"+this.props.uuid+"'));";This project was bootstrapped with Create React App. In the project directory, you can run:
Runs the app in the development mode.
Open http://localhost:3000 to view it in the browser.
The page will reload if you make edits.
You will also see any lint errors in the console.
Launches the test runner in the interactive watch mode.
See the section about running tests for more information.
Builds the app for production to the build folder.
It correctly bundles React in production mode and optimizes the build for the best performance.
The build is minified and the filenames include the hashes.
Your app is ready to be deployed!
See the section about deployment for more information.
Note: this is a one-way operation. Once you eject, you can’t go back!
If you aren’t satisfied with the build tool and configuration choices, you can eject at any time. This command will remove the single build dependency from your project.
Instead, it will copy all the configuration files and the transitive dependencies (webpack, Babel, ESLint, etc) right into your project so you have full control over them. All of the commands except eject will still work, but they will point to the copied scripts so you can tweak them. At this point you’re on your own.
You don’t have to ever use eject. The curated feature set is suitable for small and middle deployments, and you shouldn’t feel obligated to use this feature. However we understand that this tool wouldn’t be useful if you couldn’t customize it when you are ready for it.

