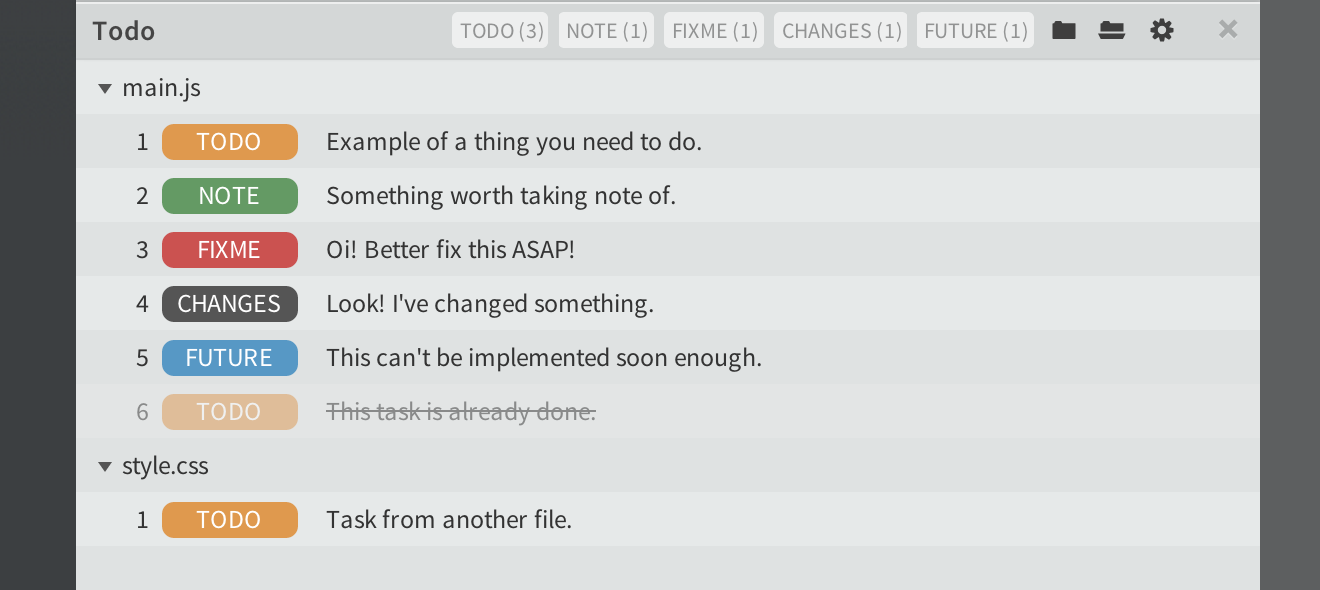
Brackets/Edge Code extension that displays all TODO comments in current document or project.
You may download and install this extension in one of three ways. Using Extension Manager to find it through the extension registry you always find the latest stable release conveniently within Brackets.
You can also get the latest work-in-progress version by downloading or installing the extension directly from the repository. This allows you to try new features that might not have been tested properly yet.
- Open the Extension Manager from the File menu.
- Click the Available tab in the upper left corner.
- Find Todo in list of extensions (use the search field to filter the list).
- Click Install.
- Open the the Extension Manager from the File menu.
- Click on Install from URL...
- Copy and paste following URL in the text field:
https://github.com/mikaeljorhult/brackets-todo - Click Install.
- Download this extension using the ZIP button and unzip it.
- Copy it in Brackets'
/extensions/userfolder by selecting Show Extension Folder in the Help menu. - Reload Brackets.
The extension can be activated by going to the View menu and click on Todo, by using the key command CTRL/CMD+ALT+T or by clicking the icon in the toolbar. A panel will be displayed in the bottom of the Brackets window displaying all TODO comments within the document in a list.
Clicking on one of the comments in the list will move the cursor to that point in the document.
Todo will by default recognize C-style comments using the tags
TODO, NOTE, FIXME, CHANGES or FUTURE as shown in examples below.
Please note that multiline comments will not work. Todo will only return the first line of the comment.
// TODO: This is a comment.
/* NOTE The colon after the tag is optional. */
/* @NOTE Preceding at sign is also optional. */
# NOTE: This is a comment as well.
To keep track of your, or your teams, progress you may mark tasks as done. This is achieved by adding [x]
before the text of the task.
// TODO: [x]This task is done.
Tasks can be sorted so that done tasks is moved to the bottom of the list by checking that option in the settings dialog.
The extensions settings can be overridden by adding a .todo file in your project folder. This is a simple
JSON that override default settings with its own.
Custom settings will let you customize what tags are used or the style of comments you wish to use. This will allow you to use the extension with other commenting syntaxes including standards like JSDoc and phpDoc or bring your own in the form of plain comments in your language of choice. Settings for alternative syntaxes for some common standards is listed below.
Please note that backslashes in regular expressions need to be escaped themselves as these are first stored within JavaScript strings before parsed as regular expressions.
These are the default settings as they would be set in the .todo file.
{
	"regex": {
		"prefix": "(?:\\/\\*|\\/\\/|#) *@?(",
		"suffix": "):? *(.*?) ?(?=\\*/|\\n|$)"
	},
	"tags": [
		"TODO",
		"NOTE",
		"FIX ?ME",
		"CHANGES",
		"FUTURE"
	],
	"case": false,
	"search": {
		"scope": "current",
		"excludeFolders": [],
		"excludeFiles": []
	}
}By default Todo looks at the currently opened document for comments. This is nice for small projects but for larger ones you might want to keep an eye on the progress of all parts of the project. This is done by changing scope of the search to project instead of current.
{
    "search": {
        "scope": "project"
    }
}By adding a prefix and a suffix Todo can recognize comments in other formats and languages. Examples below covers some common formats.
{
    "regex": {
        "prefix": "(?:\\* *@*)(",
        "suffix": "):? *(.*?) ?(?=\\n)"
    }
}{
"regex": {
"prefix": "(?:<!--) *(",
"suffix": "):? *(.*?) ?(?=-->)"
}
}The default tags each has a default color but they can be overridden using the settings dialog or a .todo file. This is either done by either defining the tag as a string, separating tag name and color with a colon character, or by defining the tag as a object, with a name and a color property.
{
	"tags": [
		"TODO:#d95",
		{ "name": "NOTE", "color": "#696" }
	]
}Files and folders may be excluded from searches by defining the properties excludeFolders and excludeFiles within the search object. These should both be an array of strings containing full, or part of, the file or folder names that should be excluded.
Please note that excludes will only work with project wide search scope.
{
	"search": {
		"scope": "project",
		"excludeFiles": [ ".scss" ]
	}
}{
"search": {
"scope": "project",
"excludeFiles": [ "index" ]
}
}{
"search": {
"scope": "project",
"excludeFolders": [ "vendor" ]
}
}{
"search": {
"scope": "project",
"excludeFolders": [ "/vendor" ]
}
}
