-
Notifications
You must be signed in to change notification settings - Fork 1.8k
Keypad
The Keypad class constructs an object that represents a single Keypad attached to the board. Touchpad is an alias for Keypad.
Supported Keypads:
- VKEY
- Waveshare AD (Analog)
- MPR121
- MPR121QR2
- Grove QTouch (AT42QT1070)
- 12 Button Keypad (requires I2C backpack)
-
General Options
Property Type Value/Description Default Required controller string AT42QT1070, MPR121, MPR121_* (variants below), QTOUCH, VKEY, ANALOG. The Name of the controller to use ANALOG Yes keys array Mapping of key values By Device No holdtime Number Time in milliseconds that the button must be held until emitting a "hold" event. 500ms no -
MPR121 Options (
controller: "MPR121" | "MPR121_*")In addition to the General Options, the MPR121 supports the following:
Property Type Value/Description Default Required sensitivity Object { press: 0-1, release: 0-1 }. Use a generic sensitivity for all pads* no sensitivity Array An array of { press: 0-1, release: 0-1 }objects* no The sensitivity setting allows the calibration of the keypad to compensate for factors such as humidity, temperature, etc. A too high sensitivity % might result in false positives; in some cases, just getting close to it might be enough to trigger a press.
Type Default press 0.95 release 0.975 Note:
releaseshould always have a higher sensitivity thanpress.For this MPR121 variant... Use this controller 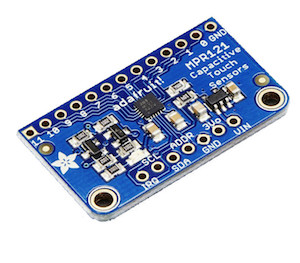
MPR121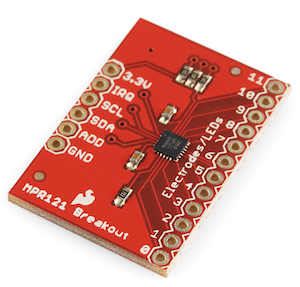
MPR121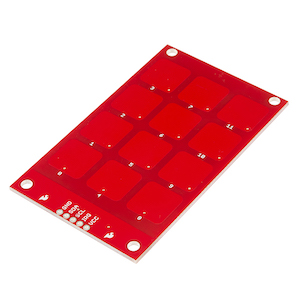
MPR121_KEYPAD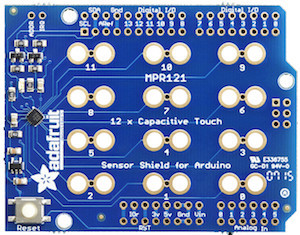
MPR121_SHIELD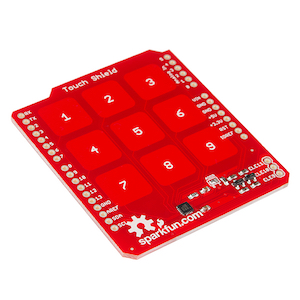
MPR121QR2_SHIELD -
VKEY Options (
controller: "VKEY")Property Type Value/Description Default Required pin number, string Analog pin Yes -
ANALOG Options (
controller: "ANALOG")Property Type Value/Description Default Required pin number, string Analog pin Yes length number Number of keys (required only if keysis not specified)Yes
| Property Name | Description | Read Only |
|---|---|---|
value |
Index of the pressed key | No |
target |
Mapped key value of pressed key | No |
new five.Keypad({
  pin: "A0",
  length: 16
});new five.Keypad({
controller: "VKEY",
pin: "A0",
});new five.Keypad({
controller: "MPR121"
});new five.Keypad({
controller: "MPR121QR2_SHIELD"
});new five.Keypad({
controller: "MPR121_KEYPAD"
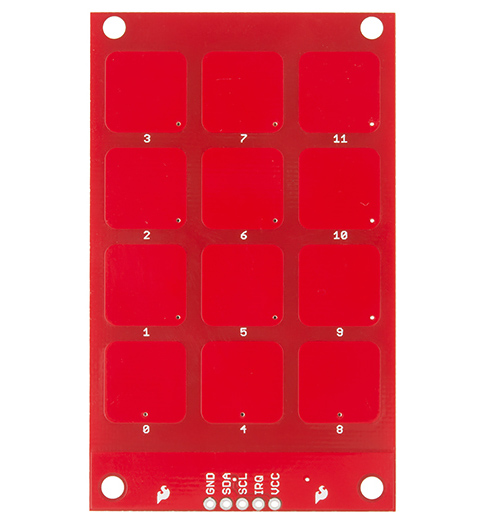
});
new five.Keypad({
  controller: "QTOUCH", // or "AT42QT1070"
});
Note: the Adafruit: Standalone 5-Pad Capacitive Touch Sensor Breakout - AT42QT1070 will not work with the keypad class, it has i2c disabled and must be used with the Button class instead.
This requires using a Nano Backpack. It's possible to use a 3x4 membrane, as long as it's pins are connected correctly:
| Row | Nano Pin |
|---|---|
| 1 | 7 |
| 2 | 2 |
| 3 | 3 |
| 4 | 5 |
| Col | Nano Pin |
|---|---|
| 1 | 6 |
| 2 | 8 |
| 3 | 4 |
new five.Keypad({
  controller: "3X4_I2C_NANO_BACKPACK"
});var five = require("johnny-five");
var board = new five.Board();
board.on("ready", function() {
// MPR121 3x4 Capacitive Touch Pad
var keypad = new five.Keypad({
controller: "MPR121",
keys: [
["!", "@", "#"],
["$", "%", "^"],
["&", "-", "+"],
["_", "=", ":"]
]
});
["change", "press", "hold", "release"].forEach(function(eventType) {
keypad.on(eventType, function(data) {
console.log("Event: %s, Target: %s", eventType, data.which);
});
});
});The keys option allows the assignment of any value to any key/button on the device. The value of keys may be a flat array of strings, or an array of arrays where the nested array are "rows" on the device. The values given in the keys array are the values that the instance will report for key/button presses.
Using the MPR121QR2 to illustrate keys:
The buttons are labelled 1, 2, 3, 4, 5, 6, 7, 8, 9. If the instance of Keypad is created without an explicit keys property, the output will be exactly those numbers; ie. pressing 1 will result in an event whose data object's which property is the value 1 (and so on):
var keypad = new five.Keypad({
  controller: "MPR121QR2"
});

keypad.on("press", function(event) {
  console.log("Which button?", event.which);
});
However, the keys property allows a program to assign any value to be the resulting value (because who knows—you may want to use symbols!)
var keypad = new five.Keypad({
  controller: "MPR121QR2",
  keys: [
    ["", "△", ""],
    ["◁", "☐", "▷"],
    ["", "▽", ""]
  ]
});

keypad.on("press", function(event) {
  if (event.which) {
    console.log(event.which);
  }
});
Pressing 2, 8, 4, 6, 5 would result in the following output:
$ node eg/keypad-symbol-MPR121QR2.js
1448040971577 Device(s) /dev/cu.usbmodem1411
1448040971586 Connected /dev/cu.usbmodem1411
1448040975171 Repl Initialized
>> △
▽
◁
▷
☐
If your program prefers a flat array, the equivalent program would be:
var keypad = new five.Keypad({
  controller: "MPR121QR2",
  keys: ["", "△", "", "◁", "☐", "▷", "", "▽", ""]
});

keypad.on("press", function(event) {
  if (event.which) {
    console.log(event.which);
  }
});-
change Emitted for hold, down, up
-
hold The key or keys have been held for
holdtimemilliseconds -
down, press The key or keys have been pressed.
-
up, release The key or keys have been released.
The following data object is emitted with each event:
| Key Name | Description |
|---|---|
which |
An array containing keys of which buttons or pads are pressed. |
timestamp |
Timestamp at time of event |


