Table of contents
Environmental configuration used in the following annotation examples:
- Python 3.8+
- label-studio == 1.6.0
- paddleocr >= 2.6.0.1
Use pip to install label-studio in the terminal:
pip install label-studio==1.6.0Once the installation is complete, run the following command line:
label-studio startOpen http://localhost:8080/ in the browser, enter the user name and password to log in, and start using label-studio for labeling.
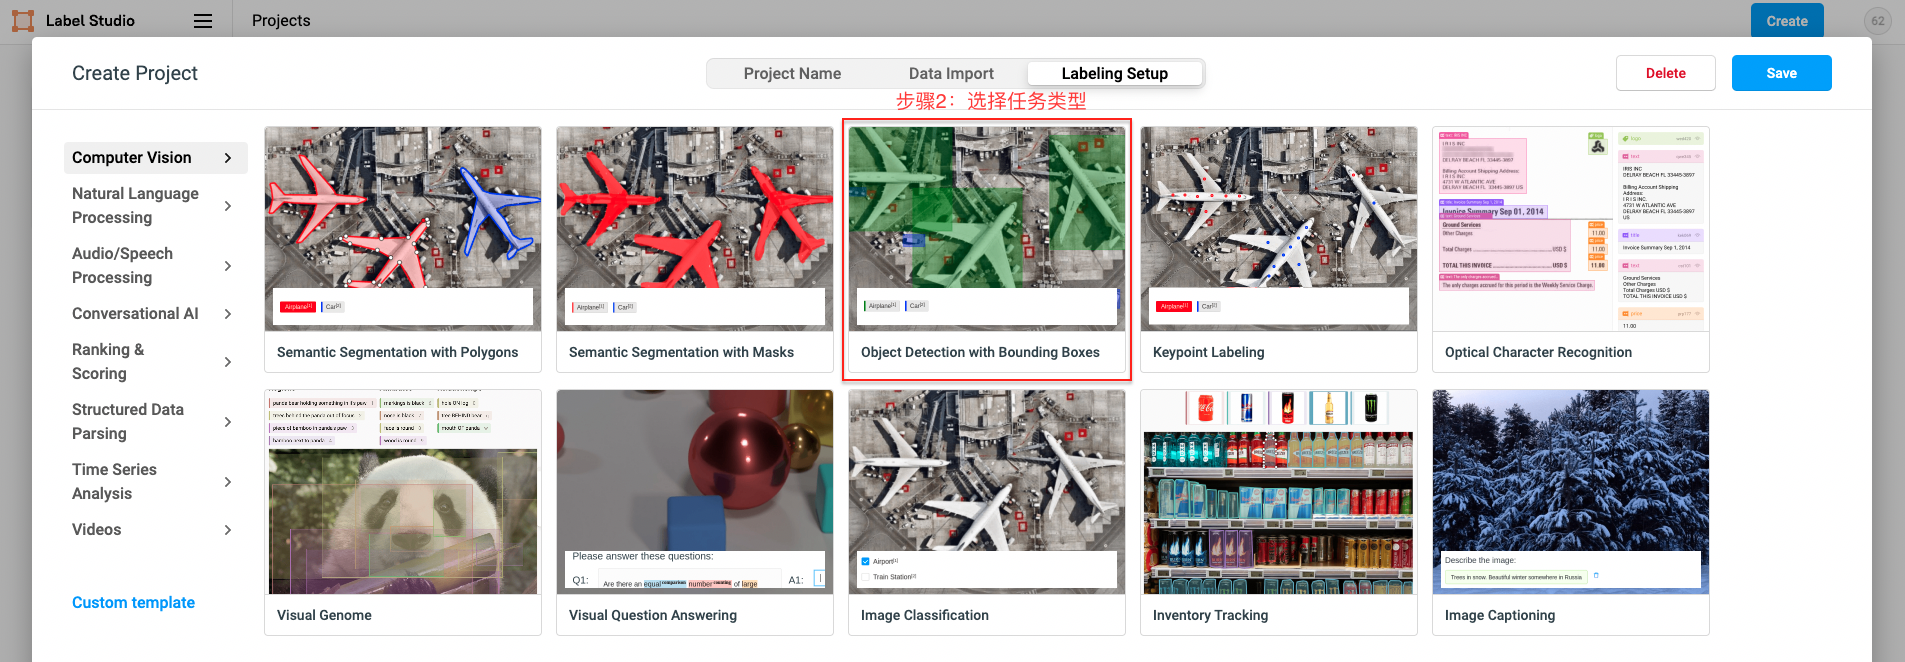
Click Create to start creating a new project, fill in the project name, description, and select Object Detection with Bounding Boxes.
- Fill in the project name, description
- For Named Entity Recognition, Relation Extraction tasks please select ``Object Detection with Bounding Boxes`
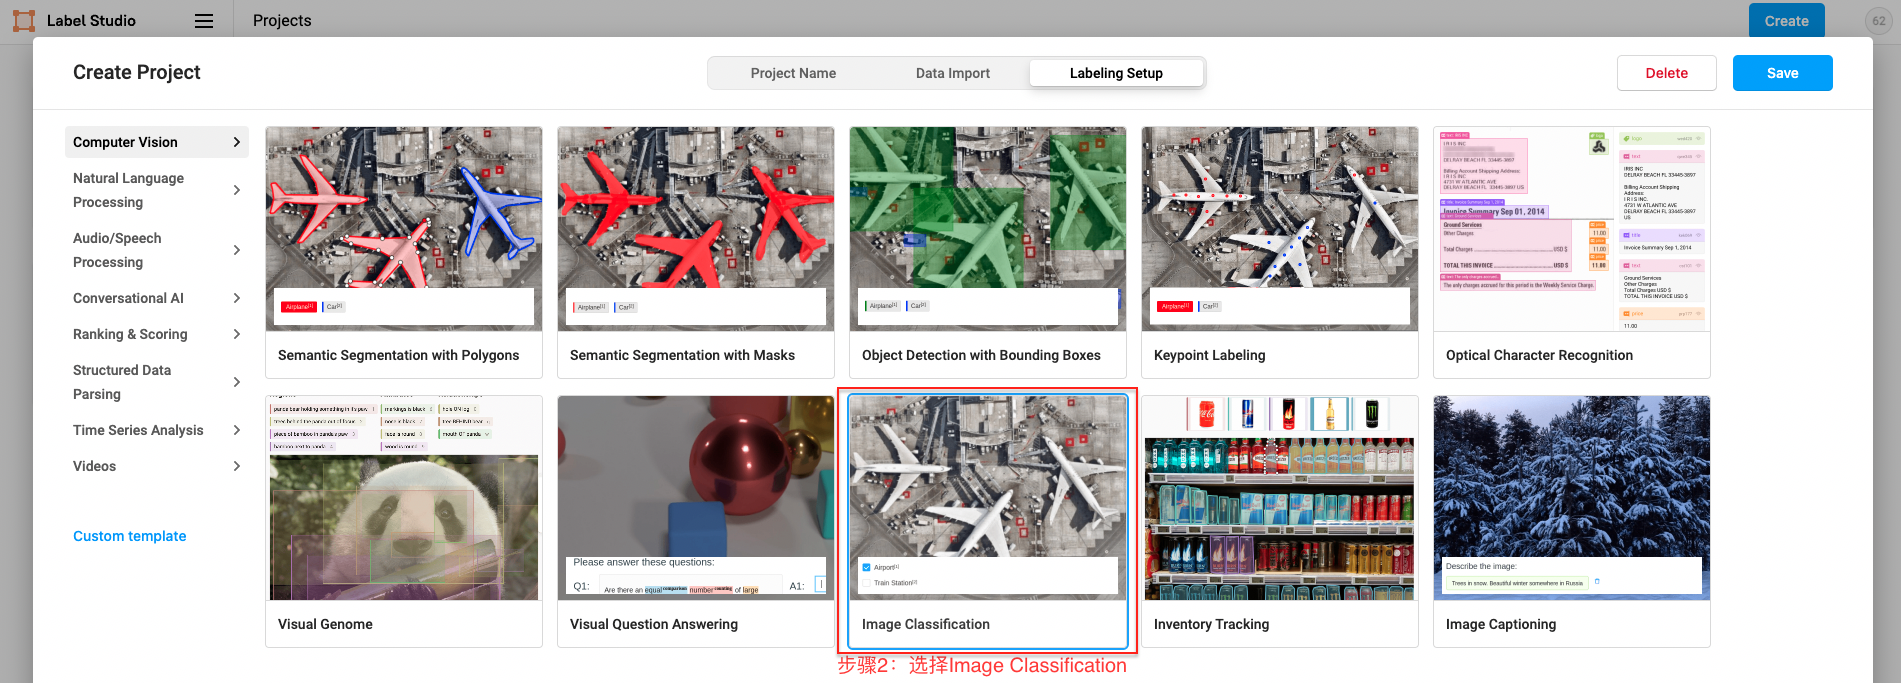
- For Document Classification task please select ``Image Classification`
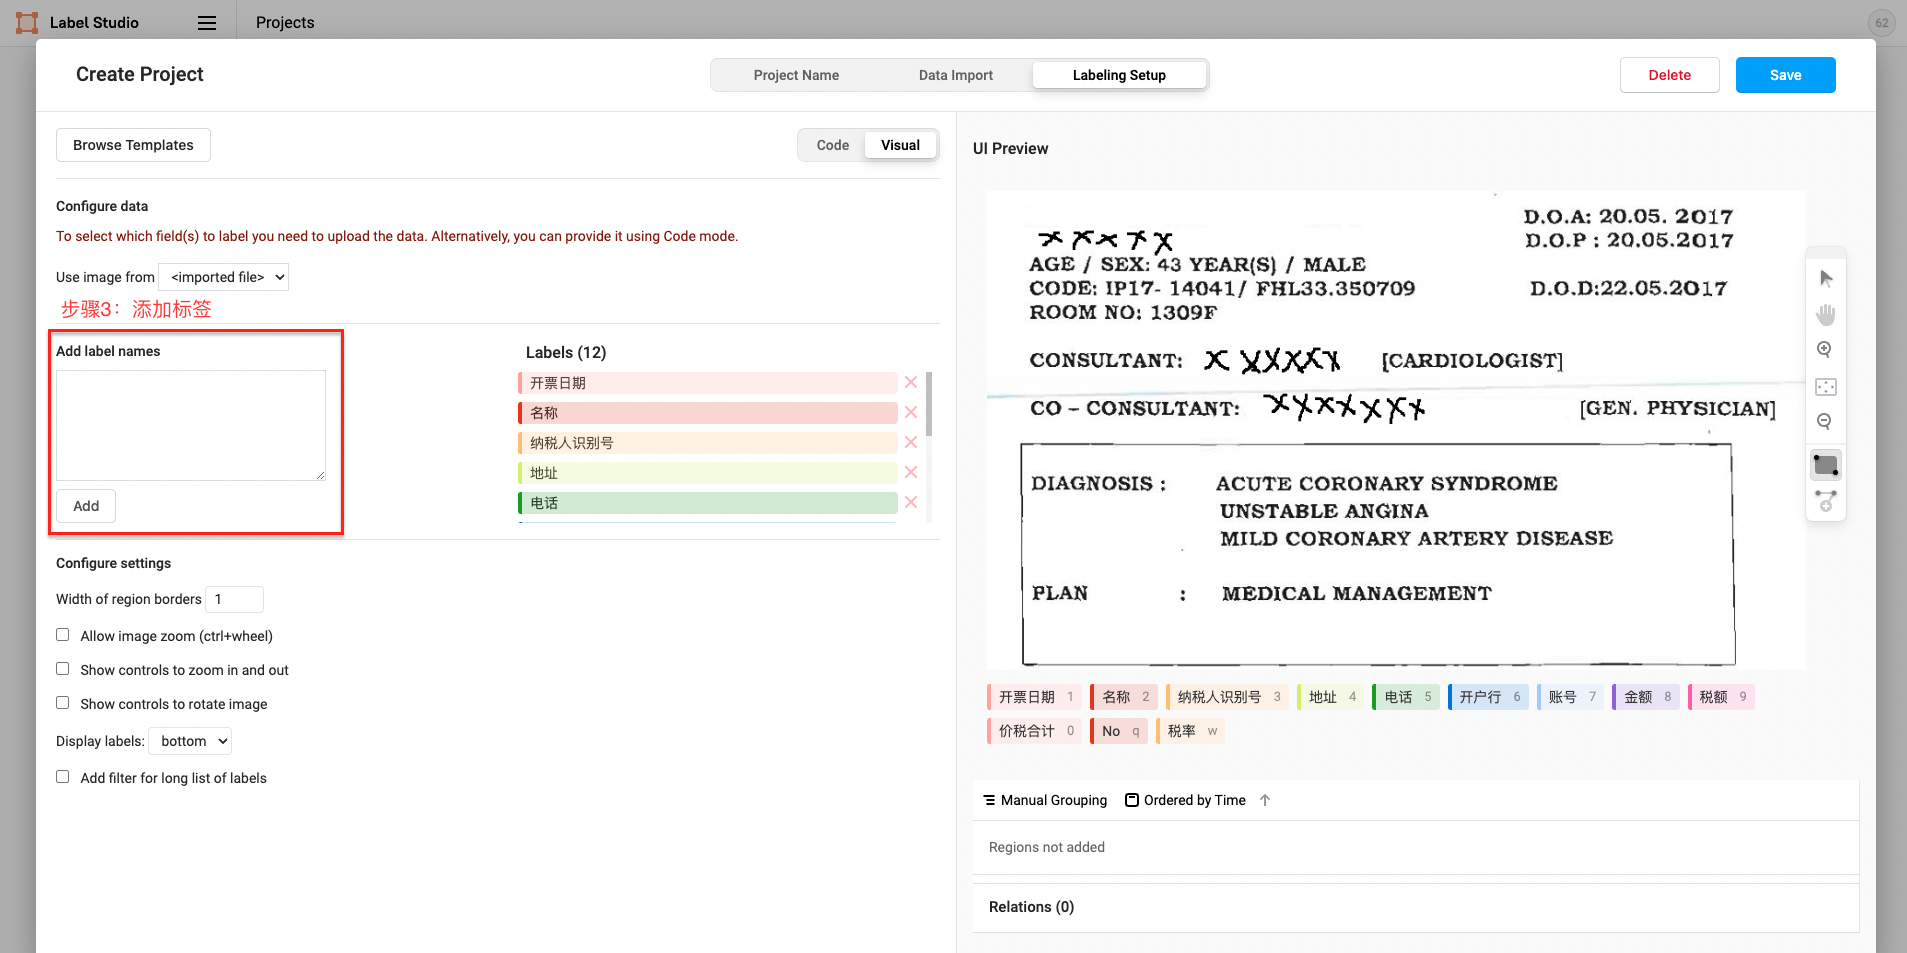
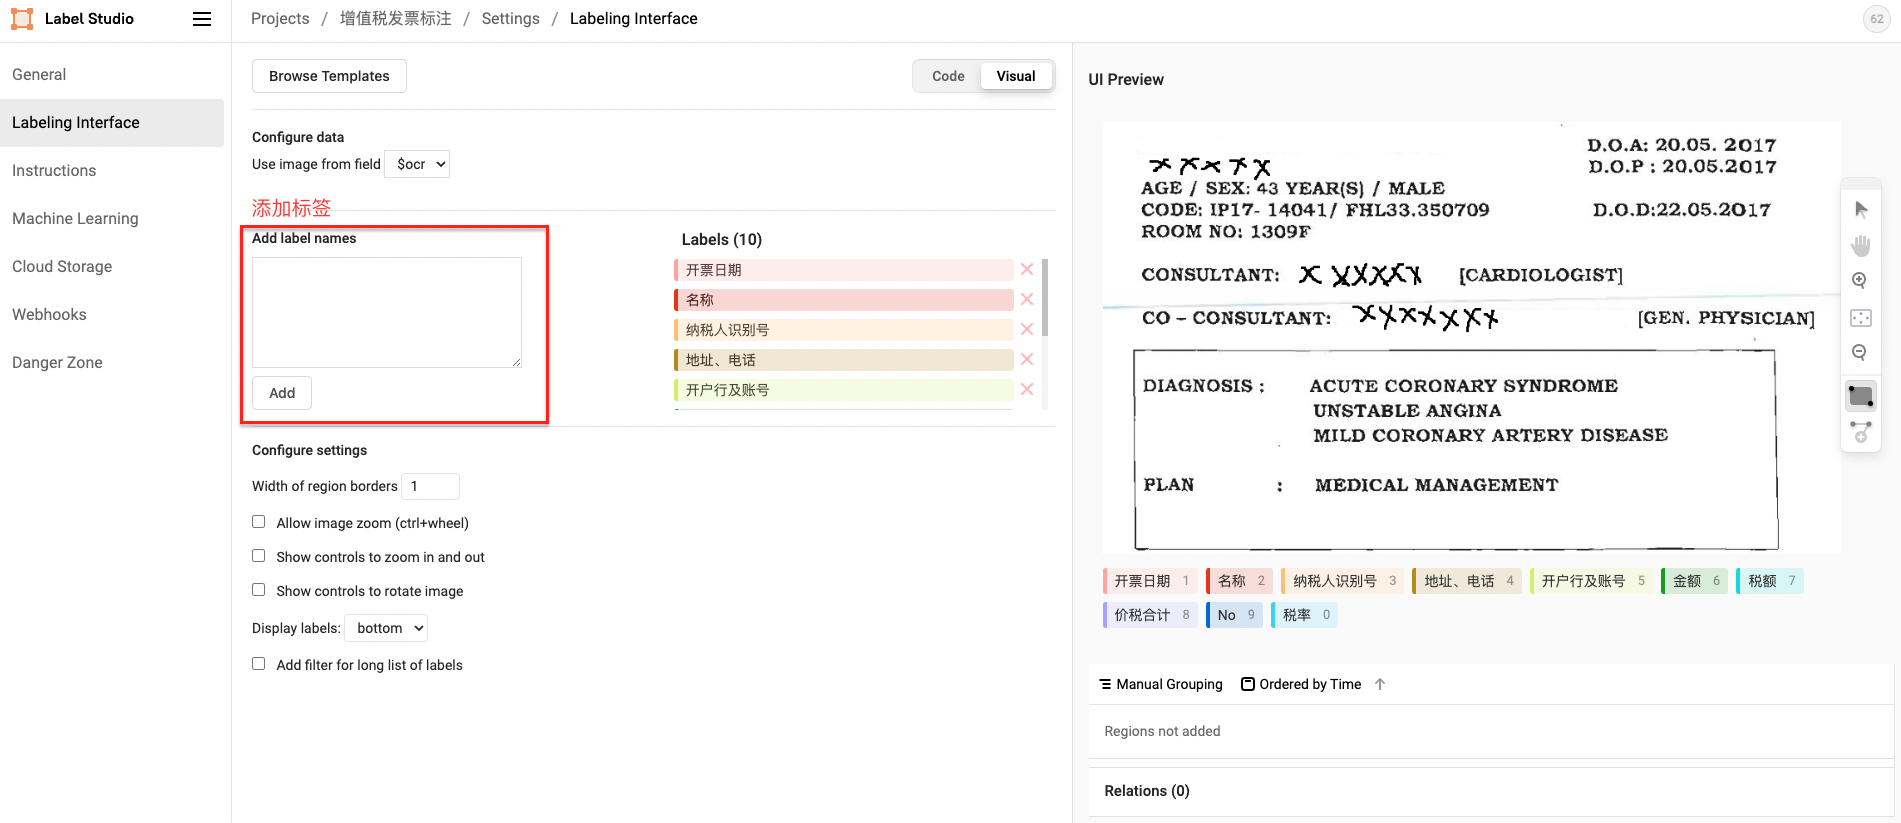
- Define labels
The figure shows the construction of Span entity type tags. For the construction of other types of tags, please refer to 2.3 Label Construction
First upload the picture from a local or HTTP link, and then choose to import this project.
- Entity Label
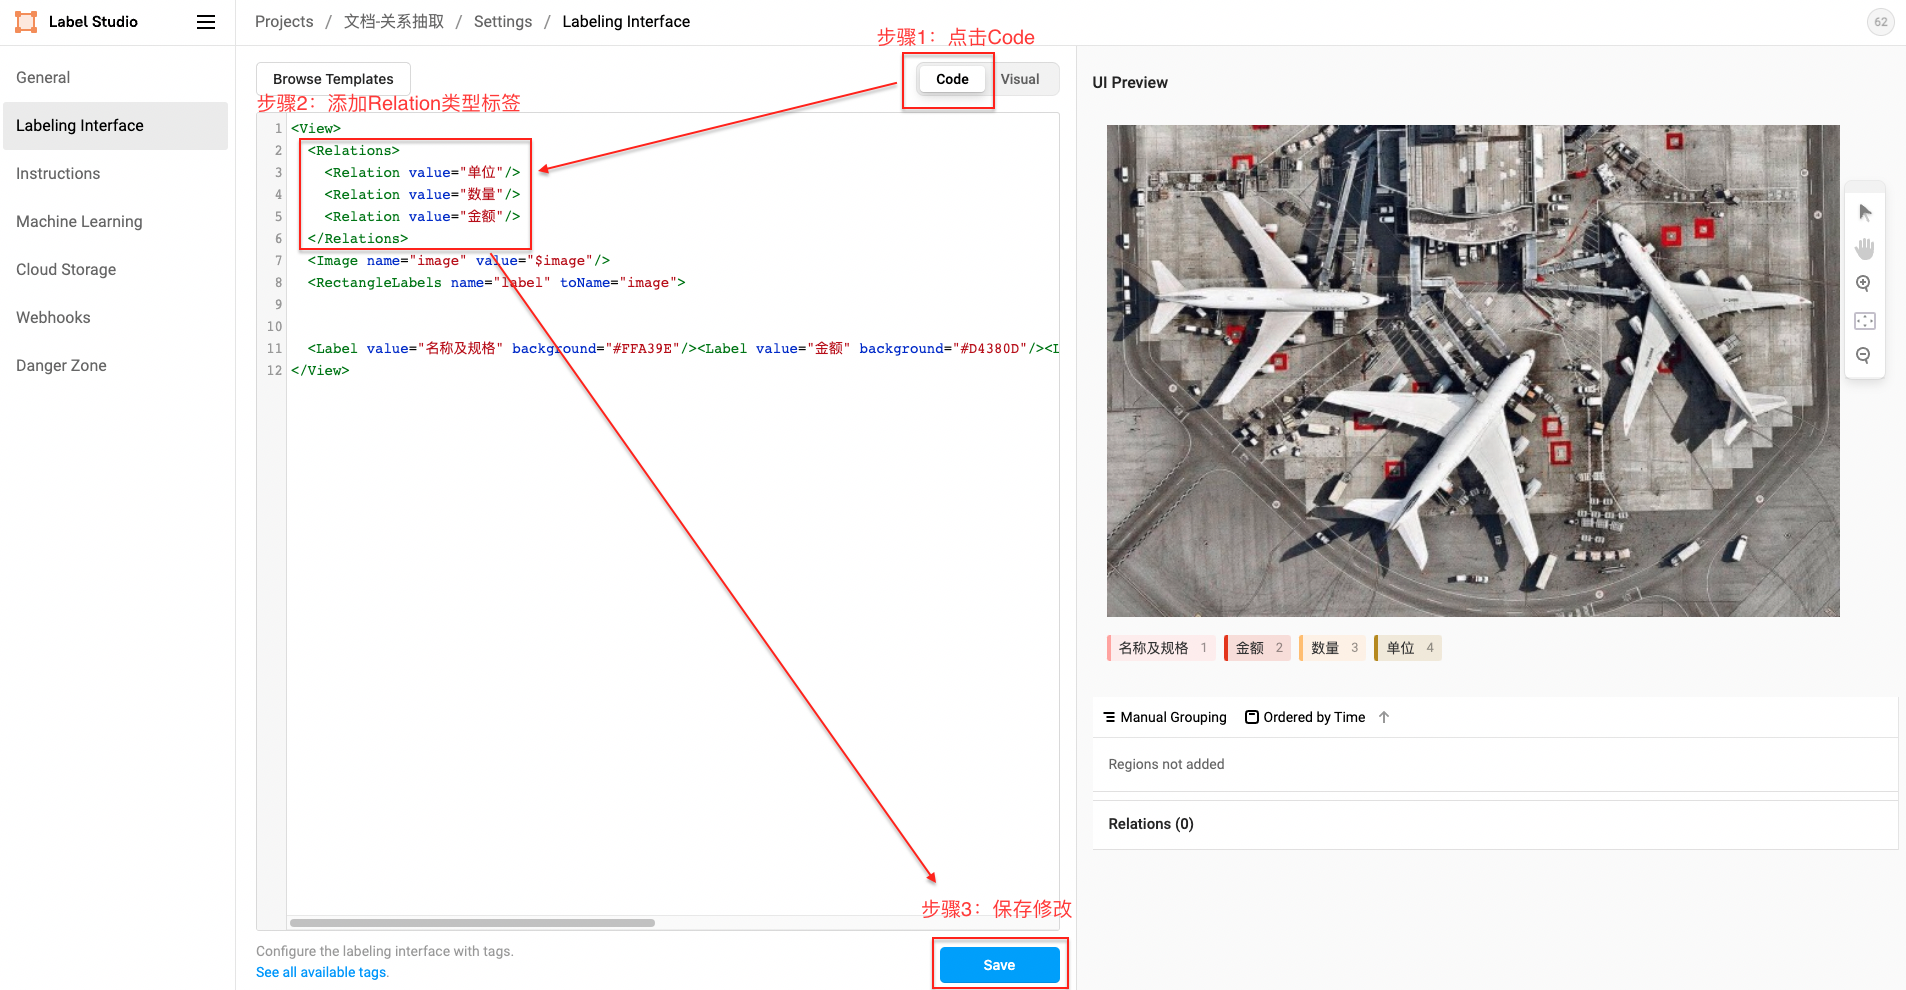
- Relation label
Relation XML template:
   <Relations>
     <Relation value="unit"/>
     <Relation value="Quantity"/>
     <Relation value="amount"/>
</Relations>- Classification label
-
Entity extraction
-
Callout example:
-
The schema corresponding to this annotation example is:
schema = ['开票日期', '名称', '纳税人识别号', '地址、电话', '开户行及账号', '金额', '税额', '价税合计', 'No', '税率']
-
-
Relation extraction
-
Step 1. Label the subject and object
-
Step 2. Relation line, the direction of the arrow is from the subject to the object
-
Step 3. Add corresponding relation label
-
Step 4. Finish labeling
-
The schema corresponding to this annotation example is:
schema = {
    '名称及规格': [
        '金额',
        '单位',
        '数量'
    ]
}
-
-
Document classification
-
Callout example
-
The schema corresponding to this annotation example is:
schema = '文档类别[发票,报关单]'
-
Check the marked image ID, select the exported file type as JSON, and export the data:
After renaming the exported file to label_studio.json, put it into the ./document/data directory, and put the corresponding label image into the ./document/data/images directory (The file name of the picture must be the same as the one uploaded to label studio). Through the label_studio.py script, it can be converted to the data format of UIE.
- Path example
./document/data/
├── images # image directory
│ ├── b0.jpg # Original picture (the file name must be the same as the one uploaded to label studio)
│ └── b1.jpg
└── label_studio.json # Annotation file exported from label studio- Extraction task
python label_studio.py \
     --label_studio_file ./document/data/label_studio.json \
     --save_dir ./document/data \
     --splits 0.8 0.1 0.1 \
--task_type ext- Document classification tasks
python label_studio.py \
     --label_studio_file ./document/data/label_studio.json \
     --save_dir ./document/data \
     --splits 0.8 0.1 0.1 \
     --task_type cls \
     --prompt_prefix "document category" \
--options "invoice" "customs declaration"label_studio_file: Data labeling file exported from label studio.save_dir: The storage directory of the training data, which is stored in thedatadirectory by default.negative_ratio: The maximum negative ratio. This parameter is only valid for extraction tasks. Properly constructing negative examples can improve the model effect. The number of negative examples is related to the actual number of labels, the maximum number of negative examples = negative_ratio * number of positive examples. This parameter is only valid for the training set, and the default is 5. In order to ensure the accuracy of the evaluation indicators, the verification set and test set are constructed with all negative examples by default.splits: The proportion of training set and validation set when dividing the data set. The default is [0.8, 0.1, 0.1], which means that the data is divided into training set, verification set and test set according to the ratio of8:1:1.task_type: Select the task type, there are two types of tasks: extraction and classification.options: Specify the category label of the classification task, this parameter is only valid for the classification type task. Defaults to ["positive", "negative"].prompt_prefix: Declare the prompt prefix information of the classification task, this parameter is only valid for the classification type task. Defaults to "Sentimental Tendency".is_shuffle: Whether to randomly shuffle the data set, the default is True.seed: random seed, default is 1000.separator: The separator between entity category/evaluation dimension and classification label. This parameter is only valid for entity/evaluation dimension classification tasks. The default is"##".schema_lang: Select the language of the schema, which will be the construction method of the training data prompt, optionalchanden. Defaults toch.ocr_lang: Select the language for OCR, optionalchanden. Defaults toch.layout_analysis: Whether to use PPStructure to analyze the layout of the document. This parameter is only valid for document type labeling tasks. The default is False.
Note:
- By default the label_studio.py script will divide the data proportionally into train/dev/test datasets
- Each time the label_studio.py script is executed, the existing data file with the same name will be overwritten
- In the model training phase, we recommend constructing some negative examples to improve the model performance, and we have built-in this function in the data conversion phase. The proportion of automatically constructed negative samples can be controlled by
negative_ratio; the number of negative samples = negative_ratio * the number of positive samples. - For files exported from label_studio, each piece of data in the default file is correctly labeled manually.

