AML's goal is to make benchmarking of various AI architectures on Ampere CPUs a pleasurable experience :)
This means we want the library to be quick to set up and to get you numbers you are interested in. On top of that we want the code to be readible and well structured so it's easy to inspect what exactly is being measured. If you feel like we are not exactly there, please let us know right away by raising an issue! Thank you :)

sudo apt update && sudo apt install -y docker.io
sudo docker run --privileged=true -it amperecomputingai/pytorch:latest
# we also offer onnxruntime and tensorflow
You should see terminal output similar to that one:
Now, inside the Docker container, run:
git clone --recursive https://github.com/AmpereComputingAI/ampere_model_library.git
cd ampere_model_library
bash setup_deb.sh
source set_env_variables.sh
You are good to go! 👌
Benchmark script allows you to quickly evaluate performance of your Ampere system on the example of:
- ResNet-50 v1.5
- Whisper medium EN
- DLRM
- BERT large
- YOLO v8s
It's incredibly user-friendly and designed to assist you in getting the best out of your system.
After completing setup with Ampere Optimized PyTorch (see AML setup), it's as easy as:
python3 benchmark.py --no-interactive # remove --no-interactive if you want a quick estimation of performanceArchitectures are categorized based on the task they were originally envisioned for. Therefore, you will find ResNet and VGG under computer_vision and BERT under natural_language_processing.
Usual workflow is to first setup AML (see AML setup), source environment variables by running source set_env_variables.sh and run run.py or similarly named python file in the directory of the achitecture you want to benchmark. Some models require additional setup steps to be completed first, which should be described in their respective directories under README.md files.
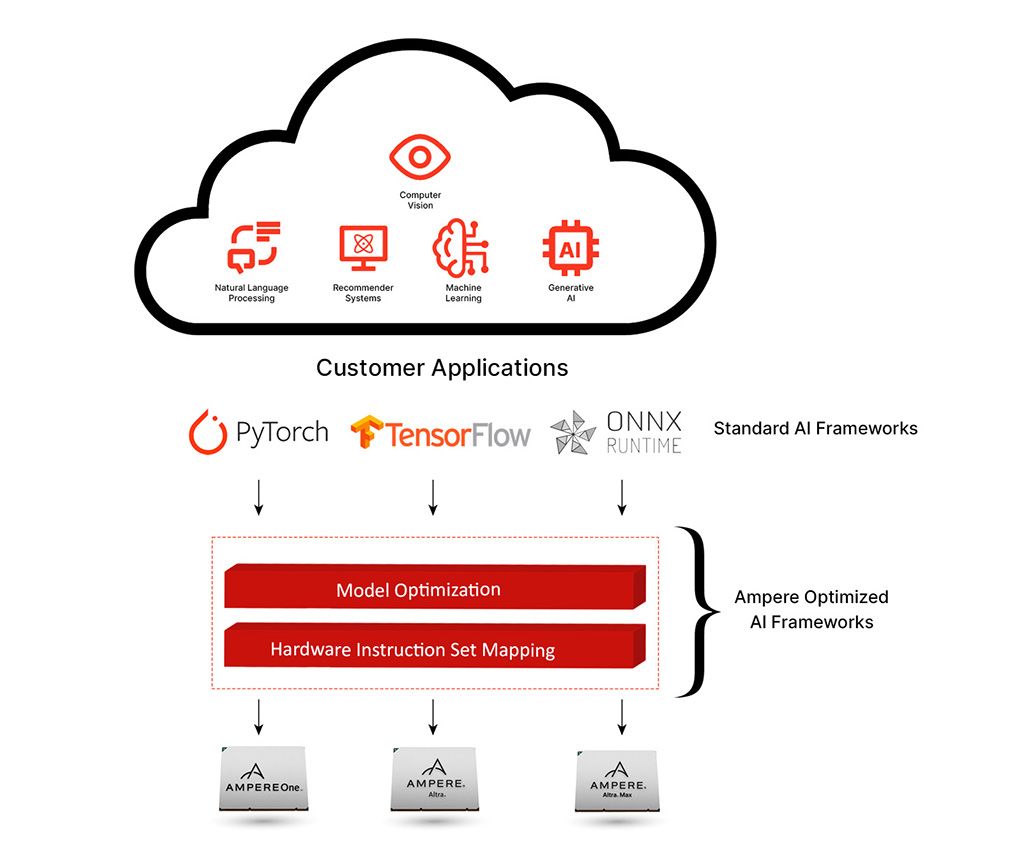
Note that the example uses PyTorch - we recommend using Ampere Optimized PyTorch for best results (see AML setup).
source set_env_variables.sh
IGNORE_DATASET_LIMITS=1 AIO_IMPLICIT_FP16_TRANSFORM_FILTER=".*" AIO_NUM_THREADS=32 python3 computer_vision/classification/resnet_50_v15/run.py -m resnet50 -p fp32 -b 16 -f pytorch
The command above will run the model utilizing 32 threads, with batch size of 16. Implicit conversion to FP16 datatype will be applied - you can default to fp32 precision by not setting the AIO_IMPLICIT_FP16_TRANSFORM_FILTER variable.
PSA: you can adjust the level of AIO debug messages by setting AIO_DEBUG_MODE to values in range from 0 to 4 (where 0 is the most peaceful)
Note that the example uses PyTorch - we recommend using Ampere Optimized PyTorch for best results (see AML setup).
source set_env_variables.sh
AIO_IMPLICIT_FP16_TRANSFORM_FILTER=".*" AIO_NUM_THREADS=32 python3 speech_recognition/whisper/run.py -m tiny.en
The command above will run the model utilizing 32 threads, implicit conversion to FP16 datatype will be applied - you can default to fp32 precision by not setting the AIO_IMPLICIT_FP16_TRANSFORM_FILTER variable.
Note that the example uses PyTorch - we recommend using Ampere Optimized PyTorch for best results (see AML setup).
Before running this example you need to be granted access by Meta to LLaMA2 model. Go here: Meta and here: HF to learn more.
source set_env_variables.sh
wget https://github.com/tloen/alpaca-lora/raw/main/alpaca_data.json
AIO_IMPLICIT_FP16_TRANSFORM_FILTER=".*" AIO_NUM_THREADS=32 python3 natural_language_processing/text_generation/llama2/run.py -m meta-llama/Llama-2-7b-chat-hf --dataset_path=alpaca_data.json
The command above will run the model utilizing 32 threads, implicit conversion to FP16 datatype will be applied - you can default to fp32 precision by not setting the AIO_IMPLICIT_FP16_TRANSFORM_FILTER variable.
Note that the example uses PyTorch - we recommend using Ampere Optimized PyTorch for best results (see AML setup).
source set_env_variables.sh
wget https://github.com/ultralytics/assets/releases/download/v0.0.0/yolov8l.pt
AIO_IMPLICIT_FP16_TRANSFORM_FILTER=".*" AIO_NUM_THREADS=32 python3 computer_vision/object_detection/yolo_v8/run.py -m yolov8l.pt -p fp32 -f pytorch
The command above will run the model utilizing 32 threads, implicit conversion to FP16 datatype will be applied - you can default to fp32 precision by not setting the AIO_IMPLICIT_FP16_TRANSFORM_FILTER variable.
Note that the example uses PyTorch - we recommend using Ampere Optimized PyTorch for best results (see AML setup).
source set_env_variables.sh
wget -O bert_large_mlperf.pt https://zenodo.org/records/3733896/files/model.pytorch?download=1
AIO_IMPLICIT_FP16_TRANSFORM_FILTER=".*" AIO_NUM_THREADS=32 python3 natural_language_processing/extractive_question_answering/bert_large/run_mlperf.py -m bert_large_mlperf.pt -p fp32 -f pytorch
The command above will run the model utilizing 32 threads, implicit conversion to FP16 datatype will be applied - you can default to fp32 precision by not setting the AIO_IMPLICIT_FP16_TRANSFORM_FILTER variable.


