-
-
Notifications
You must be signed in to change notification settings - Fork 9
Shell Preperation
Eugene Andruszczenko edited this page May 16, 2018
·
1 revision

In 6 easy steps
- Game Boy Pocklet Shell (Aftermarket or donor)
- Sharp utility knife
- Small Flat Bastard File (Rectangular)
- Small needle nose pliers
- Small phillips screw driver
- Small tri-wing screw driver (if donor case)
 |
|---|
| This is an empty shell |
 |
|---|
| Remove metal shim |
| Using the small phillips screw driver, remove the inner metal shell... ...keep the screws for later |
 |
|---|
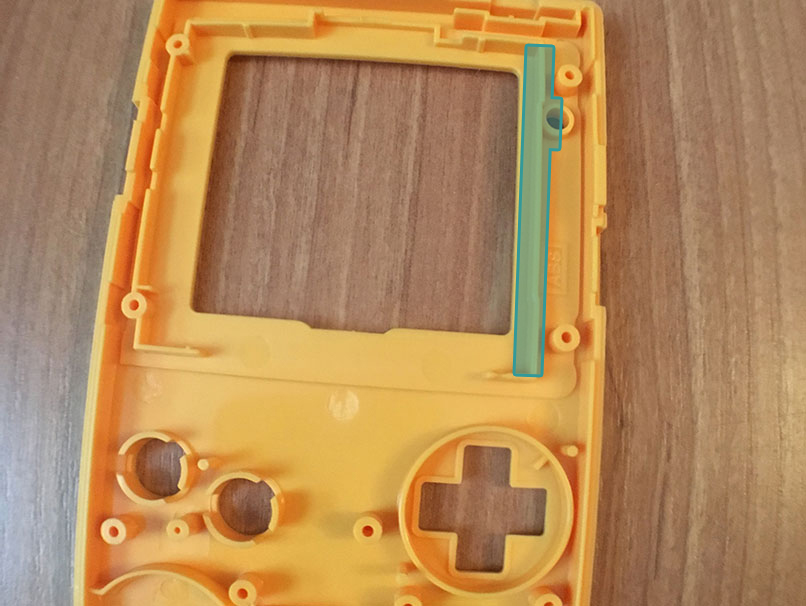
| Blue parts indicate removal |
- Score the inside of the indicated lcd retaining wall with your utility knife.
- Continue scoring until loose.
- You can bend back and fourt until it comes out
- Cut out the inner half of the LED holder (just the retaining wall part)
 |
|---|
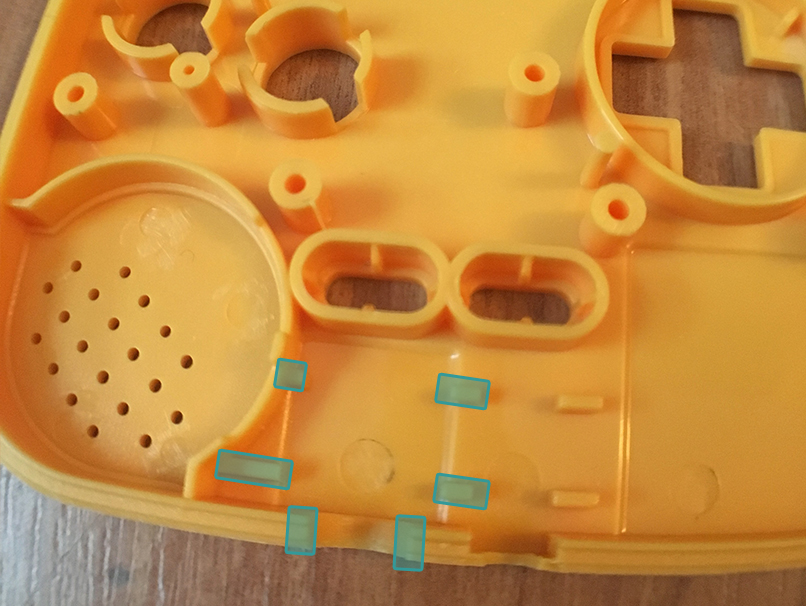
| Clearance for headphone jack |
- remove the 4 inside posts as indicated usnig either your knife, or twist out with pliers (on aftermarket shells, they come out pretty clean)
- on the headphone jack, remove 1mm to each side for barrel clearance (test fit with your PCB)
 |
|---|
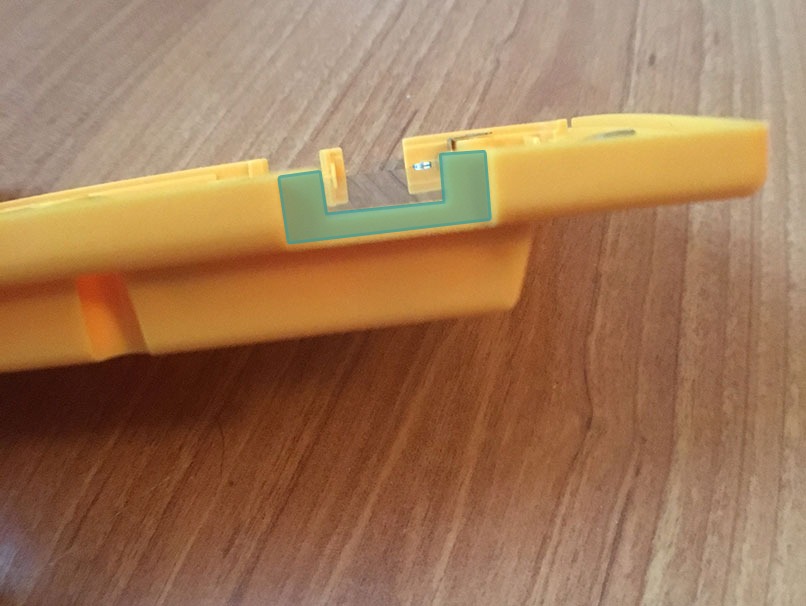
| SD Card Slot |
- Using your utility knife, remove the indicated area for SD card clearance (this is the original contrast wheel location)
- Using your flat file, make your cut flat for aesthetics
 |
|---|
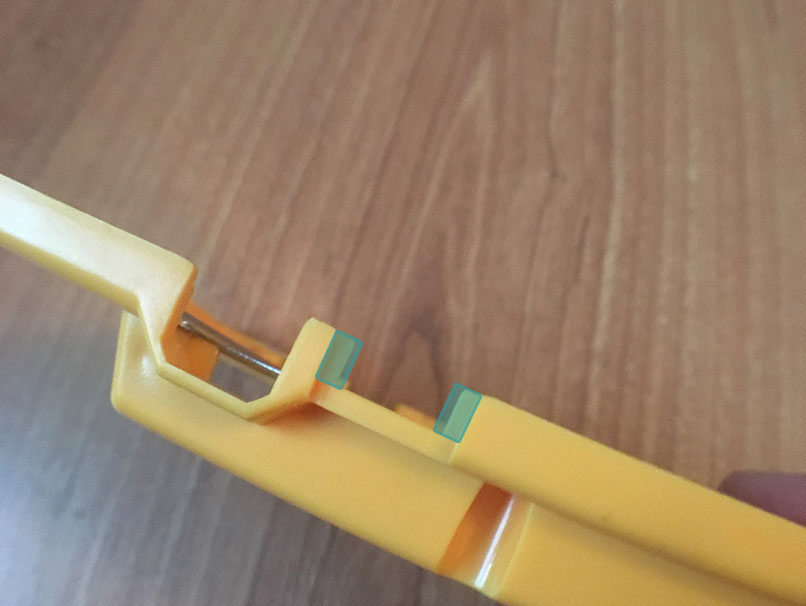
| Add some space for volume |
- Give your volume wheel some spacing
- Using your utility knife, cut out the indicated area
- Clean it up with your file
