How to create a DngProfile
First you have to take a .bayer File.
It contains the "RAW" data seen by the sensor.
Note: You can't open that file with any App, because the "Reader" don't know how to read it.
Next you close FreeDcam and open the Viewer and go to the Folder where the .bayer is stored.

Click on the 3 dots and select RawToDng. Select the .bayer File.
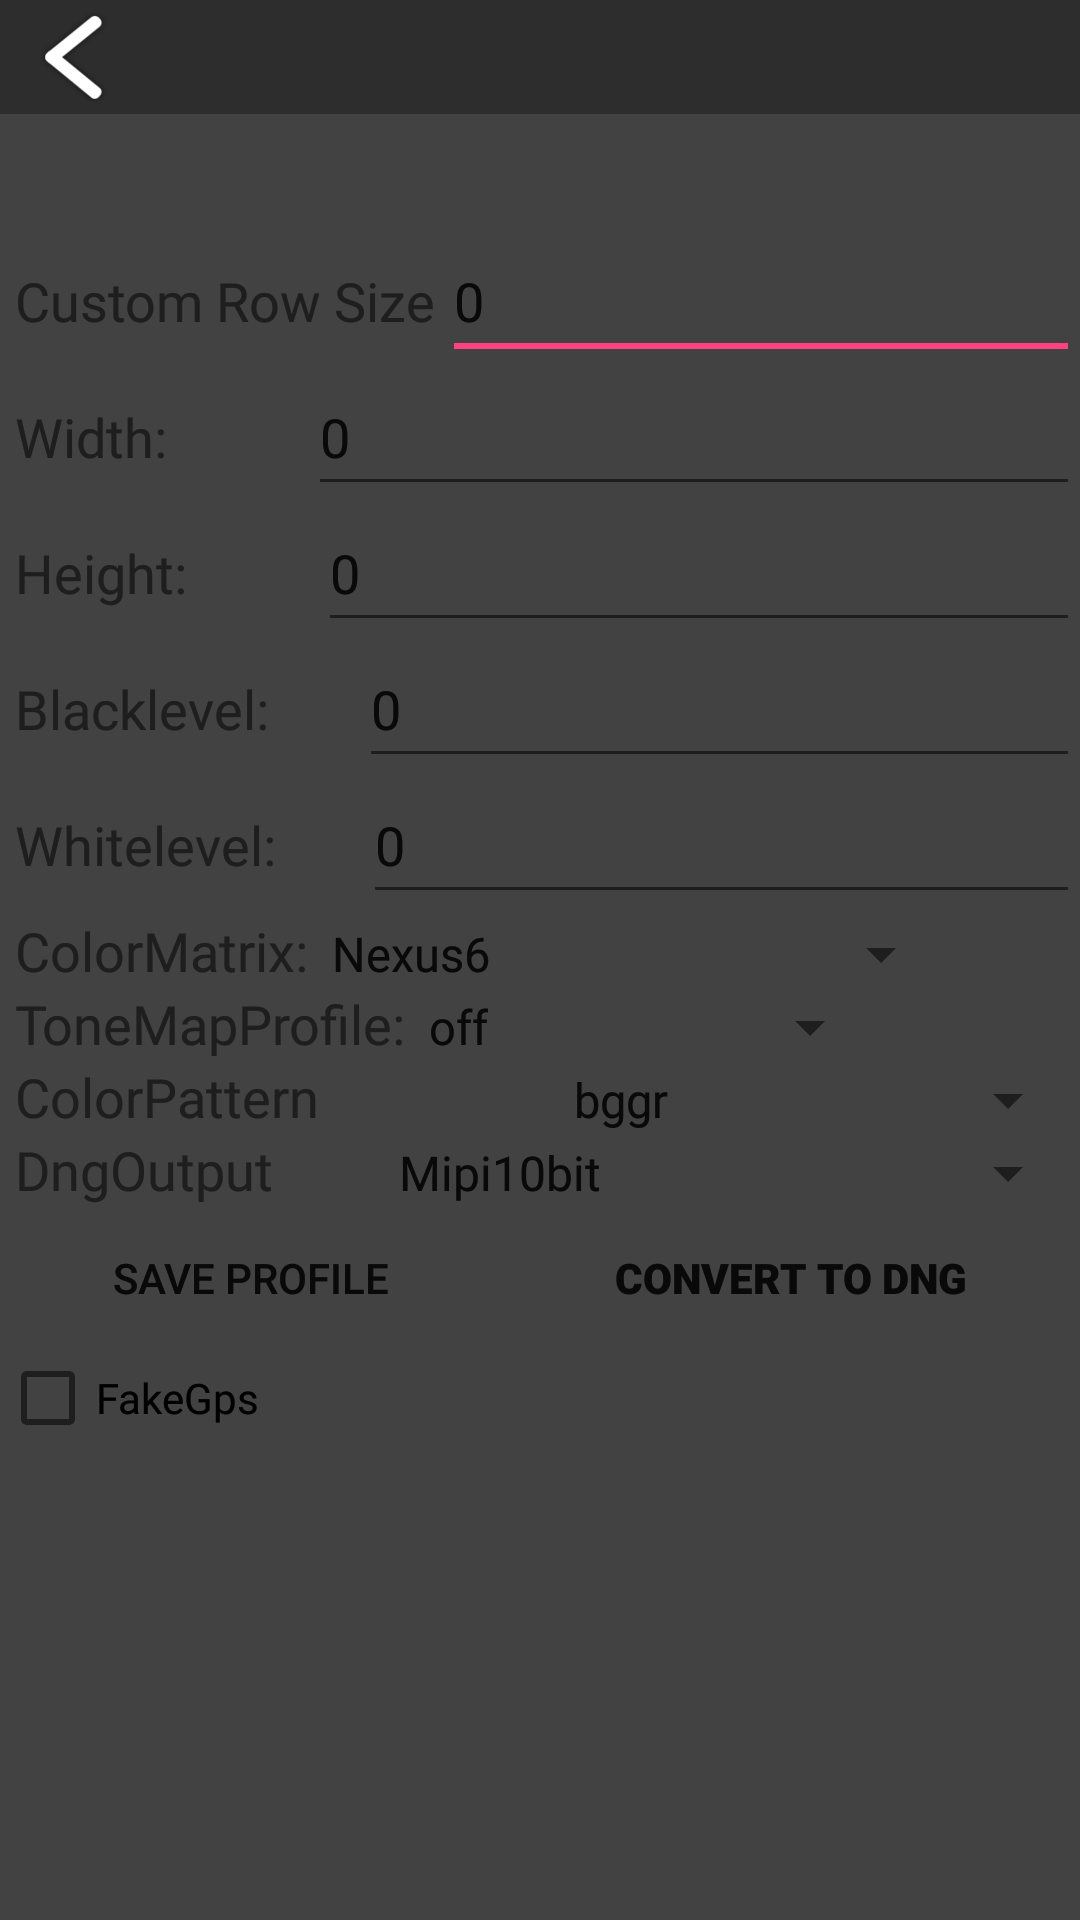
- Custom Row size should be 0, its only needed when rawdata contains a padding.
- Width, well its self explaining, the width of the bayerfile. Normaly its the same as the max possbile width.
- On camera1 check the CameraParameters for "raw-size:".
- On camera2 use the max size.
- Mtk soc contains the size in the bayerfilename.
- Height see 2.
- Blacklevel its used to tell the Reader how it should read shadows/dark areas. When your image has a red cast in shadows/dark areas, you have to increase it till black is realy black. Seen values are 0,16,64.
- Whitelevel is used to tell the Reader how Hightlight/Whiteareas gets handeld. Normaly that value is 1023. If you get a pink clipping on Highlights/Whiteareas you should decrase it.
- ColorMatrix tells the Reader how it should shift the colors.
- TonemapProfile just keep it off. It can get used to apply a tonecurve/saturationmap.
- ColorPattern tells the reader how to read the colorchannels from the bayer. When you have switched colors or the image is pink, change it.
- DngOutput tells RawToDng how it should store the bayerdata in the dngContainer
- Mipi10bit: Used on qcom socs. Move 10bit mipi into 10bit dng
- QCom16bit: Used on qcom socs: Move 10bit ideal-qcom into 16bit dng
- Plain16bit: Used on camera2 and MTK socs. Store 16bit data into 16bit dng
- Mipi16bit: Used on qcom socs: Store 10bit data into 16bit dng.
- Pure16bit_To_12bit: Store 16bit data into 12bit dng. (Only seen on Huawei P9)
- Convert to Dng click it to get a preview how your settings look in the final dng.
- Save Profile save the create DngProfile. After that its availible in FreeDcam.