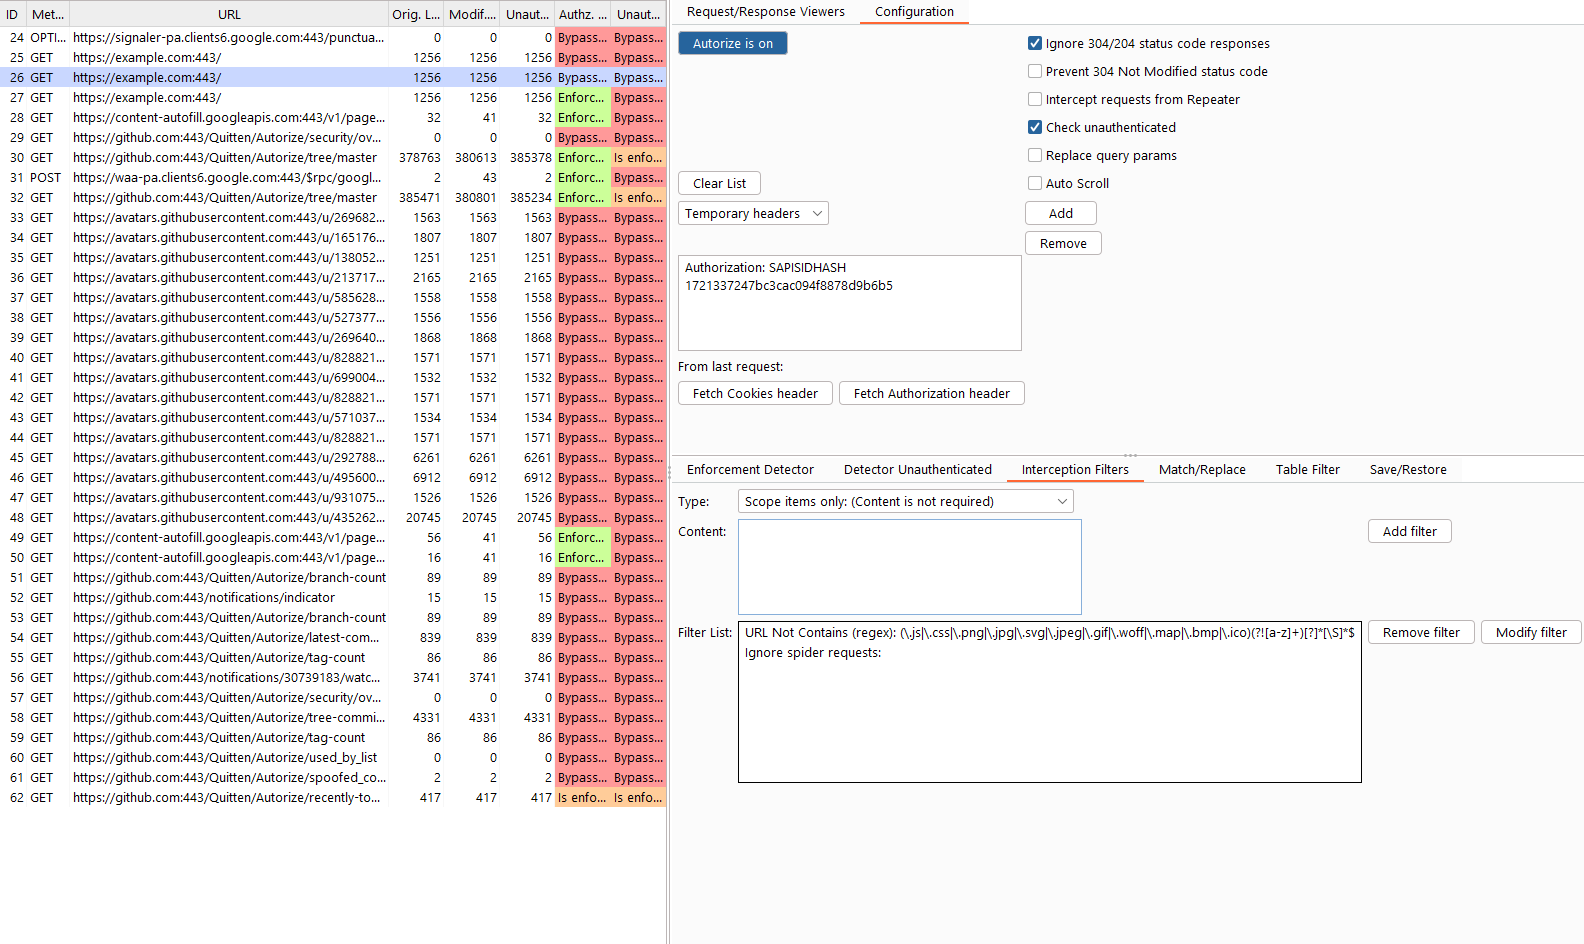
Autorize is an automatic authorization enforcement detection extension for Burp Suite. It was written in Python by Barak Tawily, an application security expert. Autorize was designed to help security testers by performing automatic authorization tests. With the last release now Autorize also perform automatic authentication tests.
- Download Burp Suite (obviously): http://portswigger.net/burp/download.html
- Download Jython standalone JAR: http://www.jython.org/download.html
- Open burp -> Extender -> Options -> Python Environment -> Select File -> Choose the Jython standalone JAR
- Install Autorize from the BApp Store or follow these steps:
- Download Autorize source code:
git clone git@github.com:Quitten/Autorize.git - Open Burp -> Extender -> Extensions -> Add -> Choose Autorize.py file.
- See the Autorize tab and enjoy automatic authorization detection :)
- After installation, the Autorize tab will be added to Burp.
- Open the configuration tab (Autorize -> Configuration).
- Get your low-privileged user authorization token header (Cookie / Authorization) and copy it into the textbox containing the text "Insert injected header here". Note: Headers inserted here will be replaced if present or added if not.
- Uncheck "Check unauthenticated" if the authentication test is not required (request without any cookies, to check for authentication enforcement in addition to authorization enforcement with the cookies of low-privileged user)
- Check "Intercept requests from Repeater" to also intercept the requests that are sent through the Repeater.
- Click on "Intercept is off" to start intercepting the traffic in order to allow Autorize to check for authorization enforcement.
- Open a browser and configure the proxy settings so the traffic will be passed to Burp.
- Browse to the application you want to test with a high privileged user.
- The Autorize table will show you the request's URL and enforcement status.
- It is possible to click on a specific URL and see the original/modified/unauthenticated request/response in order to investigate the differences.
There are 3 enforcement statuses:
-
Bypassed! - Red color
-
Enforced! - Green color
-
Is enforced??? (please configure enforcement detector) - Yellow color
The first 2 statuses are clear, so I won't elaborate on them.
The 3rd status means that Autorize cannot determine if authorization is enforced or not, and so Autorize will ask you to configure a filter in the enforcement detector tabs. There are two different enforcement detector tabs, one for the detection of the enforcement of low-privileged requests and one for the detection of the enforcement of unauthenticated requests.
The enforcement detector filters will allow Autorize to detect authentication and authorization enforcement in the response of the server by content length or string (literal string or regex) in the message body, headers or in the full request.
For example, if there is a request enforcement status that is detected as "Authorization enforced??? (please configure enforcement detector)" it is possible to investigate the modified/original/unauthenticated response and see that the modified response body includes the string "You are not authorized to perform action", so you can add a filter with the fingerprint value "You are not authorized to perform action", so Autorize will look for this fingerprint and will automatically detect that authorization is enforced. It is possible to do the same by defining content-length filter or fingerprint in headers.
The interception filter allows you configure what domains you want to be intercepted by Autorize plugin, you can determine by blacklist/whitelist/regex or items in Burp's scope in order to avoid unnecessary domains to be intercepted by Autorize and work more organized.
Example of interception filters (Note that there is default filter to avoid scripts and images):

- Barak Tawily, CTO @ enso.security by day, Application Security Researcher by night, former Application Security Consultant @ AppSec Labs
