Building a Computer Vision based tool for detecting fractures and fatiguing in mechanical components.
-
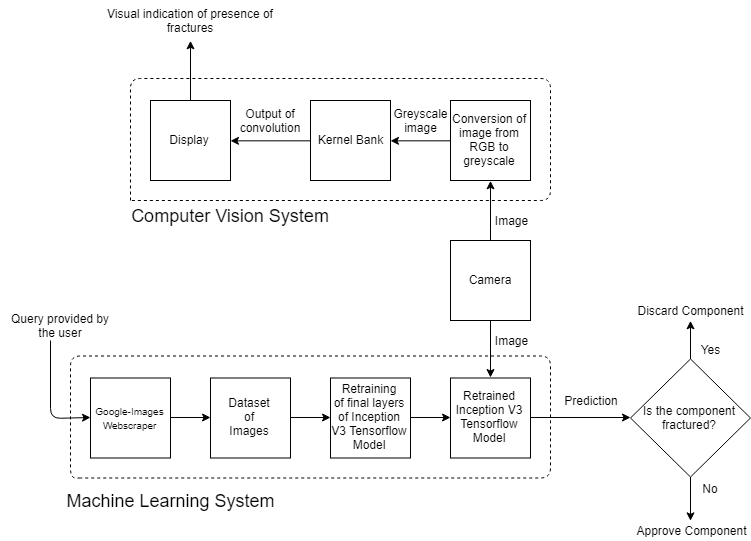
This project aims to develop a tool for identifying fractures and fissures in a mechanical component.
-
The tool makes use of OpenCV and TensorFlow. OpenCV is used to visually detect the presence of the fracture and TensorFlow is used to predict the presence of fractures.
Note: Most of the TensorFlow code has been pulled from the TensorFlow repository sans a few changes.
-
Paper on the approach & results presented at the Artificial Intelligence International Conference in Barcelona is available on arXiv here!
-
A image is sent to the OpenCV code which runs it through a series of "Kernels", which include:
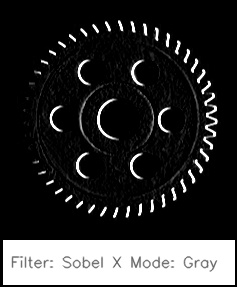
- Sobel-X
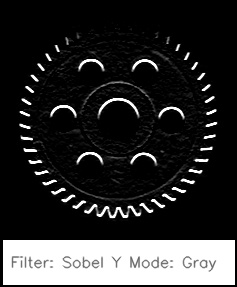
- Sobel-Y
- Small Blur
- Large Blur
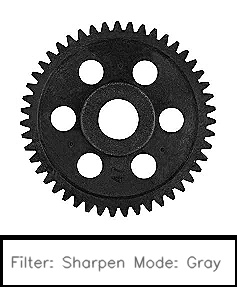
- Sharpen
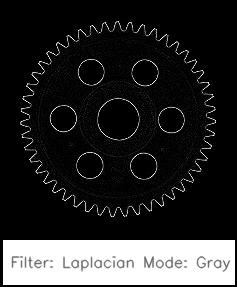
- Laplacian
-
The OpenCV code serves as a detector for fractures and relays it to the operator.
-
The image is then passed to the
label_image.pyscript, which predicts whether the object is classified as fractured or not. -
A
retrain.pyscript code is provided which is trained on the dataset of images. -
A webscraper has been developed which scrapes Google Images for the images to build your dataset (yet to be developed).
-
Clone the repository:
git clone https://github.com/SarthakJShetty/Fracture.git -
Using the webscraper, scrape images from Google Images to build your dataset.
Usage:
python webscraper.py --search "Gears" --num_images 100 --directory /path/to/dataset/directoryNote: Make sure that both categories of images are in a common directory.
Credits: This webscraper was written by genekogan. All credits to him for developing the scrapper.
-
Retrain the final layers of Inception V3, to identify the images in the new dataset.
Usage:
python retrain.py --image_dir path/to/dataset/directory --path_to_files="project_name"Note: The
path_to_filescreates a new fileproject_nameunder thetmpfolder, and stores retrain logs, bottlenecks, checkpoints for the project here. -
The previous step will cause logs and graphs to be generated during the training, and will take up a generous amount of space. We require the labels, bottlenecks and output graphs generated for the
Labeller.pyscript. -
We can now use
Labeller.pyto identify the whether the given component is defective or not.Usage:
python Labeller.py --graph=path/of/tmp/file/generated/output_graph.pb --labels=path/of/tmp/file/project_name/generated/labels.txt --output_layer=final_result -
The above step triggers the
VideoCapture()function, which displays the camera feed. Once the specimen is in position, press the Q button on the keyboard, the script will retain the latest frame and pass it onto theLabeller.pyandKerneler.pyprograms.
-
Laplacian Kernel:
Fig 2. Result of Laplacian Kernel -
Sharpen:
Fig 3. Result of Sharpening Kernel -
Sobel X:
Fig 4. Result of Sobel-X Kernel -
Sobel Y:
Fig 5. Result of Sobel-Y Kernel
- Fig 6. Prediction 1 made by model
- Fig 7. Prediction 2 made by model
-
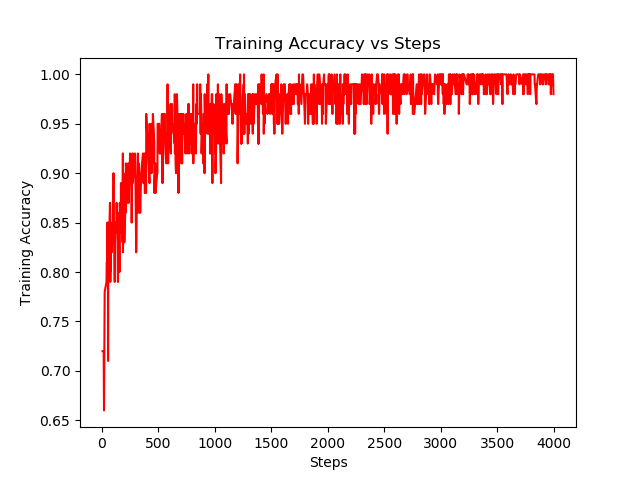
Train accuracy:
Fig 8. Training Accuracy vs Steps -
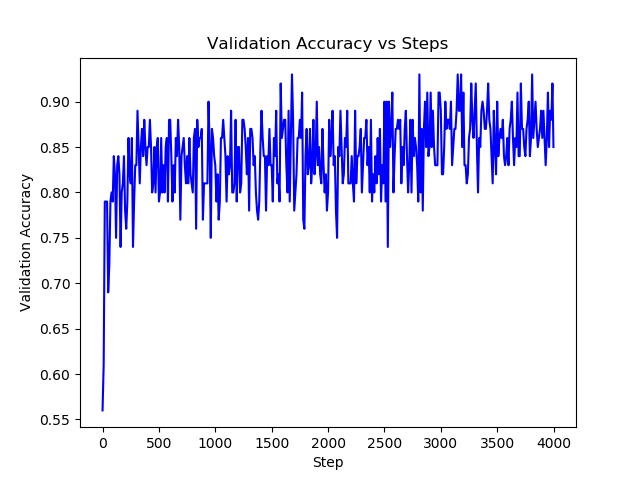
Validation accuracy:
Fig 9. Validation Accuracy vs Steps -
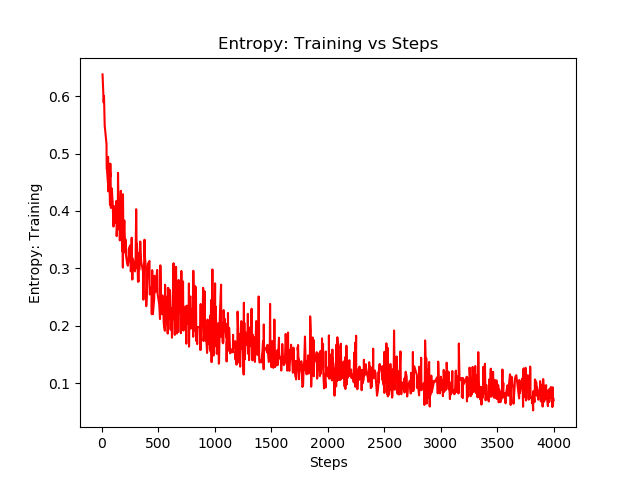
Cross-entropy (Training):
Fig 10. Training Entropy vs Steps -
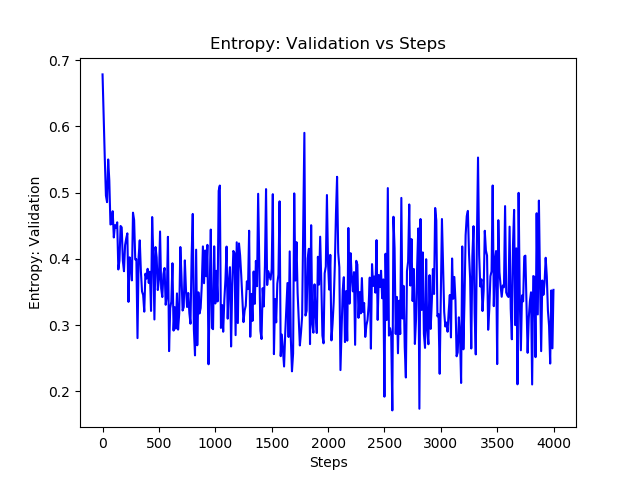
Cross-entropy (Validation):
Fig 11. Validation Entropy vs Steps
