HOW TO Configure HWiNFO
Using HWiNFO with Rainmeter skins requires installing and configuring HWiNFO. No plug-ins are required. Initial HWiNFO configuration is much more complex than CoreTemp or SpeedFan.
- AMD hardware is different in several important ways from Intel hardware. You will need to pay particular attention to how AMD CPU temperatures are reported.
- Your PC may not have all the sensors needed for the Alien skin, or the sensors may have different names that those in this guide. Hardware from different manufactures will appear differently in HWiNFO; which is why HWiNFO is continually being updated as new hardware comes out.
Alien requires HWiNFO 7.02 or later. Please note that you do not need the HWiNFO Pro edition; the free edition will work fine.
👍 The HWiNFO author has worked closely with the Rainmeter community and has been very supportive of keeping HWiNFO free for Rainmeter users. I encourage everyone who can afford it to make at least a one-time purchase of the program to show your appreciation for the author's efforts.
- Download HWiNFO here.
- Install the application and run it.
Once HWiNFO is installed, the next step is to configure the HWiNFO settings.
- When launching HWiNFO the first time, the Welcome splash screen will appear.
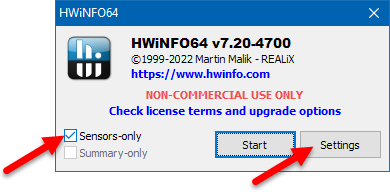
- For the best user experience, check the Sensors-only option.
- Click the Settings button to open the Settings window.
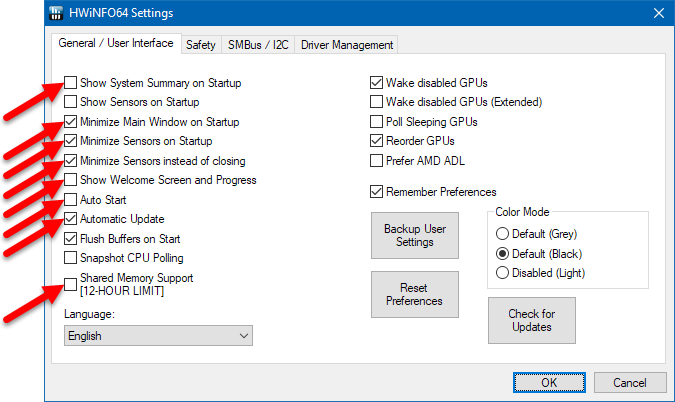
- Unlike previous versions of HWiNFO, you do not need to enable the Shared Memory Support option. You do need to enable this option if you use other Rainmeter skins that require it.
- If you would like HWiNFO to start automatically when you log into Windows, check the Auto Start option.
- If your computer has multiple GPUs, you may need to check one or both of the Wake disabled GPUs options and the Poll Sleeping GPUs options if HWiNFO cannot find your GPU when it is inactive.
- Click OK to save your changes.
- From the Welcome screen click Run to run HWiNFO.
After configuring the HWiNFO settings, the next step is to configure the Sensor settings.
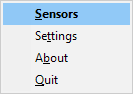
- Right-click the HWiNFO tray icon and select the Sensors option.
- At the bottom of the Sensor Status screen, click the Configure Sensors button
 .
. - On the General tab, in the Polling Period section, change the Global option to
1000milliseconds and click the Set button.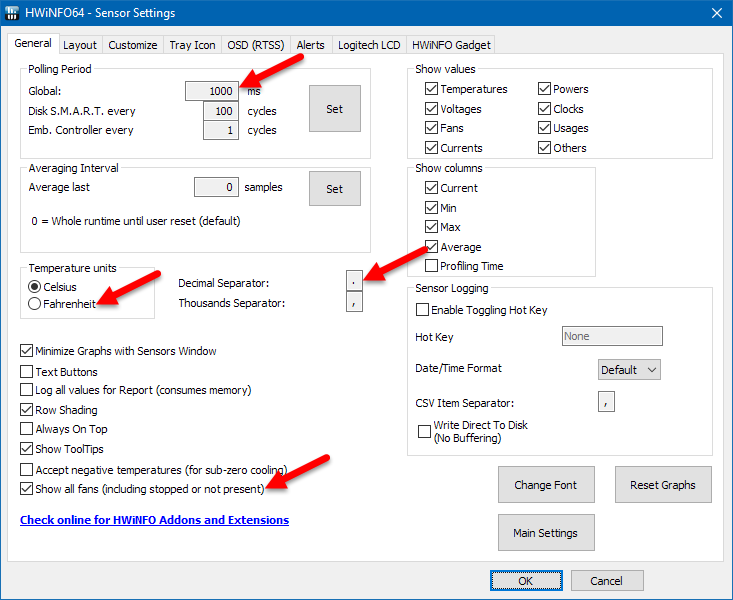
- If you want temperatures in Fahrenheit, change the Temperature Units setting to Fahrenheit.
- Check the Show all fans (including stopped or not present) option. Normally, HWiNFO will only show fans that are running (or have run since the program was started). This can make configuration of your skin difficult, especially for laptops where the fans do not run all the time.
- Select the HWiNFO Gadget tab.
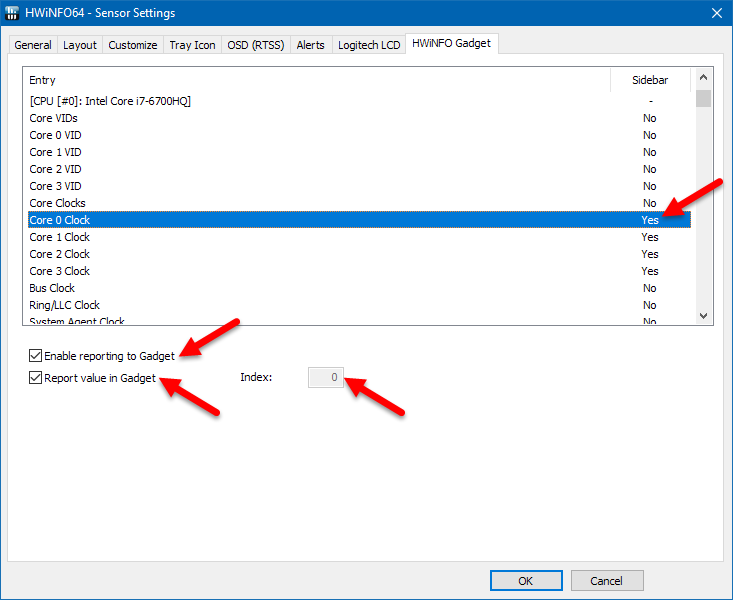
- Check the Enable reporting to Gadget option.
NOTE: To be clear, this tab and this option are in reference to the HWiNFO Windows Sidebar Gadget, not the Rainmeter-based Gadgets. Rainmeter skins can take advantage of HWiNFO's Sidebar Gadget configuration to allow using HWiNFO without the need to use the "Shared Memory Support" feature, and thus not require using the HWiNFO Pro edition of the application.
- An "Entry" can be selected for monitoring by selecting the item in the list and checking the Report value in Gadget option. (Control-click or shift-click to select multiple entries.)
Select the following entries (the actual names may differ depending on your hardware):
- The
Core Max(maximum of all cores) temperature entry for Intel CPUs, or theCPU(Tdie)orCPU (Tctl/Tdie)entry for AMD CPUs, if available; - The
CPUfan RPM entry on the motherboard sensor;
NOTE: If you use other skins that use HWiNFO, enable every sensor entry needed by all skins you use. It is not recommended to enable every entry in the list for reporting, as this will noticeably impact your system performance.
- The
- As entries are selected for reporting, you may notice they are assigned an Index number. This index is the key to mapping your Gadget configuration to the sensor entries in HWiNFO. It is important to note that if you later add or remove entries for reporting, the index values may change and the list of indexes may be reordered. If this occurs, all your Rainmeter skins will need to be reconfigured to reference the proper indexes.
- Click OK on the Sensor Settings dialog.
- On the Sensors dialog, click the Close and Save Changes button
 to minimize the window.
The configuration of HWiNFO is complete at this point. The final step is to configure the Alien skin to work with your HWiNFO settings.
- From the main Alien page, click the settings icon at the bottom of the skin.

- In the
HWiNFO Indexessection, click theLISTbutton to view the sensor indexes as selected above. - Enter the index of the CPU temperature and CPU fan speed into the textboxes. You must press the
Enterkey to save your entries (this is a Rainmeter requirement). - Click the
SAVE CHANGESbutton to save your changes and refresh the skin.
Tips on using HWiNFO with Rainmeter can be found here.
For more information on HWiNFO, see the HWiNFO website.