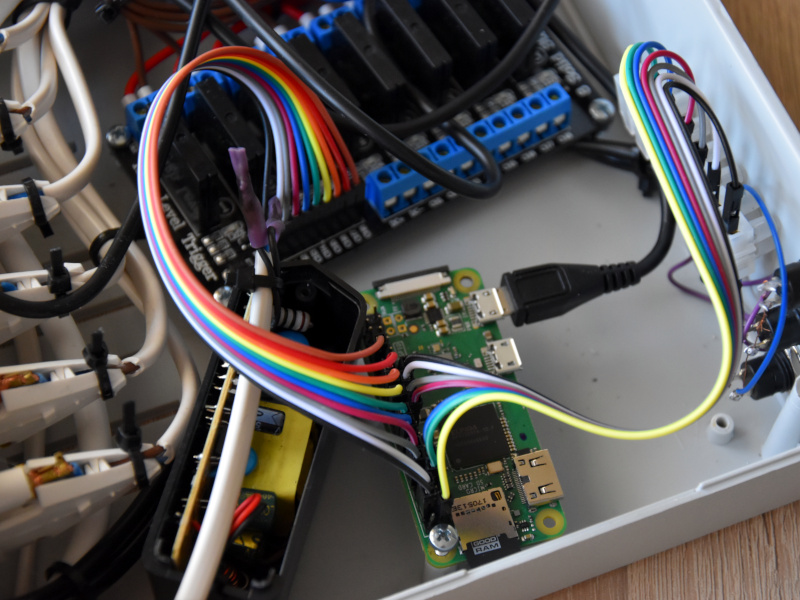
Raspberry Pi aquarium controller
- advanced scheduler and manual switches for 6 x 220V outputs (filter, lights, etc.)
- water and room temperature sensors
- www server with display / control / setup interface
- Raspberry Pi Zero W
- SD card (4GB recommended)
- power supply 2A
- DS18B20 waterproof x2 (or more) - 1-Wire Digital Temperature Sensor
- 4,7kΩ resistor for 1-wire sensors
- SSR RELAY - OMRON G3MB-202P - 8 channels module (6 channels used)
- momentary push-button switch x3
Download latest Raspbian Lite from:
https://www.raspberrypi.org/downloads/raspbian/
Install image to the SD card
# on linux run `lsblk` to find device file eg. `/dev/sdX`
$ umount /dev/sdX*
$ sudo dd bs=4M if=xxx.img of=/dev/sdX status=progress conv=fsync# mount sd-card (reinsert it)
$ cd /boot
$ vim wpa_supplicant.conf
ctrl_interface=DIR=/var/run/wpa_supplicant GROUP=netdev
update_config=1
country=«your_ISO-3166-1_two-letter_country_code»
network={
ssid="«your_SSID»"
psk="«your_PSK»"
key_mgmt=WPA-PSK
}
# enable ssh access
$ touch ssh
# unmount and insert sd-card into Raspberry Pi# insert sd-card to raspberry pi and boot
$ ssh pi@«ip-addr»
# password: raspberry
$ sudo raspi-config
# - expand filesystem
# - change hostname
# - change password
# - set timezone
# - enable 1-Wire interface (for temperature sensors)
# - disable serial interface (if not needed)
# - reboot
$ sudo rpi-update
$ sudo apt update
$ sudo apt dist-upgrade
# edit boot options
$ sudo vi /boot/config.txt
# disable bluetooth (if not needed) - append:
dtoverlay=disable-bt
# and disable splash:
disable_splash=1
# and disable boot delay
boot_delay=0
# and disable audio (if not needed):
# comment out: dtparam=audio=on
# disable unused services
$ sudo systemctl disable hciuart
$ sudo systemctl disable avahi-daemon
$ sudo systemctl disable triggerhappy
# disable swap
$ sudo systemctl disable dphys-swapfile
# reduce cron tasks
$ sudo apt purge man-db
# ramdisk mounts
$ sudo vi /etc/fstab
# and append:
tmpfs /tmp tmpfs defaults,noatime,nosuid,size=32m 0 0
tmpfs /var/tmp tmpfs defaults,noatime,nosuid,size=32m 0 0
tmpfs /var/log tmpfs defaults,noatime,nosuid,size=32m 0 0
# fix wifi disconnection issue
$ sudo vi /etc/rc.local
# and append before exit:
iw wlan0 set power_save off
$ sudo reboot- create dns name, eg:
https://www.duckdns.org - add cron entry to update IP (follow the site instructions)
- setup port forwarding in your router:
| service | inner port | outer port | protocol |
|---|---|---|---|
| web | 8080 | 80 | tcp |
WEB interface is accessible under http://«dnsname»/.
If your router doesn't support NAT loopback (hairpinning),
then inside LAN the interface is accessible only under
http://«ip_address»:8080/.
# append ssh config lines
$ sudo vim /etc/ssh/ssh_config
Host piaqua
    Hostname «ip_address»
    User pi
# copy ssh keys to log without password
$ ssh-copy-id piaqua# create user etc
$ scripts/prepare_env.sh
# create systemd service
$ scripts/deploy_service.sh
# upload configs
$ scripts/deploy_configs.sh
# adjust sensor ids and pin numbers in:
# /opt/aqua/configs/hardware.yml
# change web api credentials in:
# /opt/aqua/configs/server.yml
# upload www files
$ scripts/deploy_www.sh
# build an app
$ ./docker-build
# and deploy it
$ scripts/deploy_app.sh# check service status
$ systemctl status aqua
# view logs
$ journalctl -u aqua


