-
-
Notifications
You must be signed in to change notification settings - Fork 7
How To Change The Default Visual Studio Diff Tool For TFVC
deadlydog edited this page Jul 24, 2016
·
8 revisions
To change the default Diff Tool that Visual Studio uses for comparing various file types in TFVC (Team Foundation Version Control), in Visual Studio go to:
-
If you have Diff All Files installed:
Tools -> Options... -> Diff All Files and press the "Configure Diff Tool..." button. -
If you do not have Diff All Files installed:
Tools -> Options... -> Source Control -> Plug-in Selection and make sure the current source control plugin is set to Visual Studio Team Foundation Server. Then go to Source Control -> Visual Studio Team Foundation Server and click the "Configure User Tools..." button.
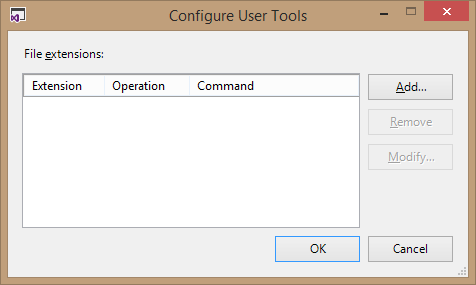
You should see the Configure User Tools window. Click the "Add..." button to get the Configure Tool window.


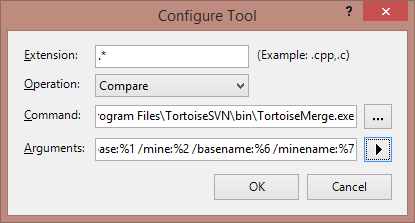
Specify the file types that you want the new diff tool to be used to compare (use .* to specify all file types), make sure the Operation is set to Compare, set the Command to the diff tool executable's path, and specify the Arguments to pass to it (see Common Diff Tool Configurations For TFVC for common diff tool arguments).