howto devonfw CobiGen OpenAPI
This article helps to create a sample application using CobiGen.
Download and install devonfw IDE here,
The HOW_TO is divided in 2 parts:
-
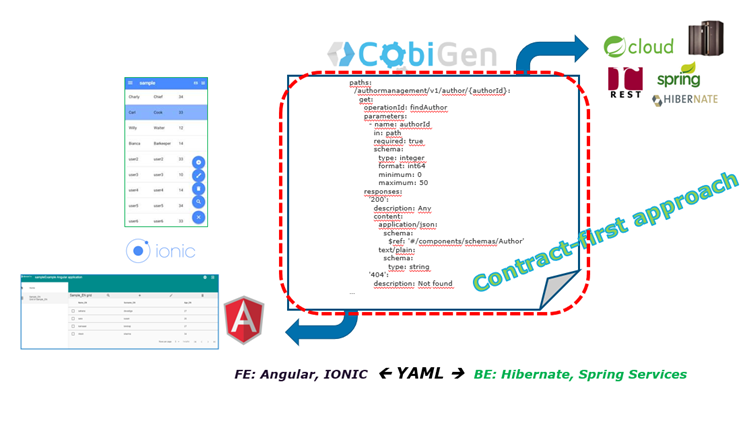
BE-Backend generator (DB+DAO+ services) – CONTRACT FIRST APPROACH -
FE-Frontend generator (Web App Angular + Ionic App) – CONTRACT FIRST APPROACH
So, ready to go! We’re going to start from the BE part …
Under your path installation of devonfw, you can find the eclipse-main.bat script and you can run it:
run installation_path\eclipse-main.bat
It will open eclipse
Create a project using a command from the command prompt.
To made it, it’s necessary to open a CMD and open the folder where it’s installed devonfw and launch this command under the path workspaces/main.
|
Note
|
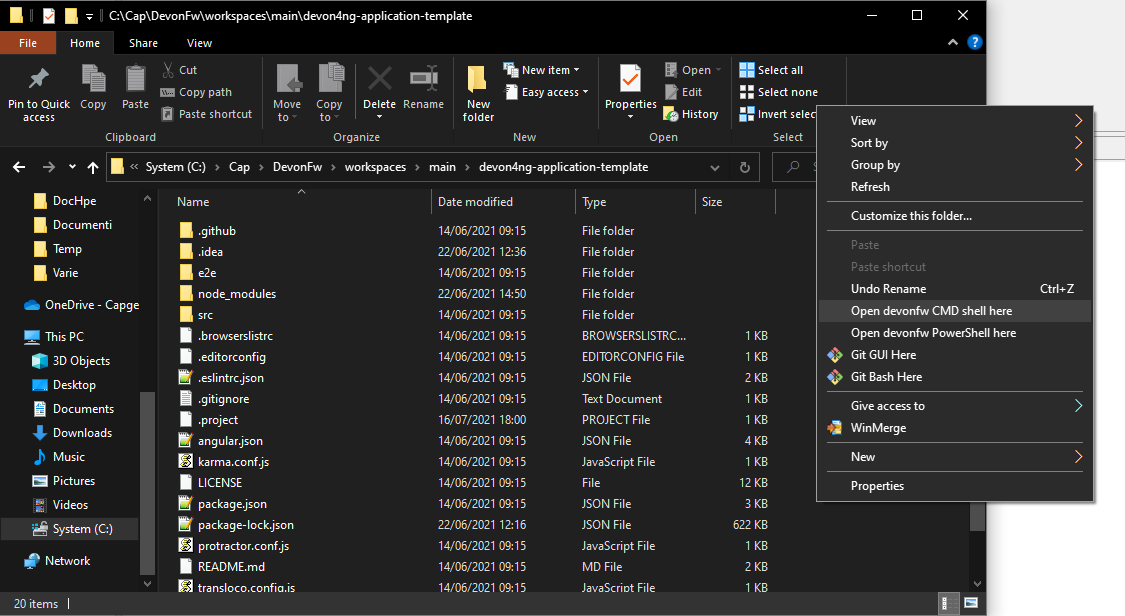
To facilitate this step, you can go from your "File Explorer" under workspaces/main folder and with the right button of the mouse, choose "Open devonfw CMD shell here"
|
Then launch this command from CMD:
devon java create com.example.domain.myappImport the project to eclipse as maven project
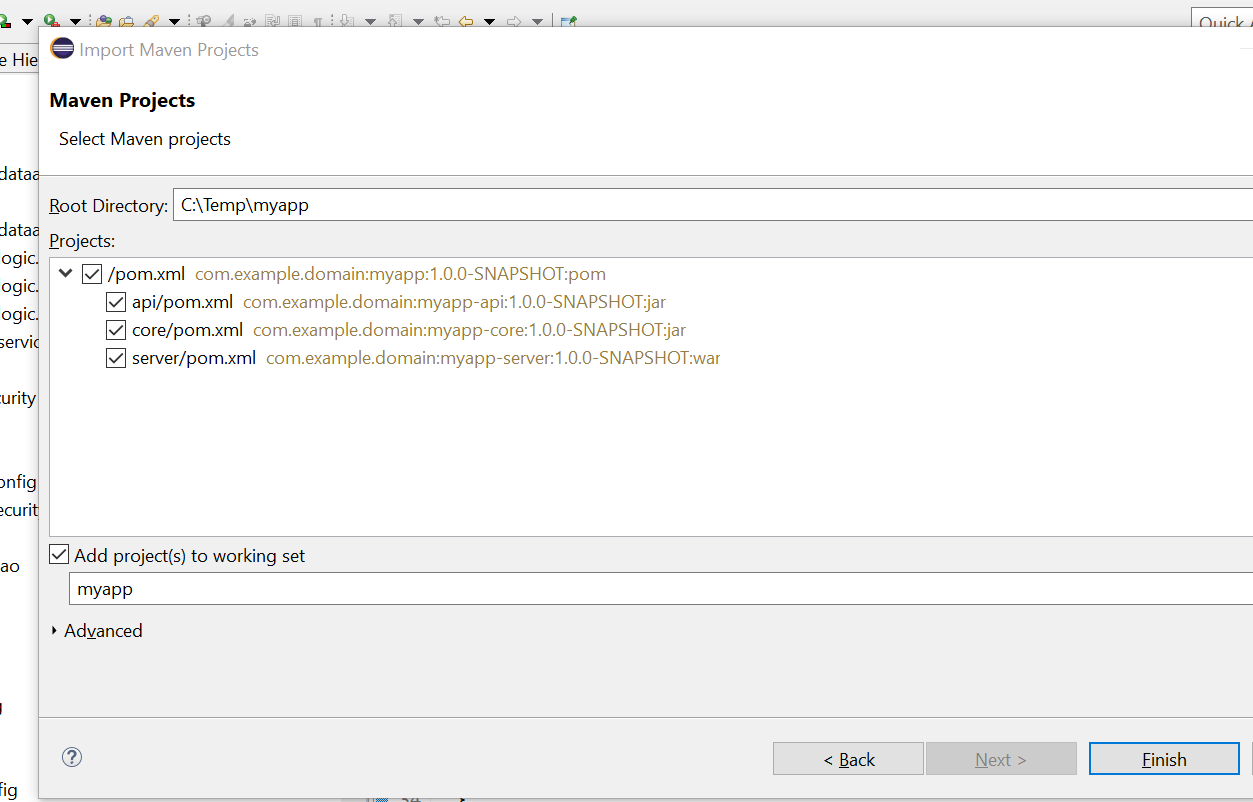
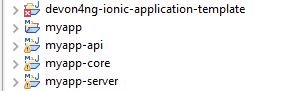
Click FINISH
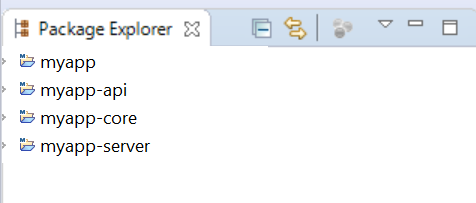
Now We have the following 4 projects.
BEFORE to start to create an Entity class, remember to create the tables, for this POC it’s used an H2 Database!
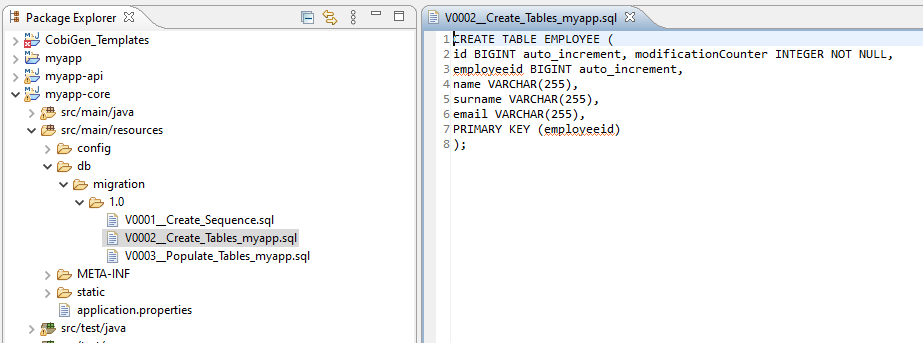
Create a new SQL file (i.e: V0002__CreateTables_myapp.sql) inside `myapp-core` , under the folder path `/myapp-core/src/main/resources/db/migration/1.0` and insert the following script:
CREATE TABLE EMPLOYEE (
id BIGINT auto_increment, modificationCounter INTEGER NOT NULL,
employeeid BIGINT auto_increment,
name VARCHAR(255),
surname VARCHAR(255),
email VARCHAR(255),
PRIMARY KEY (employeeid)
);
WARNING 1: please note that there in that folder is present only one file, 0001, and you have to add the other files in progressive number order (i.e. 0002)!
WARNING 2: please note that there are 2 underscore in the name!
Now create another SQL file (i.e: V0003__PopulateTables-myapp.sql) and add following script about the INSERT in order to populate the table created before.
The script must be inserted at the same path used before: `/myapp-core/src/main/resources/db/migration/1.0`
WARNING 1: please note that there in that folder is present only one file, 0001, and you have to add the other files in progressive number order (i.e. 0003)!
WARNING 2: please note that there are 2 underscore in the name!
INSERT INTO EMPLOYEE (id, modificationCounter, employeeid, name, surname,email) VALUES (1, 1, 1, 'John','Doe','john.doe@example.com');
INSERT INTO EMPLOYEE (id, modificationCounter, employeeid, name, surname,email) VALUES (2, 2, 2, 'Tom','Smith', 'tom.smith@example.com');
INSERT INTO EMPLOYEE (id, modificationCounter, employeeid, name, surname,email) VALUES (3, 3, 3, 'Joe','Schmoe', 'joe.schmoe@example.com');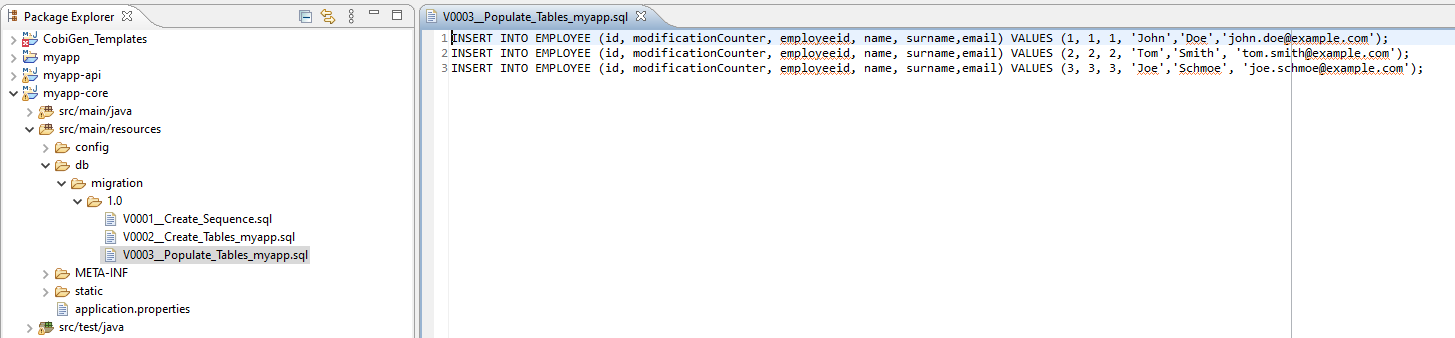
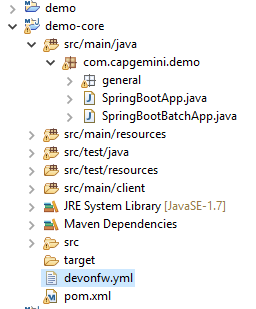
Let’s create the yml file for the code generation
Now create a new file devonfw.yml in the root of your core folder. This will be our OpenAPI contract, like shown below. Then, copy the contents of this file into your OpenAPI. It defines some REST service endpoints and a `EmployeeEntity` with its properties defined.
Important 1: Please pay attention to the content of the devonfw.yml file.
The section x-rootpackage it must be filled with the same package used when you have created the java application.
So i.e. if you have created the BE Java Application with:
devon java create com.example.domain.myappYou have to populate the devonfw.yml in this way:
x-rootpackage: com.example.domain.myapp
Important 2: if you want to know how to write an OpenAPI contract compatible with CobiGen, please read this tutorial.
Use CobiGen to generate code. Right click devonfw.yml. CobiGen → Generate
If it will ask you to download the templates, click on update:
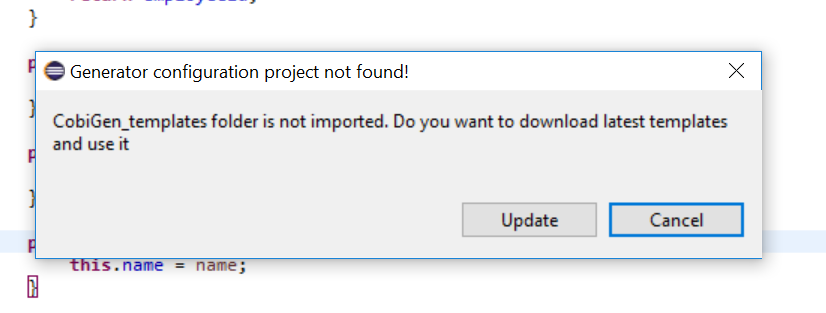
It will automatically download the latest version of CobiGen_Templates.
Attention: If you want to adapt the CobiGen_Templates, (normally this is not necessary), you will find at the end of this document (in a separate chapter) a tutorial on how to import them and adapt them!
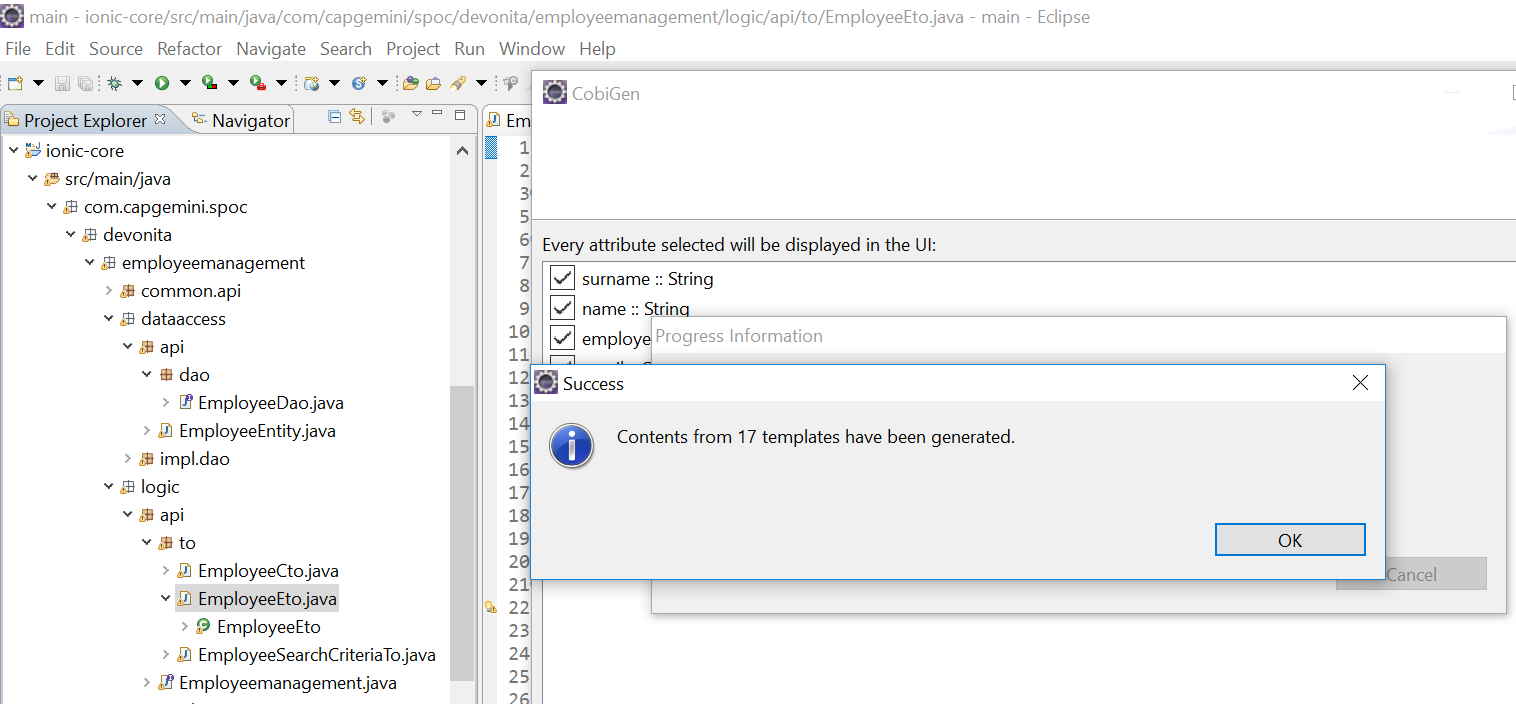
Click on all the option selected as below:
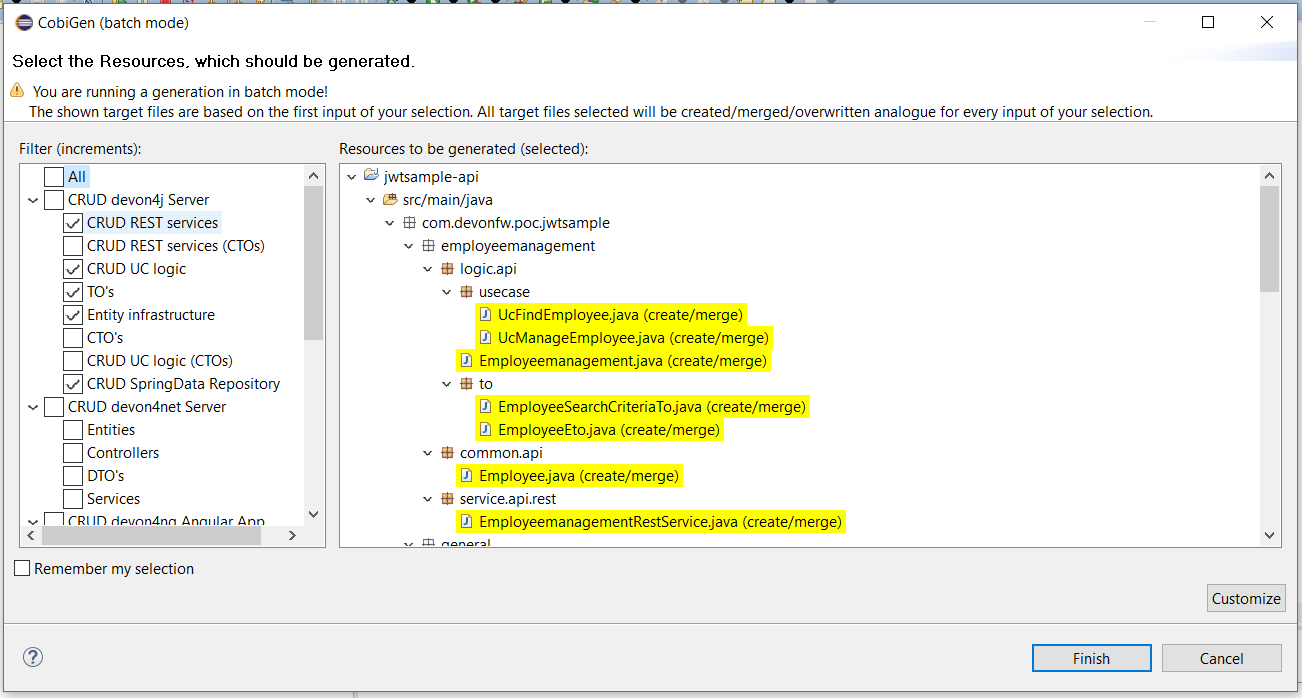
Click on finish. Below Screen would be seen. Click on continue
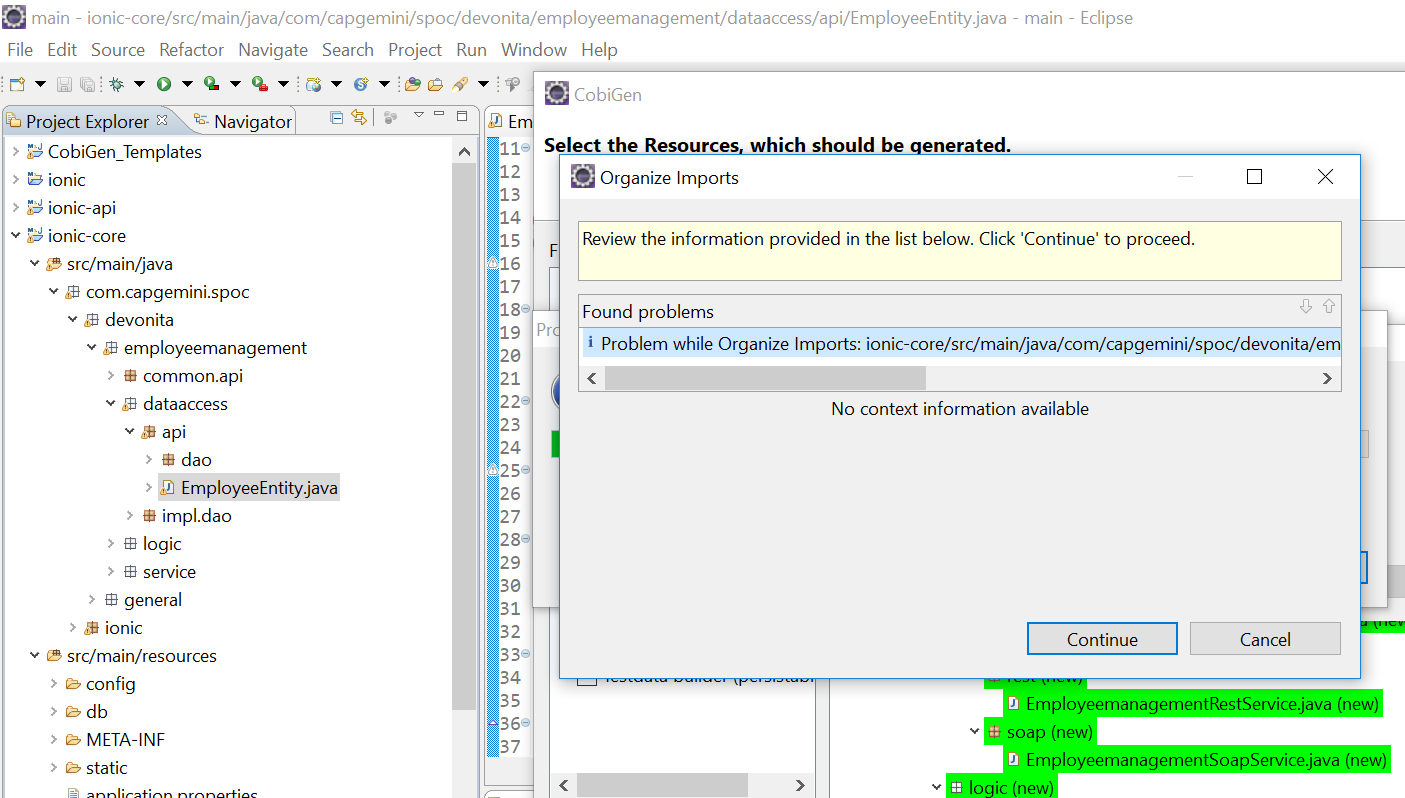
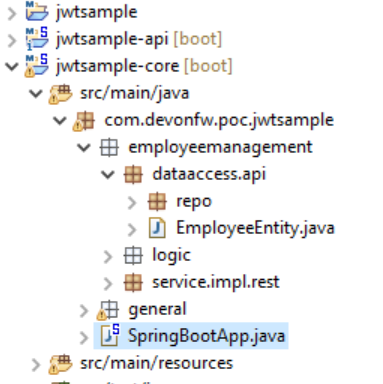
The entire BE layer structure having CRUD operation methods will be auto generated.
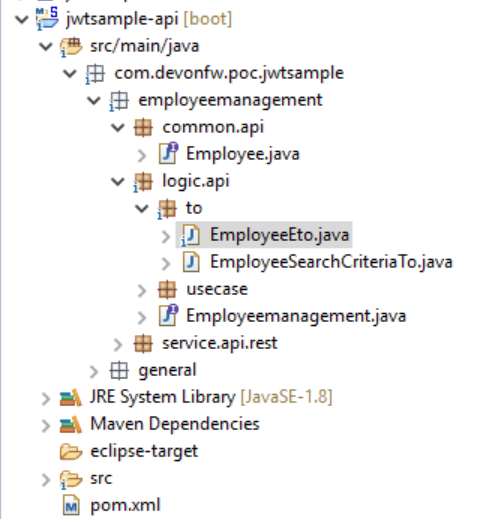
Some classes will be generated on the API part (`myapp-api`), normally it will be interfaces, as shown below:
Some other classes will be generated on the core part (`myapp-core`), normally it will be implementations as shown below:

The last step is to add the Cross Domain process, because when you are developing JavaScript client and server application separately, you have to deal with cross domain issues.
So, we need to prepare server side to accept request from other domains. We need to cover the following points:
-
Accept request from other domains.
-
Accept devonfw used headers like
X-CSRF-TOKENorcorrelationId. -
Be prepared to receive secured request (cookies).
To do this it’s necessary to add two kind of dependencies in the pom.xml of the `myapp-core` folder, at the end of the list of dependencies:
    <dependency>
      <groupId>com.devonfw.java.starters</groupId>
      <artifactId>devon4j-starter-security-cors</artifactId>
    </dependency>
    <dependency>
      <groupId>com.devonfw.java.starters</groupId>
      <artifactId>devon4j-starter-security-csrf</artifactId>
    </dependency>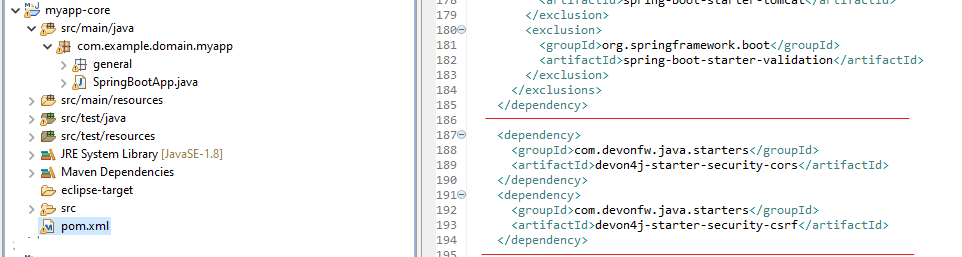
Next step is to add some properties under your application.properties file, in the myapp-core folder in the resources/config:
security.cors.spring.allowCredentials=true
security.cors.spring.allowedOriginPatterns=*
security.cors.spring.allowedHeaders=*
security.cors.spring.allowedMethods=OPTIONS,HEAD,GET,PUT,POST,DELETE,PATCH
security.cors.pathPattern=/**
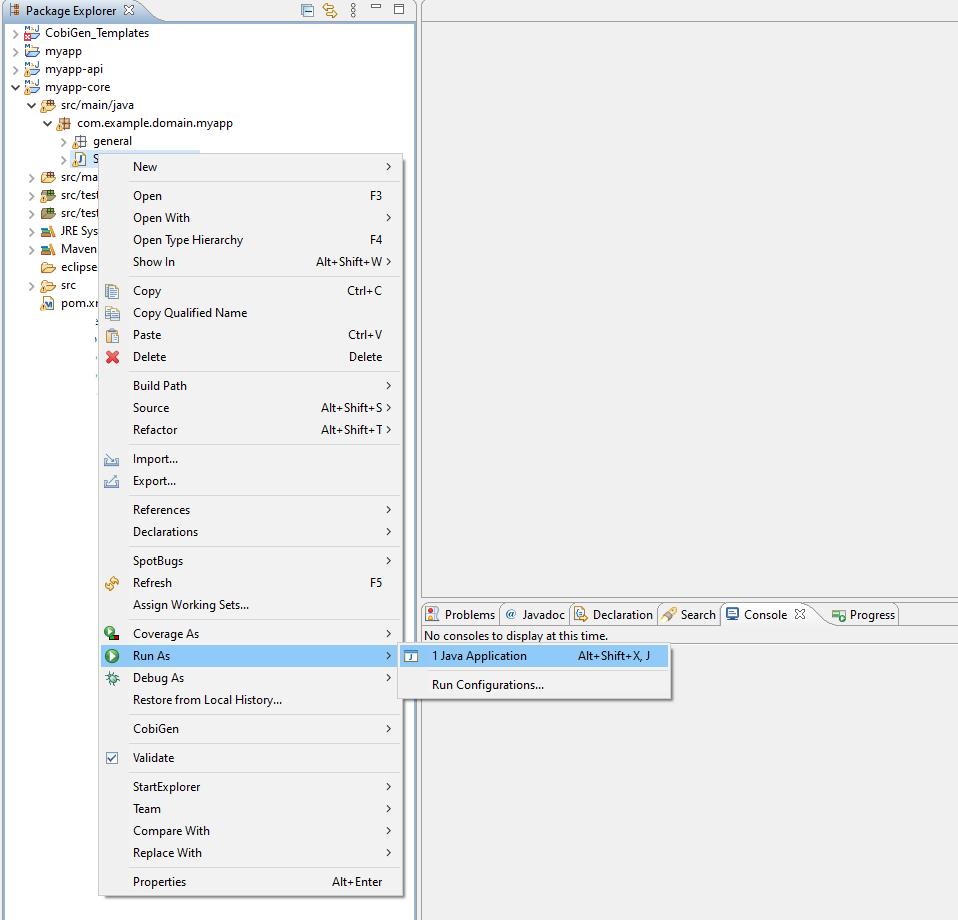
BEFORE to generate the FE, please start the Tomcat server to check that BE Layer has been generated properly.
To start a server you just have to right click on `SpringBootApp.java` → run as → Java Application
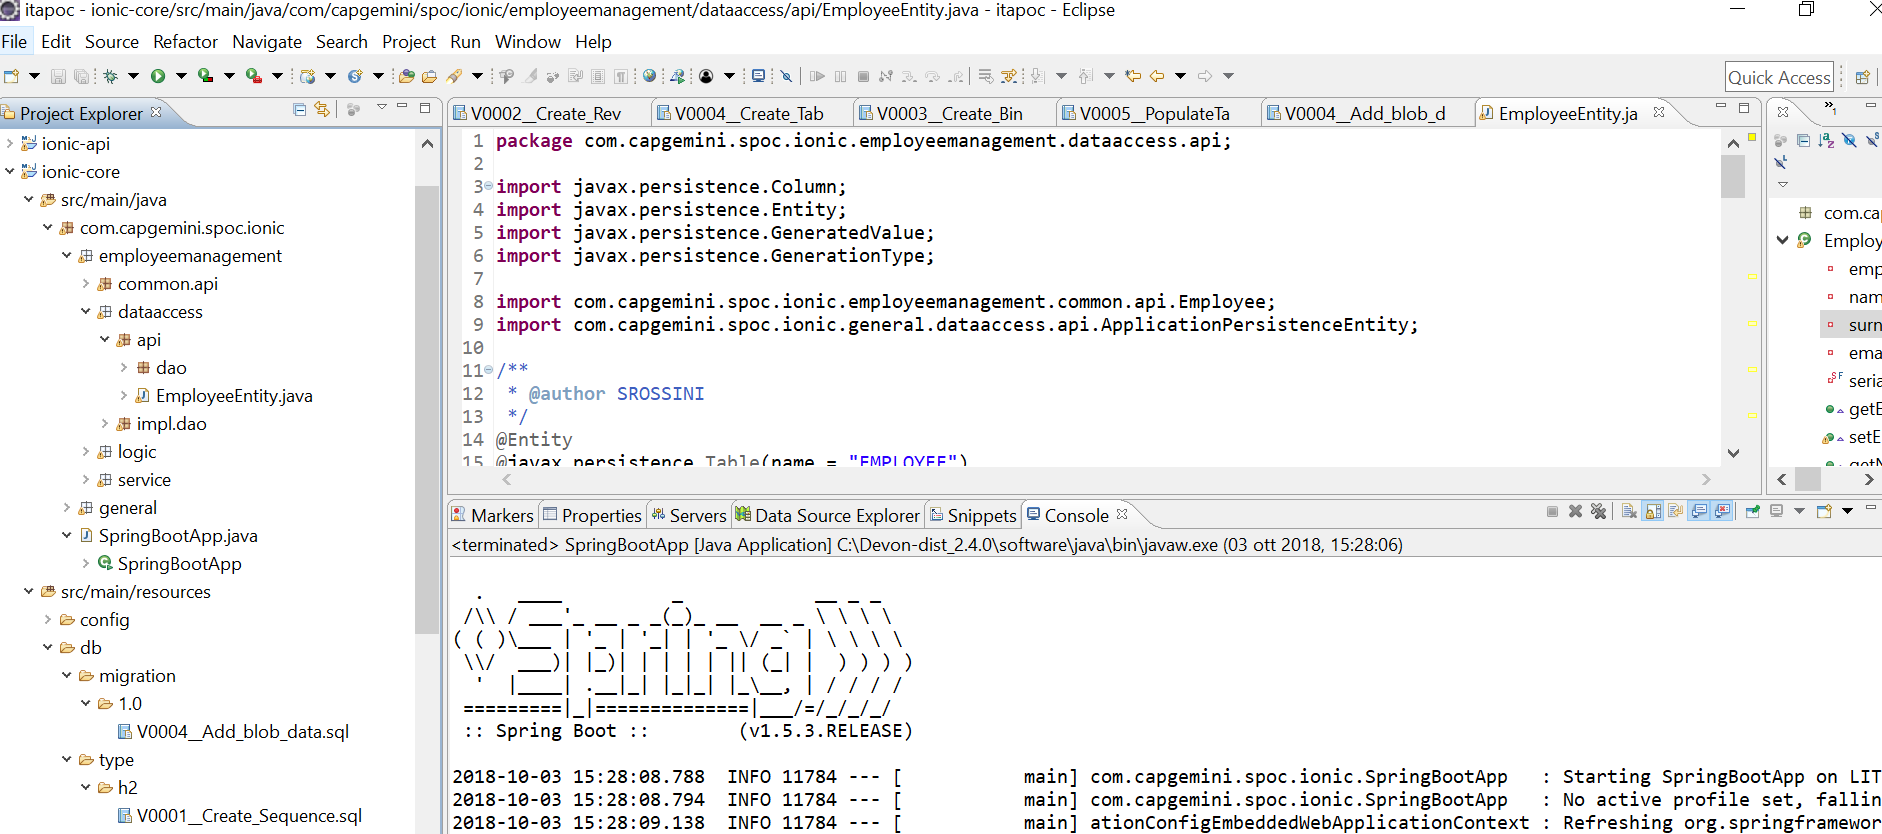
BE DONE
Last but not least: We make a quick REST services test !
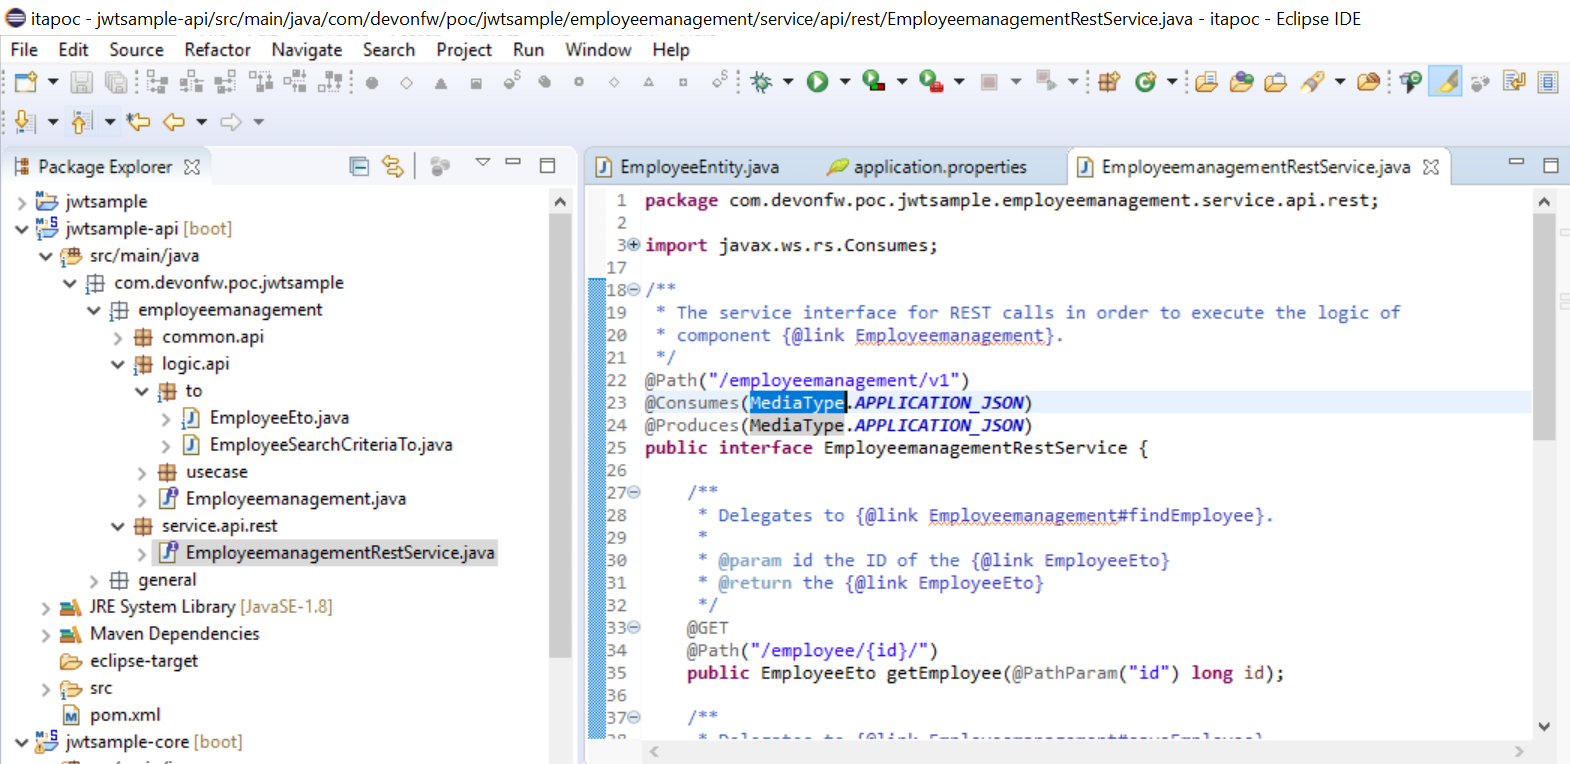
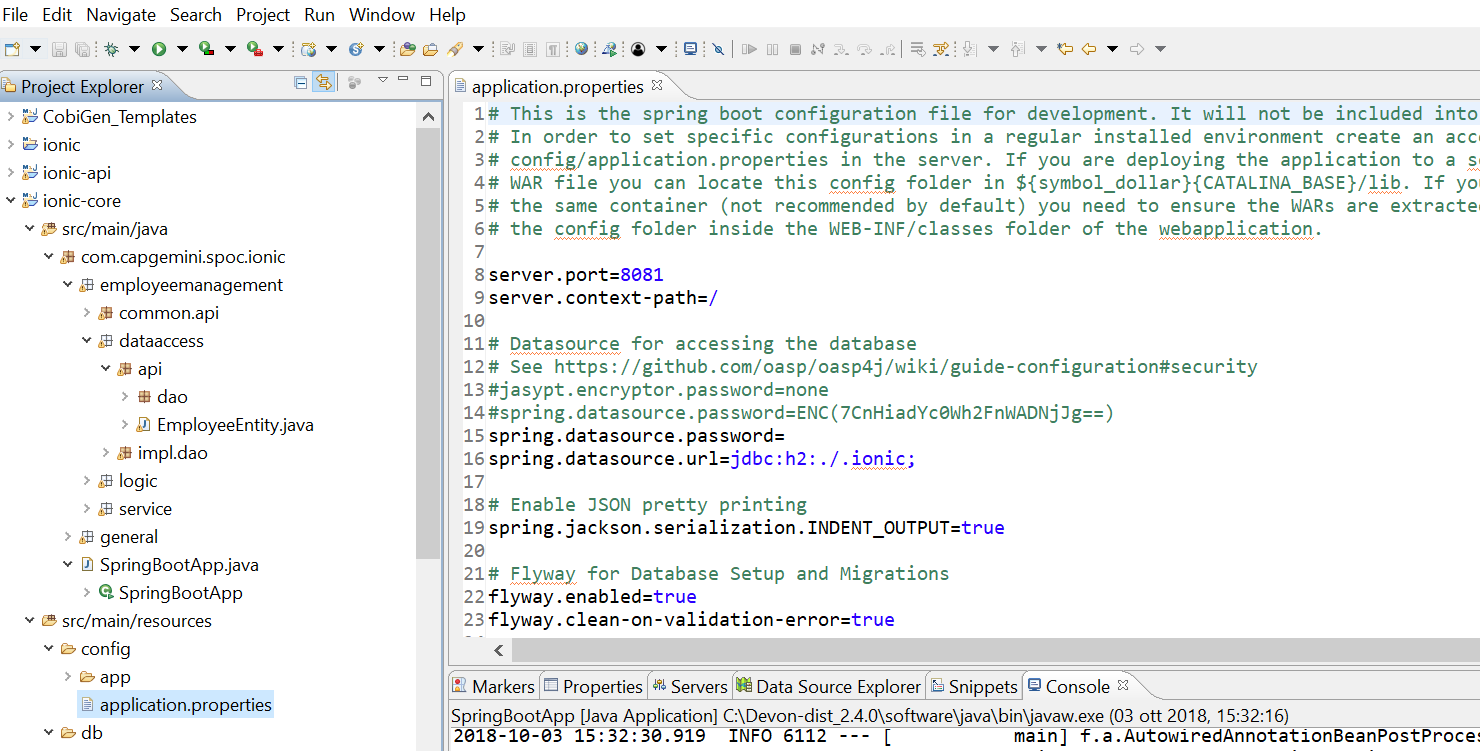
See in the application.properties the TCP Port and the PATH
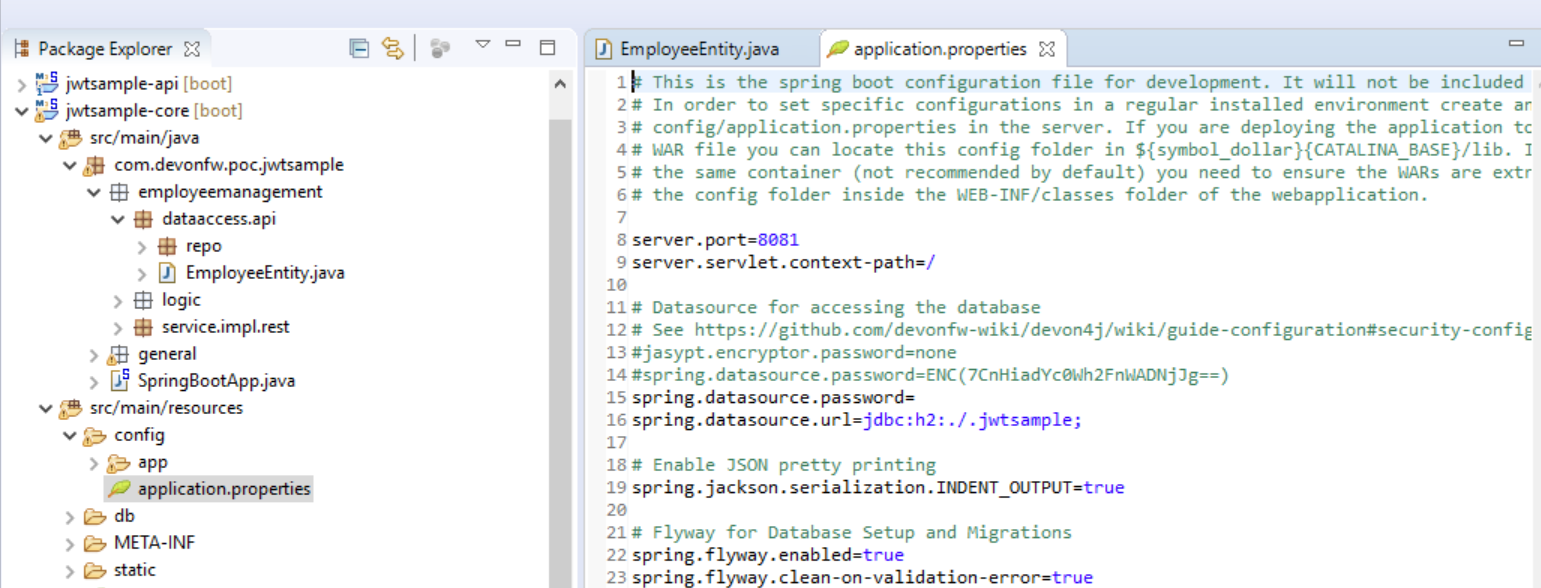
Now compose the Rest service URL:
service class <path>/<service method path>
-
<server> refers to server with port no. (i.e:
localhost:8081) -
<app> is in the application.properties (empty in our case, see above)
-
<rest service class path> refers to
EmployeemanagementRestService: (i.e:/employeemanagement/v1) -
<service method path>/employee/{id} (i.e: for
getEmployeemethod)
URL of getEmployee for this example is:
For all employees (POST)
http://localhost:8081/services/rest/employeemanagement/v1/employee/searchFor the specific employee (GET)
http://localhost:8081/services/rest/employeemanagement/v1/employee/1Now download Postman to test the rest services.
Once done, you have to create a POST Request for the LOGIN and insert in the body the JSON containing the username and password admin
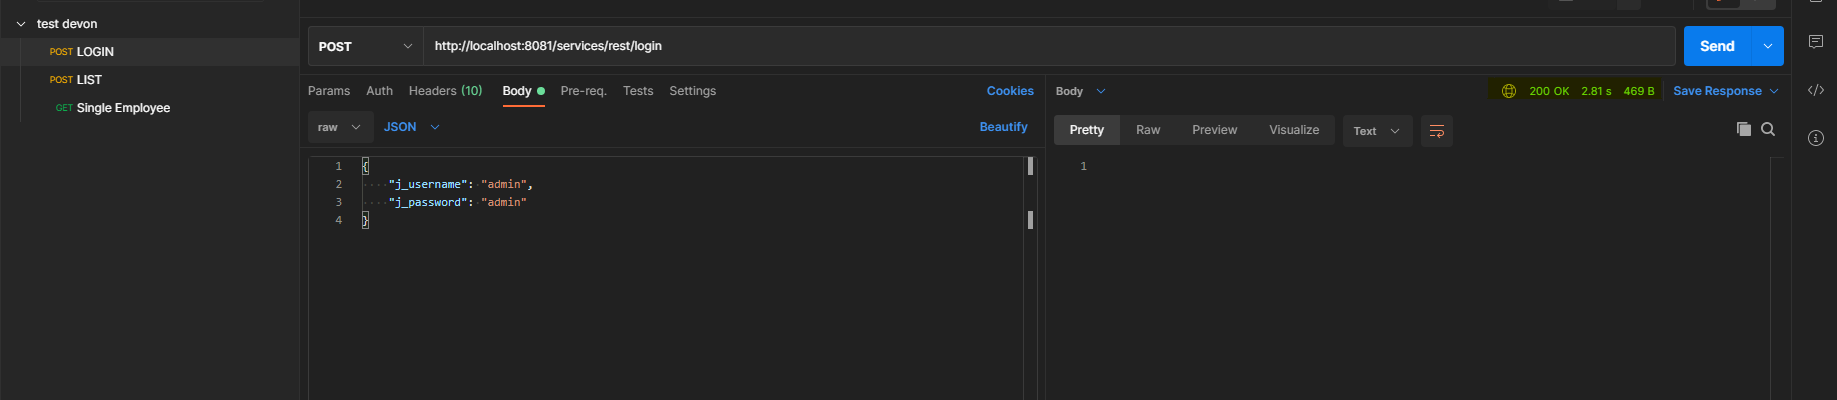
WARNING: please note that the body of the request must be JSON type!
Once done with success (Status: 200 OK) - you can see the status of the response in the top right corner of Postman - we can create a NEW GET Request in order to get one employee.
To do this you have to create a new request in Postman, GET type, and insert the URL specified before:
http://localhost:8081/services/rest/employeemanagement/v1/employee/1Then click on "SEND" button…
Now you have to check that response has got Status: 200 OK and to see the below Employee

Now that We have successfully tested the BE is time to go to create the FE !
Let’s start now with angular Web and then Ionic app.
To generate angular structure, download or clone devon4ng-application-template from
https://github.com/devonfw/devon4ng-application-template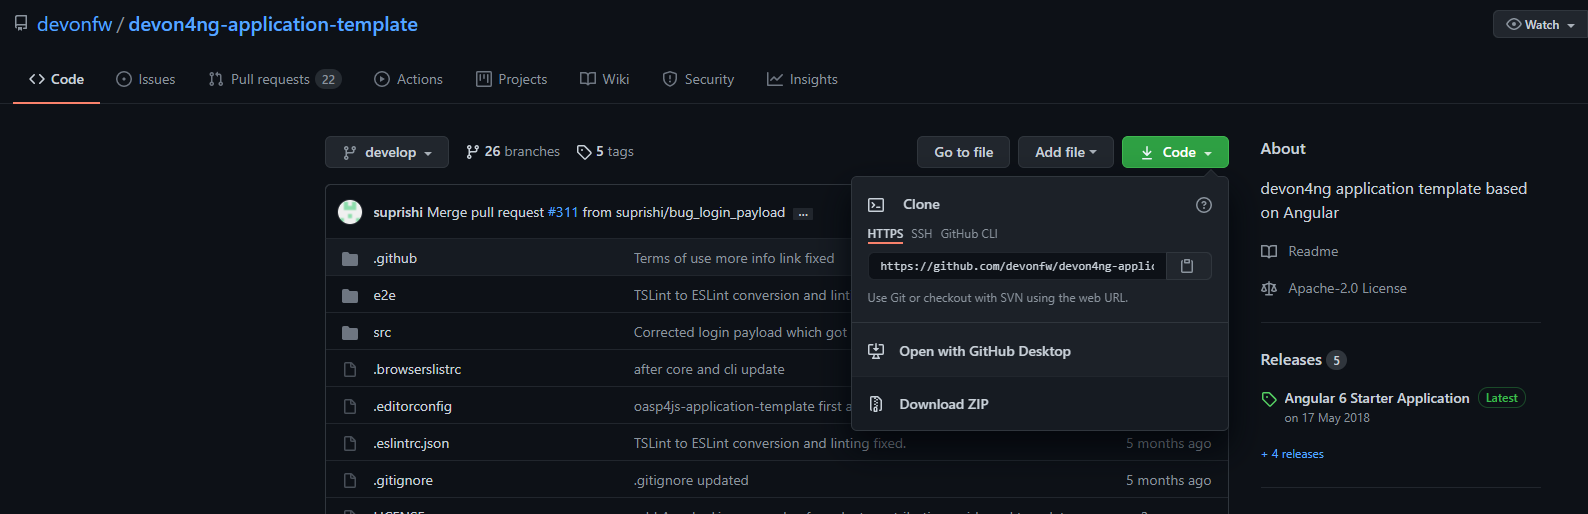
IMPORTANT when you download the zip of the source code of your FE application, the name of the app MUST BE devon4ng-application-template and you can extract it in your devonfw folder, under workspaces/main
Once downloaded the APP, you can open the application with your favorite IDE (IntelliJ, Visual Studio Code, …)
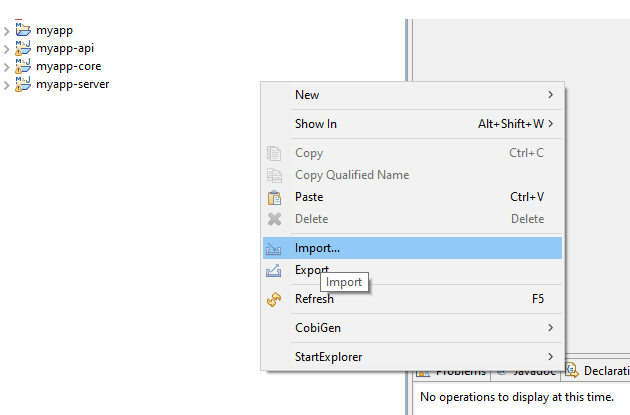
Instead, if you want to open this project with Eclipse, you have to follow these steps:
-
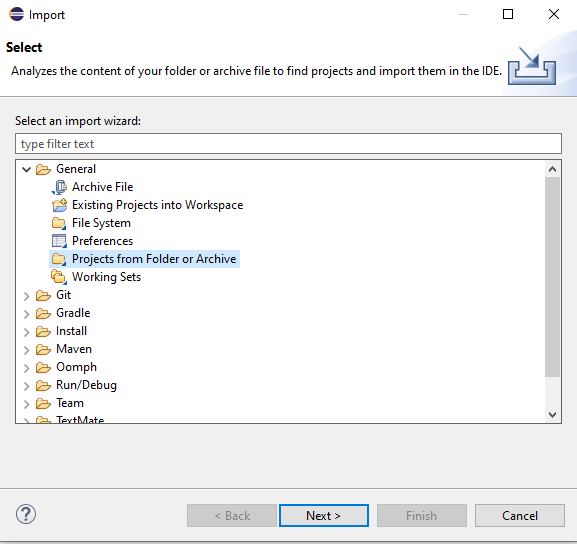
Right click on the left part of Eclipse, and click on "Import":
-
Click on "Projects from Folder or Archive"
-
Select your folder where you have saved the Angular
FEApplication, underworkspaces/main. Wait that all the dependencies are charged and then click on "Finish"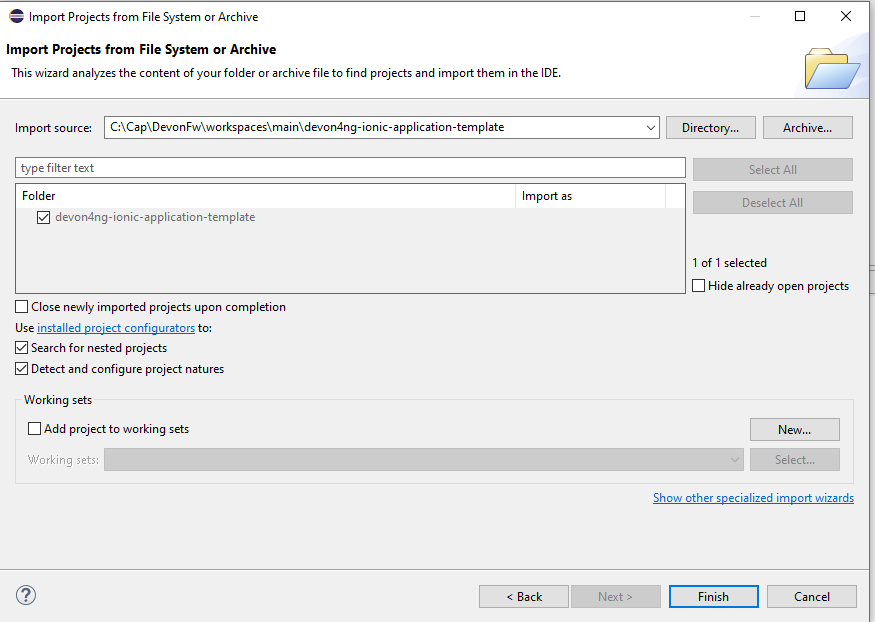
-
At the end, you will have a structure like this:
Once done, right click on the devonfw.yml (present in the `myapp-core` module) in order to use CobiGen. Click on the selected options as seen in the screenshot:
Click on Finish
The entire ANGULAR structure has been auto generated. The generated code will be merged to the existing.
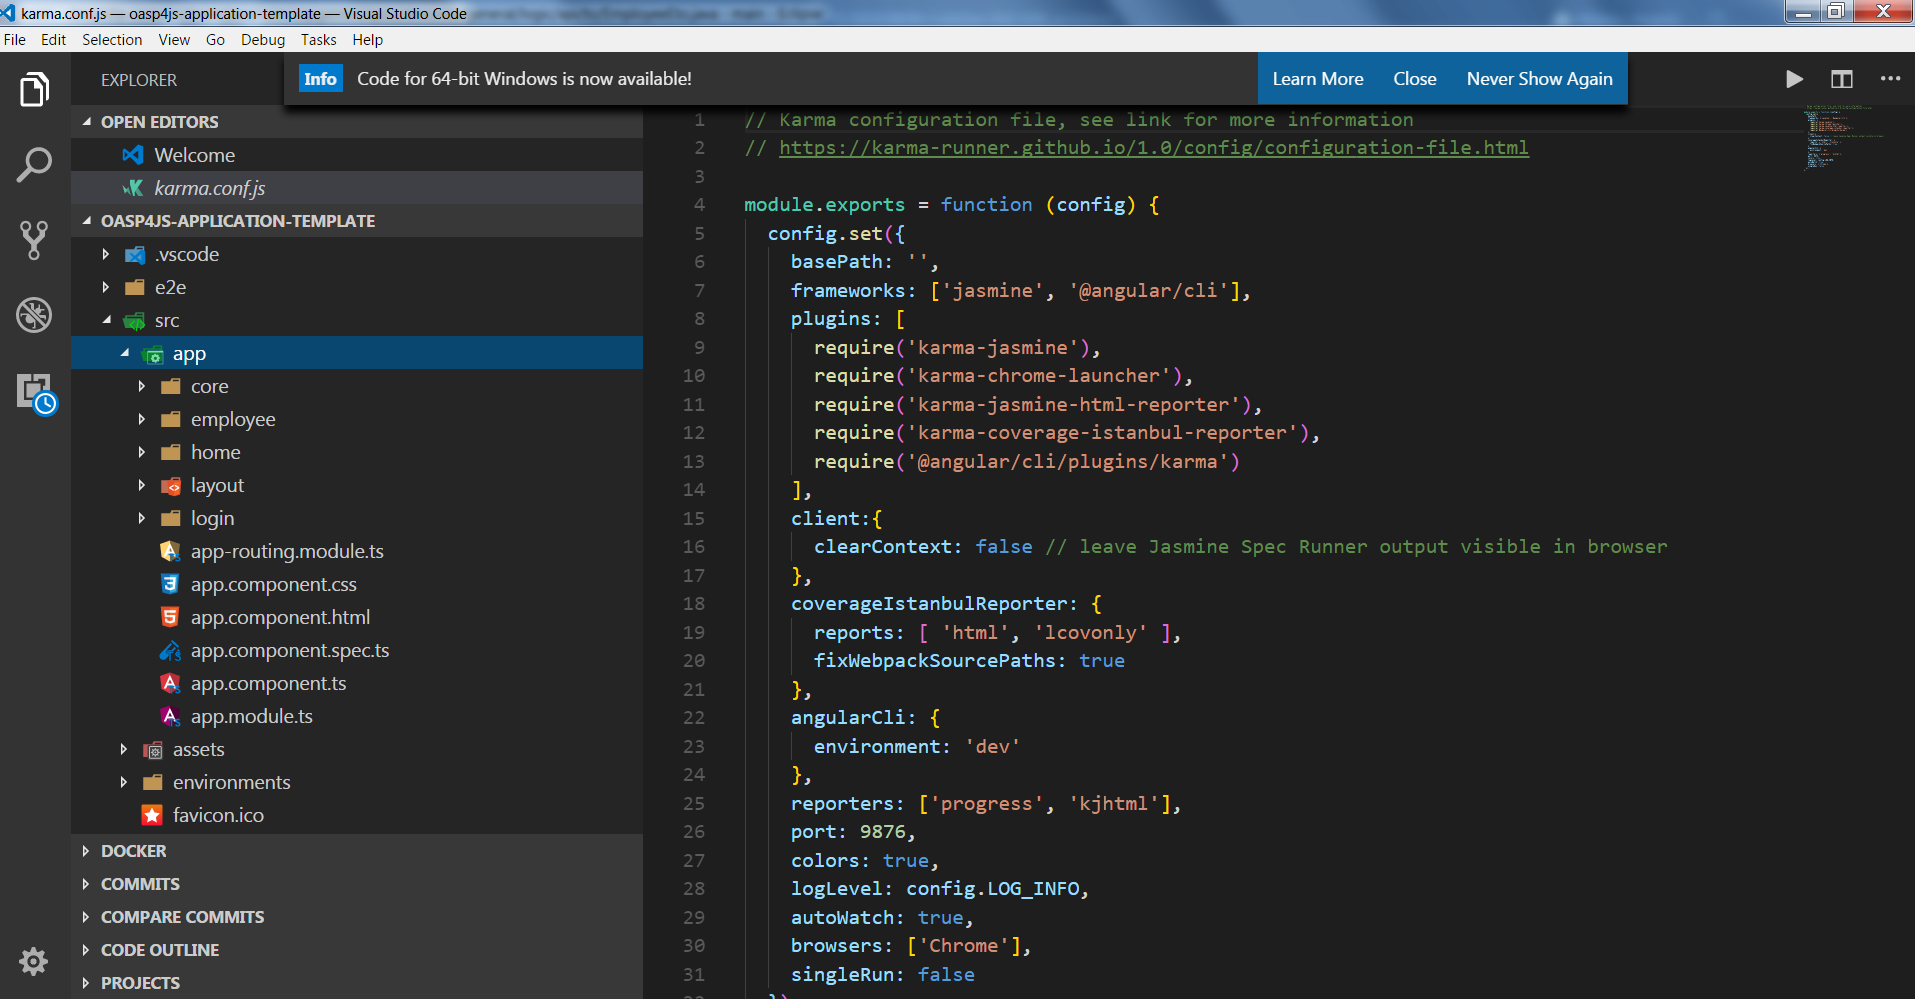
IMPORTANT now you have to check in the app-routing.module.ts file, if the content corresponding to the code below:
import { NgModule } from '@angular/core';
import { RouterModule, Routes } from '@angular/router';
import { AuthGuard } from './core/security/auth-guard.service';
import { NavBarComponent } from './layout/nav-bar/nav-bar.component';
const routes: Routes = [{
        path: '',
        redirectTo: '/login',
        pathMatch: 'full'
    },
    {
        path: 'login',
        loadChildren: () =>
            import('./auth/auth.module').then(m => m.AuthDataModule)
    },
    {
        path: 'home',
        component: NavBarComponent,
        canActivateChild: [
            AuthGuard
        ],
        children: [{
                path: 'initial',
                loadChildren: () =>
                    import('./home/initial-page/initial-page.module').then(
                        m => m.InitialPageModule,
                    )
            },
            {
                path: 'employee',
                loadChildren: () =>
                    import('./employee/employee.module').then(
                        m => m.EmployeeModule,
                    )
            }
        ]
    },
    {
       path: '**',
       redirectTo: '/login'
    },
];
@NgModule({
    imports: [
        RouterModule.forRoot(routes)
    ],
    exports: [
        RouterModule
    ]
})
export class AppRoutingModule {
}
After that, if you want to make visible the Employee Grid in you FE application, you have to modify the nav-bar.component.html, to add the Employee grid in the section:
<div class="home-container-outer">
  <div class="home-container-inner">
    <mat-toolbar class="app-header-container" color="primary">
      <app-header (toggle)="onToggle($event)" [sideNavOpened]="sideNavOpened"></app-header>
    </mat-toolbar>
    <div class="sidenav-container-outer">
      <div class="sidenav-container-inner">
        <mat-sidenav-container>
          <mat-sidenav [disableClose]="false" [mode]="isMobile ? 'over' : 'side'" [opened]="!isMobile || sideNavOpened"
                       #sidenav>
            <mat-nav-list>
              <!-- Sidenav links -->
              <a id="home" mat-list-item [routerLink]="['./initial']" (click)="close()">
                <mat-icon matListAvatar>
                  home
                </mat-icon>
                <h3 matLine>{{ 'home' | transloco }}</h3>
                <p matLine class="desc">{{ 'description' | transloco }}</p></a>
              <a id="employee" mat-list-item [routerLink]="['./employee']" (click)="close()">
                <mat-icon matListAvatar>
                  grid_on
                </mat-icon>
                <h3 matLine> {{ 'employeemanagement.Employee.navData' | transloco }} </h3>
                <p matLine class="desc"> {{ 'employeemanagement.Employee.navDataSub' | transloco }} </p></a>
            </mat-nav-list>
          </mat-sidenav>
          <mat-sidenav-content>
            <div class="content-container-outer">
              <div class="content-container-inner">
                <router-outlet></router-outlet>
              </div>
              <mat-toolbar class="public-footer">
                <span>devonfw Application</span>
                <span>devonfw</span>
              </mat-toolbar>
            </div>
          </mat-sidenav-content>
        </mat-sidenav-container>
      </div>
    </div>
  </div>
</div>
Open the command prompt and execute devon npm install from your application folder (workspaces/main/devon4ng-application-template), which would download all the required libraries.
Check the file environment.ts if the server path is correct. (for production you will have to change also the environment.prod.ts file)

In order to do that, it’s important to look at the application.properties to see the values as PATH, TCP port etc…
For example in this case the URL should be since the context path is empty the server URLS should be like:
export const environment = {
    production: false,
    restPathRoot: 'http://localhost:8081/',
    restServiceRoot: 'http://localhost:8081/services/rest/',
    security: 'csrf'
};Warning: REMEMBER to set security filed to CSRF , if it is not configured already.
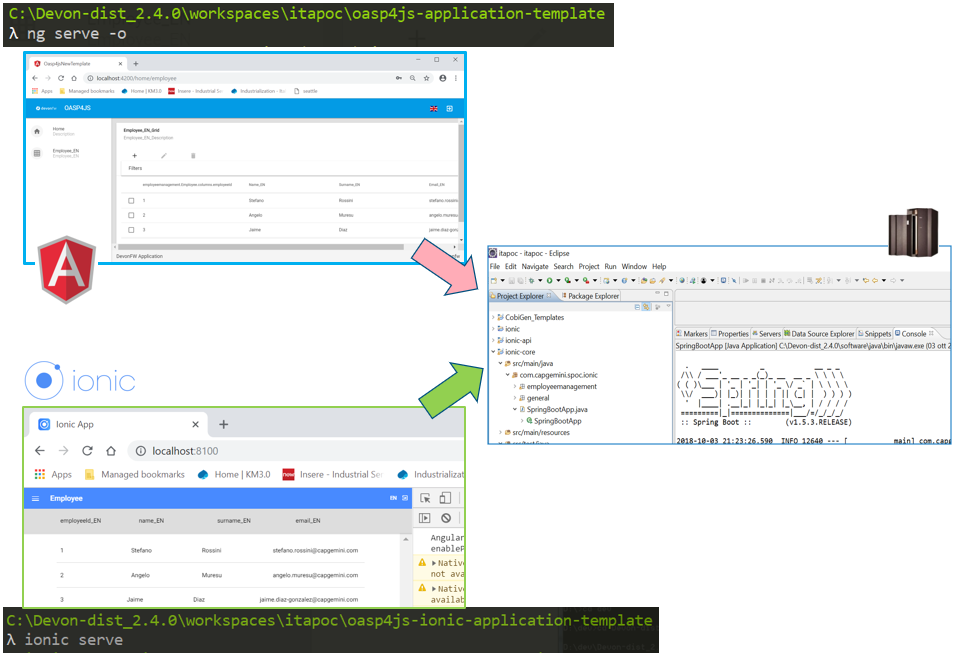
Now run the devon ng serve -o command to run the Angular Application, from your application folder (workspaces/main/devon4ng-application-template), as done before.
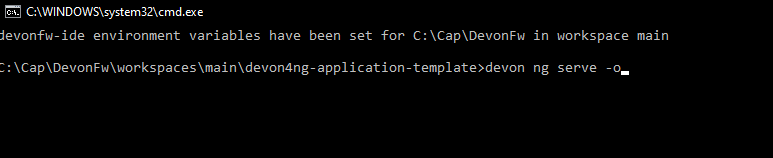
If the command execution is successful, the below screen will appear and it would be automatically redirected to the URL:
http://localhost:4200/login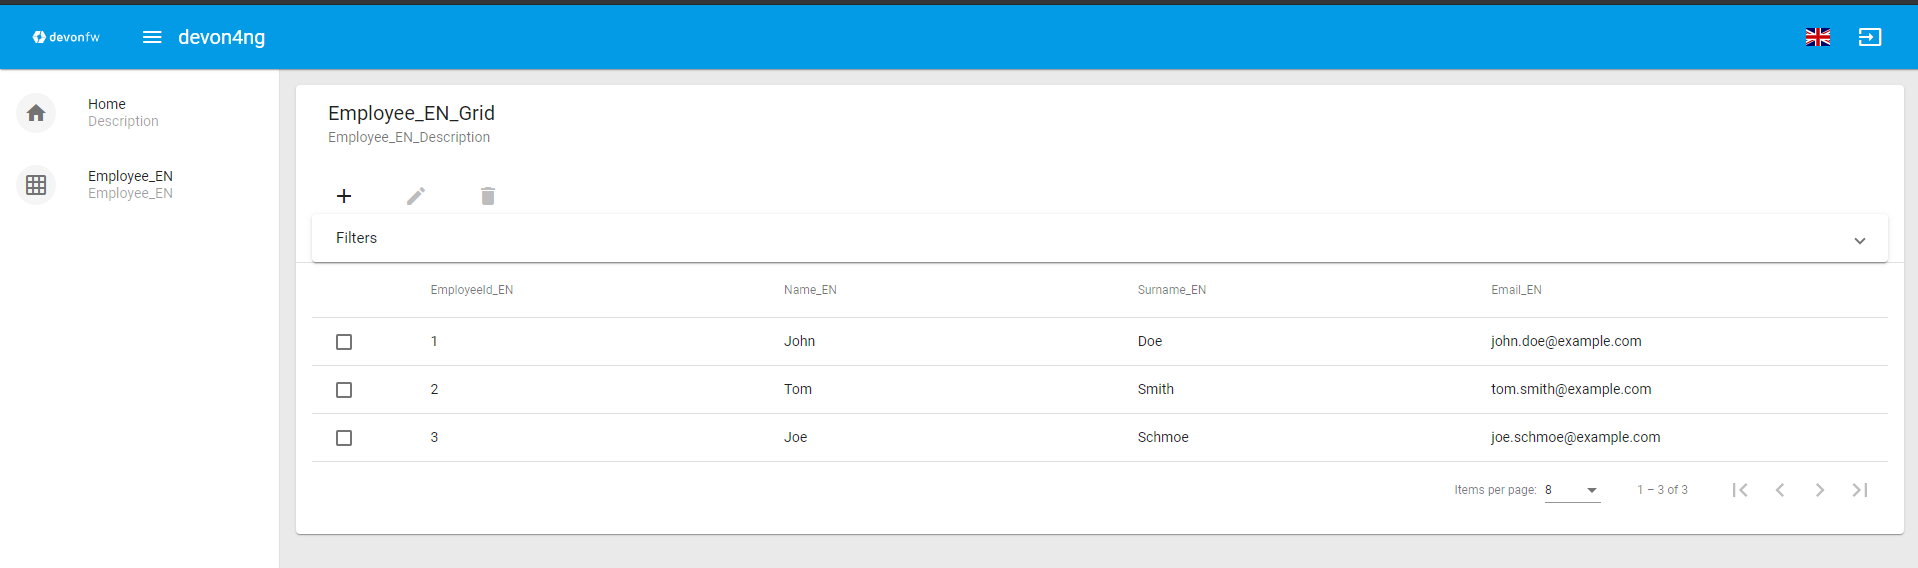
You can login in the Web Application, with admin user and password.
Obviously, the BackEnd part must be up & running during this test!
ANGULAR WebApp DONE
To generate Ionic structure, download or clone *devon4ng-application-template* from
https://github.com/devonfw/devon4ng-ionic-application-templateIMPORTANT when you download the zip of the source code of your FE application, the name of the app MUST BE devon4ng-ionic-application-template and you can extract it in your devonfw folder, under workspaces/main
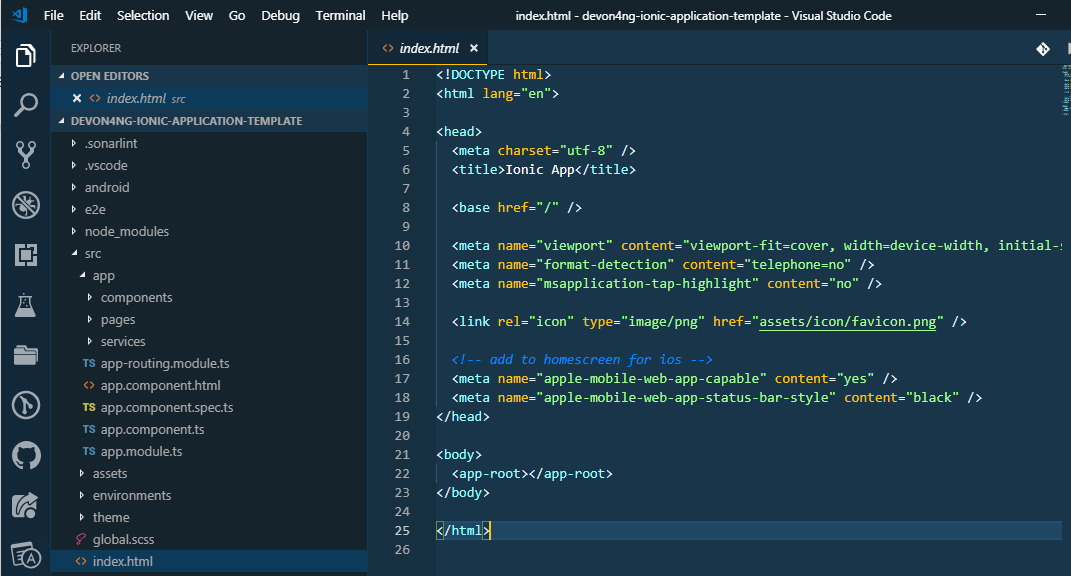
Once downloaded the APP, you can open the application with your favorite IDE (IntelliJ, Visual Studio Code, …)
Instead, if you want to open this project with Eclipse, you have to follow these steps:
-
Right click on the left part of Eclipse, and click on "Import":
-
Click on "Projects from Folder or Archive"
-
Select your folder where you have saved the Angular
FEApplication, underworkspaces/main. Wait that all the dependencies are charged and then click on "Finish" -
At the end, you will have a structure like this:
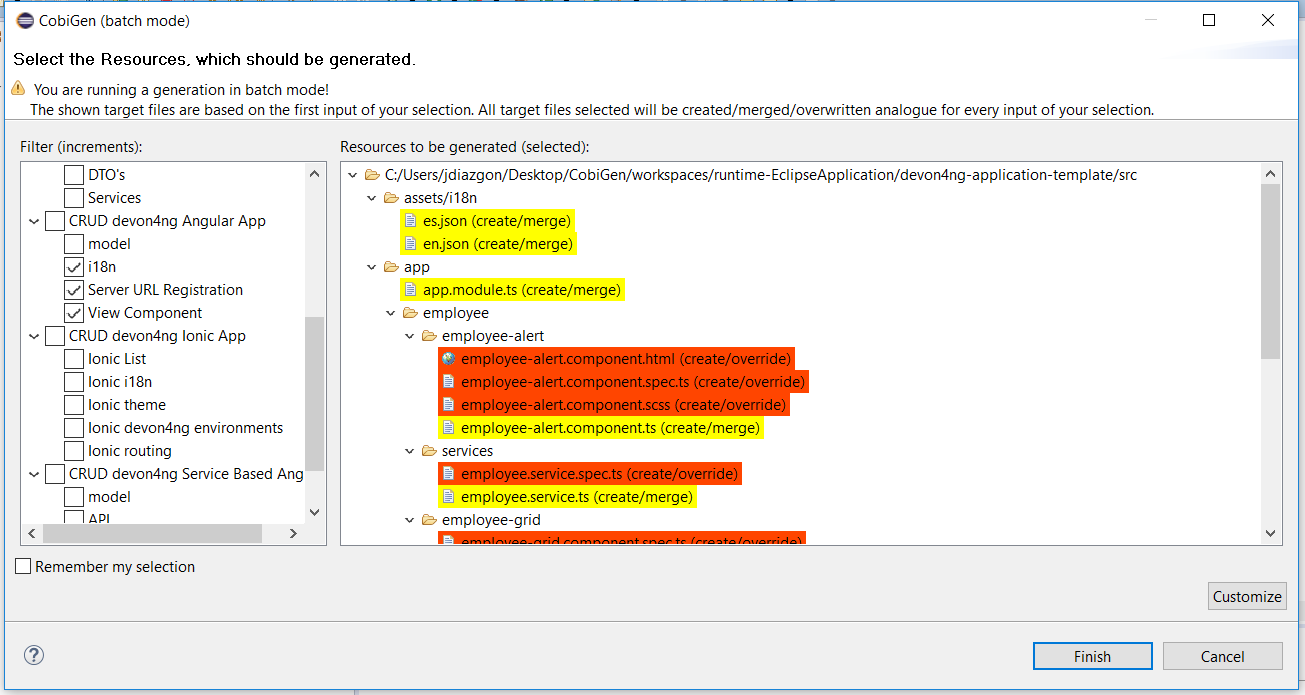
Once done, Right click on the devonfw.yml as you already did before in order to use CobiGen. Click on the selected options as seen in the screenshot:
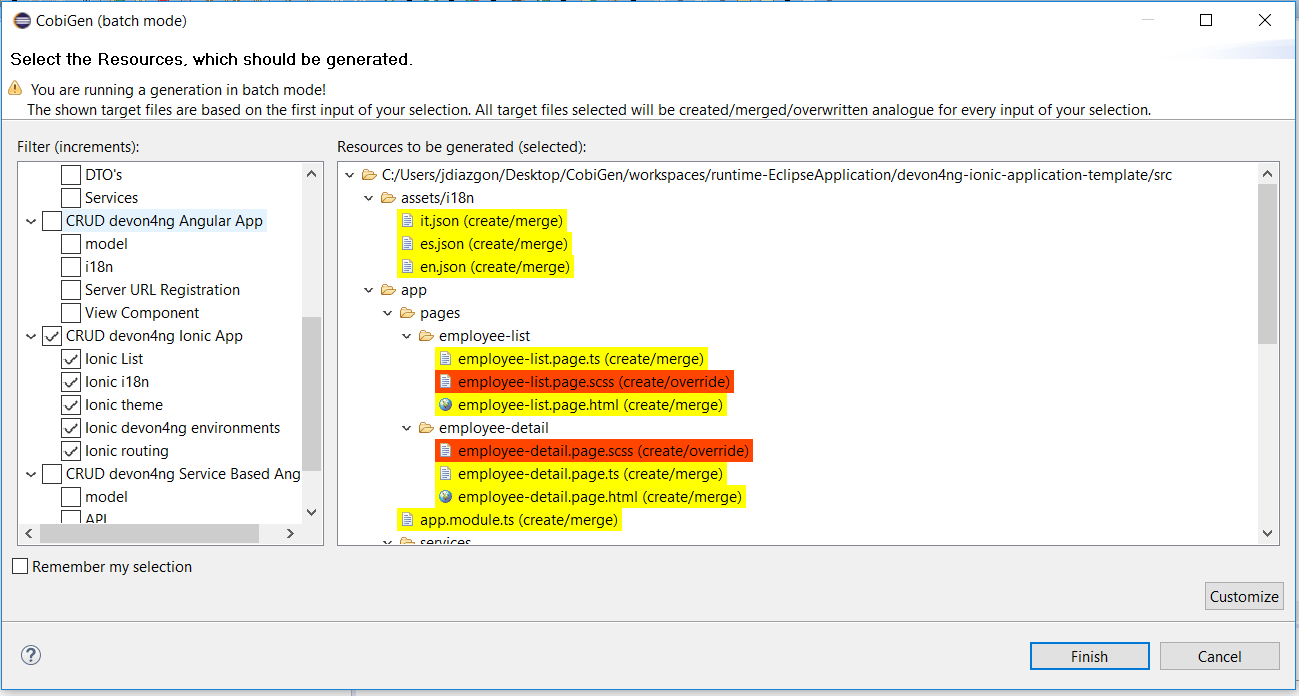
Click on Finish
The entire ionic structure will be auto generated.
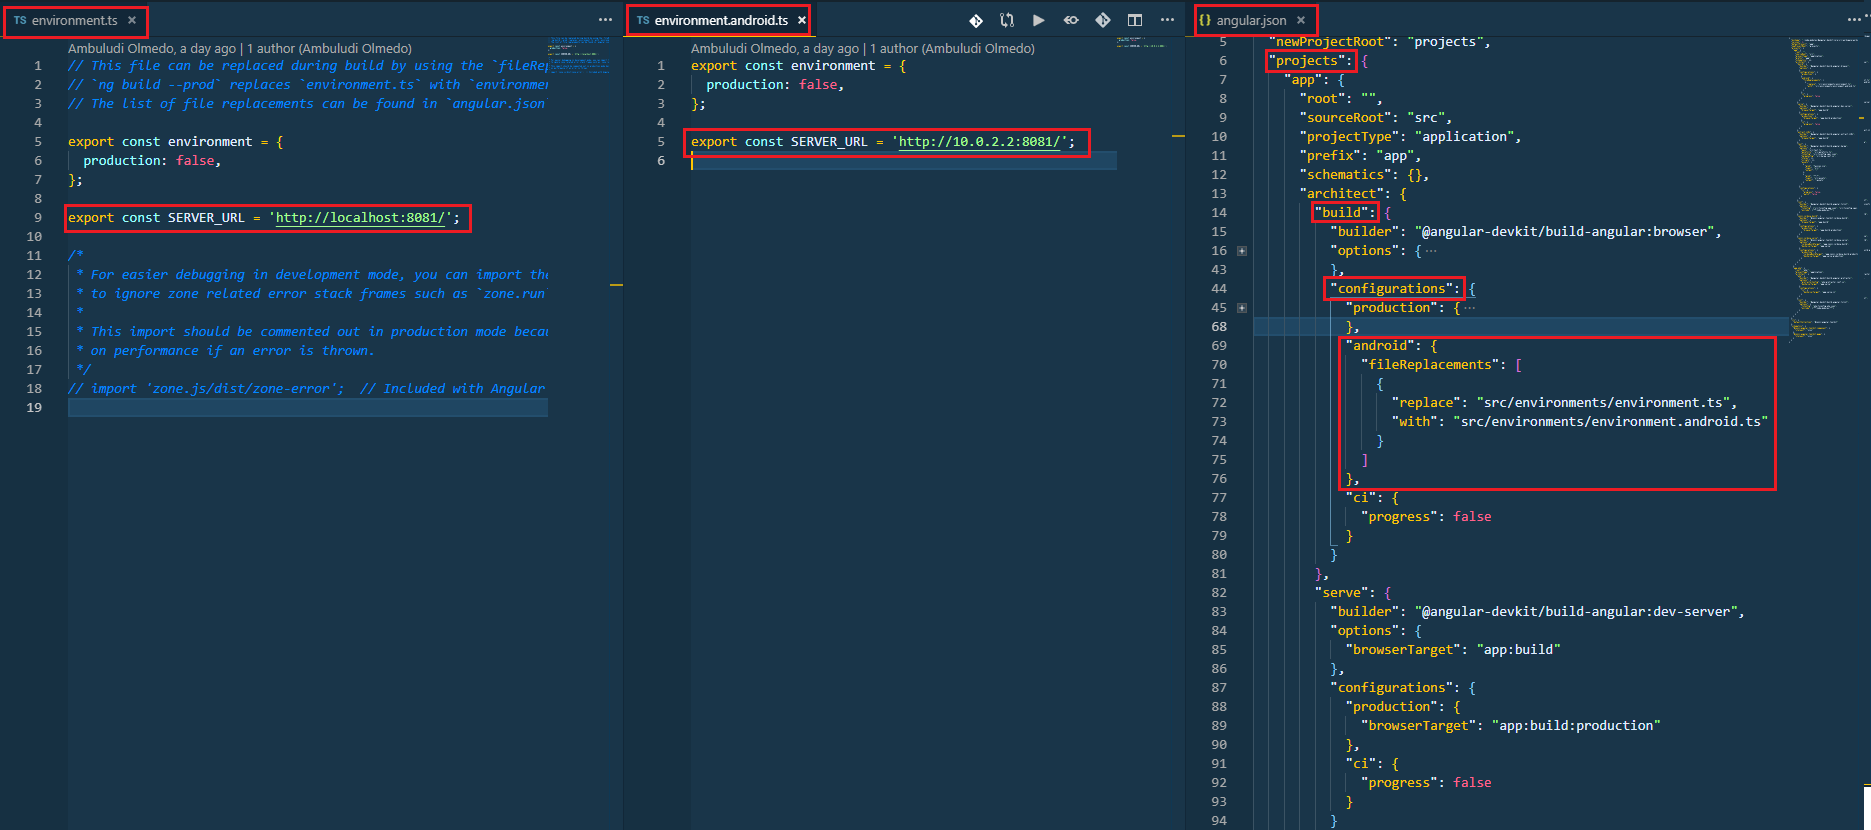
Change (if necessary) the server URL (with correct serve URL) in environment.ts, environment.prod.ts and environment.android.ts files (i.e: itapoc\devon4ng-ionic-application-template\src\environments\).
The angular.json file inside the project has already a build configuration for android.
The only TWO thing that you have to modify, in this IONIC app is in employee-list.page.html and business-operator.service.ts.y
1:
You have to change this line:
<layoutheader Title="Employee"></layoutheader>with this line:
<app-layout-header title="Employee"></app-layout-header>2:
You have to change this line:
return this.restPath + '/security/v1/csrftoken';with this line:
return this.restPath + 'csrf/v1/token/';Once checked if all the files are correct, open a CMD devon CLI on the folder of the ionic template application (workspaces/main/devon4ng-ionic-application-template), under your devonFW workspace.
In this folder:
Run the command *devon npm install* in the root folder to download the dependencies.
Once finished, run the command *devon ionic serve*
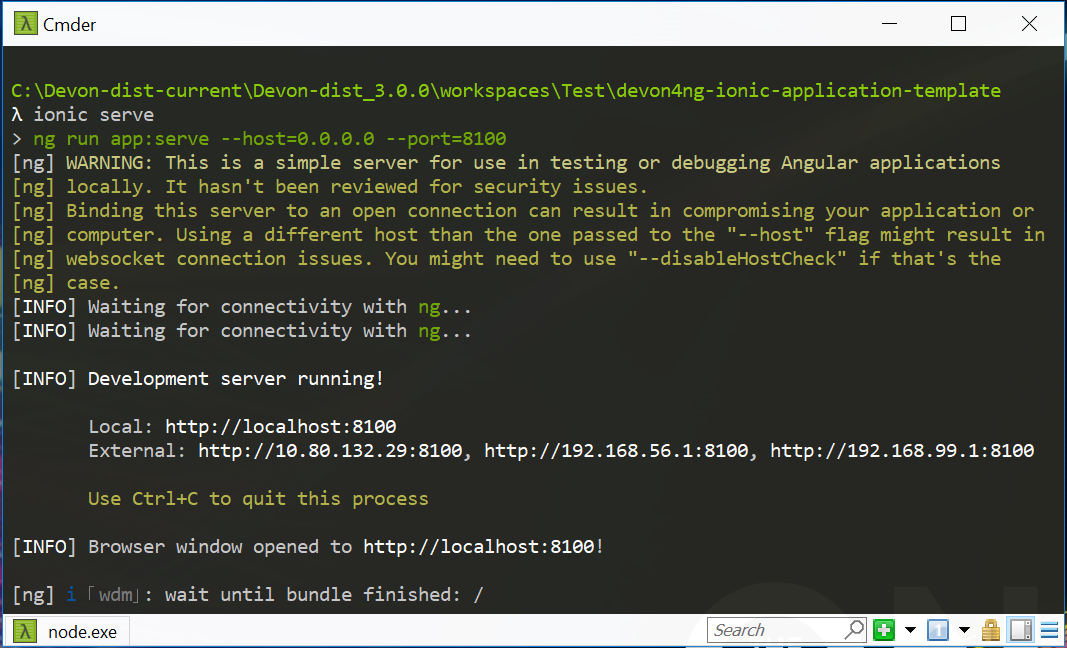
Once the execution is successful, you can make the LOGIN with admin/admin and…
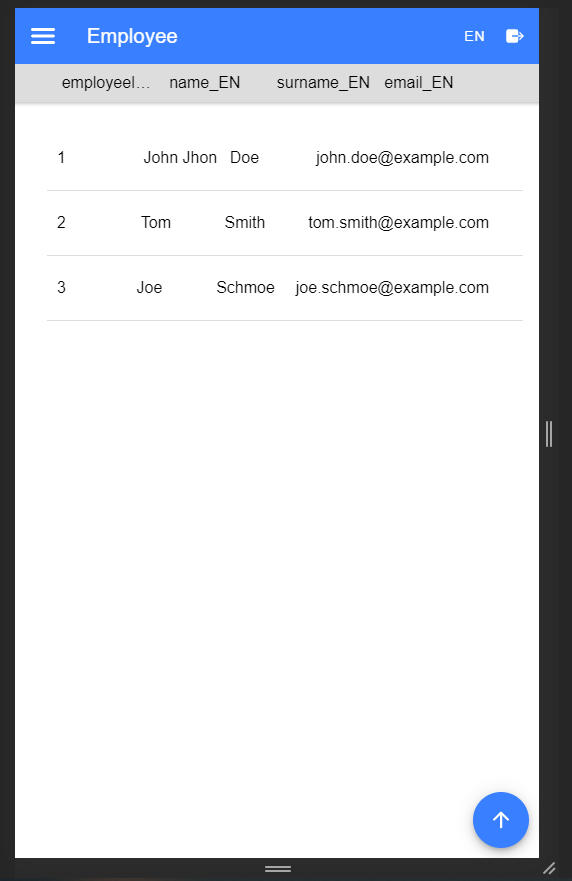
IONIC Mobile App DONE
So: Well Done!!!
Starting from an Entity class you’ve successfully generated the Backend layer (REST, SOAP, `DTO, Spring services, Hibernate DAO), the Angular Web App and the Ionic mobile App!`
Since We are going to create apk remember the following preconditions:
Now, open CMD and type the path where your devon4ng-ionic-application-template project is present.
Run the following commands:
-
npx cap init
-
ionic build --configuration=android
-
npx cap add android
-
npx cap copy
-
npx cap open android
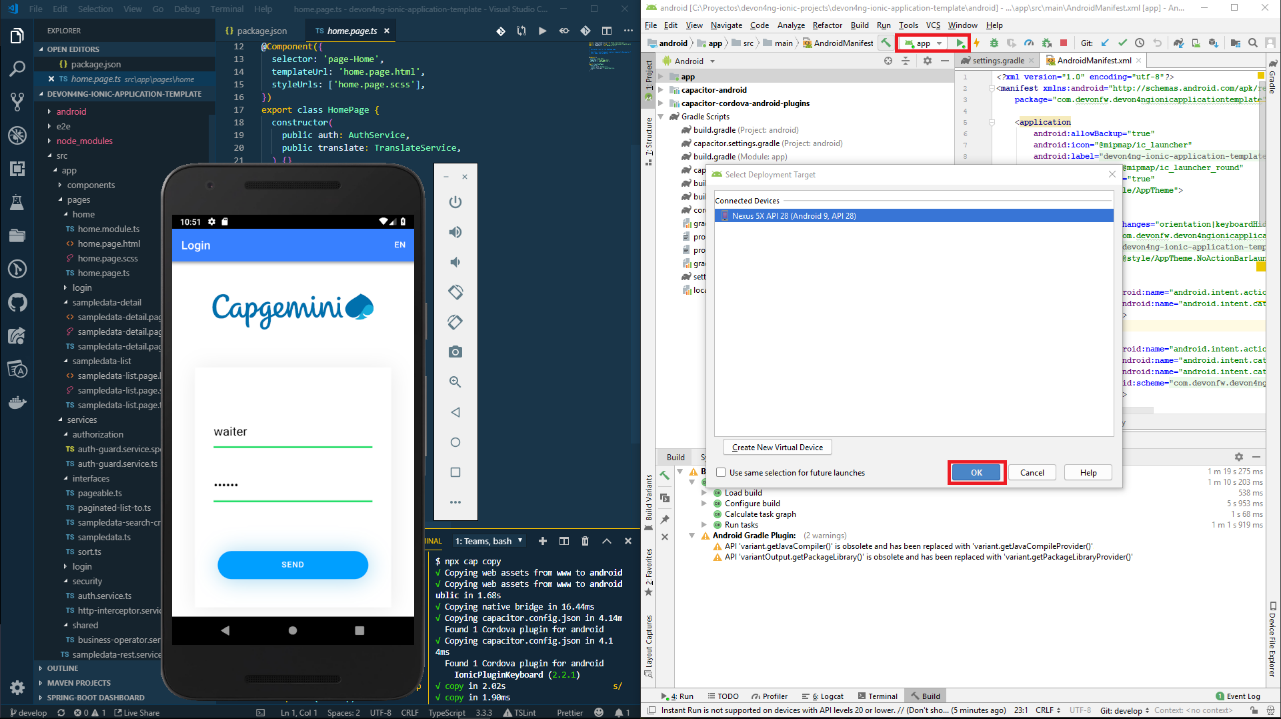
Build the APK using Android studio.
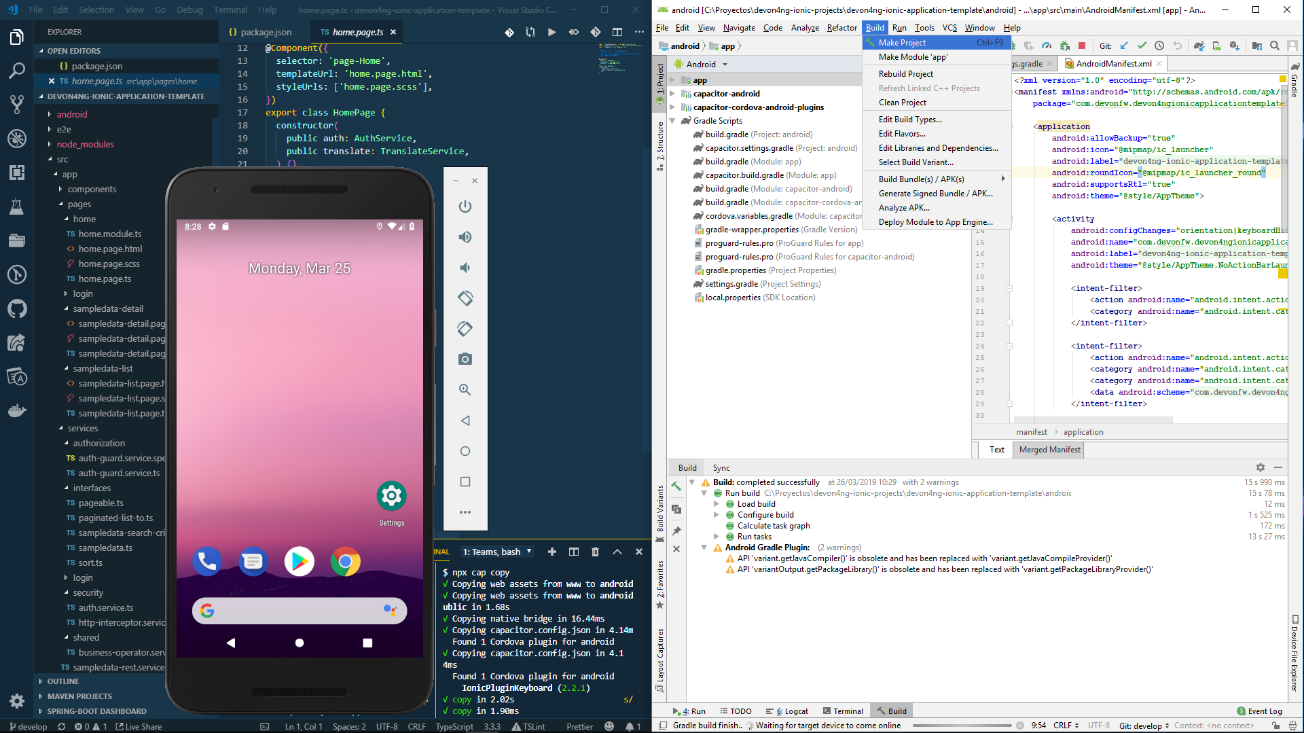
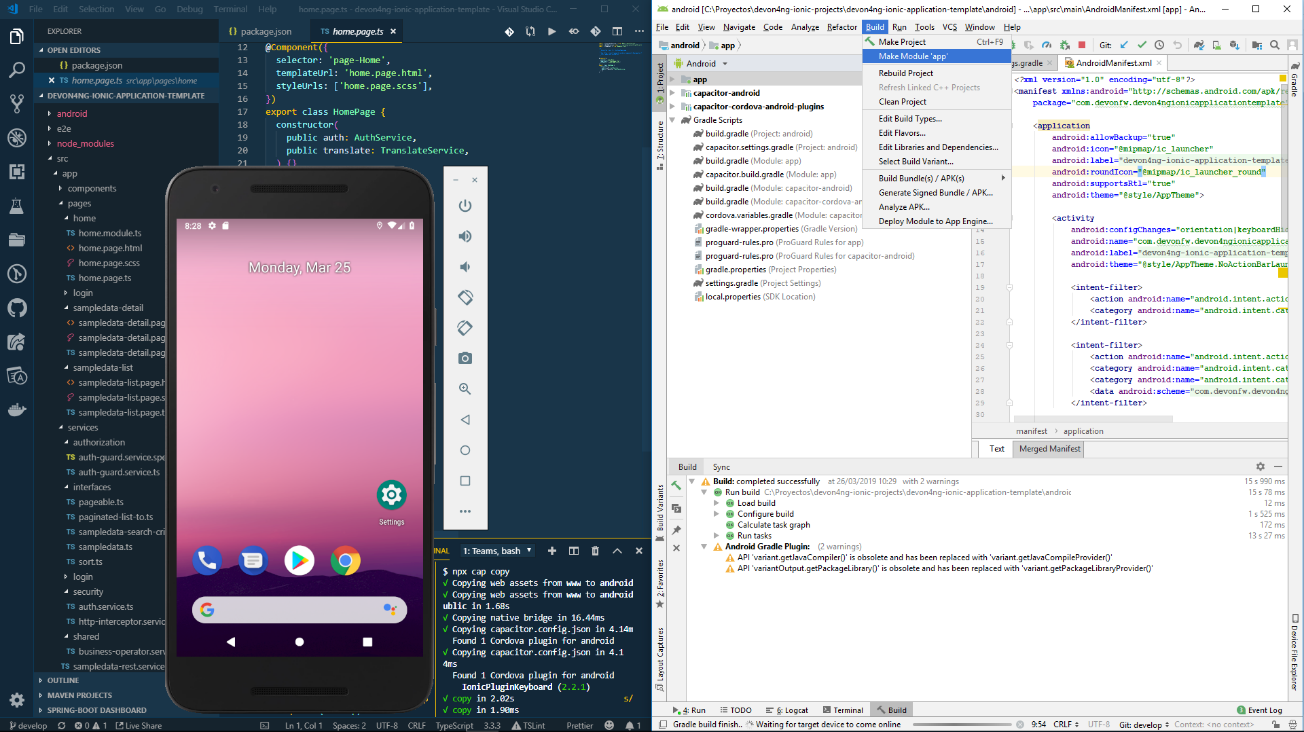

You can find your apk file in: /devon4ng-ionic-application-template/android/app/build/outputs/apk/debug
Disclaimer
If you discover any documentation bugs or would like to request new content, please raise them as an issue or create a pull request. Contributions to this wiki are done through the main repo under the folder documentation.
License

This documentation is licensed under the Creative Commons License (Attribution-NoDerivatives 4.0 International)