Integrate YOLOv8 into your C# project for a variety of real-time tasks including object detection, instance segmentation, pose estimation and more, using ONNX Runtime.
- YOLOv8 Tasks 🌟 Support for all YOLOv8 tasks (Detect, Segment, Classify, Pose and OBB)
- High Performance 🚀 Various techniques and use of .NET features to maximize performance
- Reduced Memory Usage 🧠 By reusing memory blocks and reducing the pressure on the GC
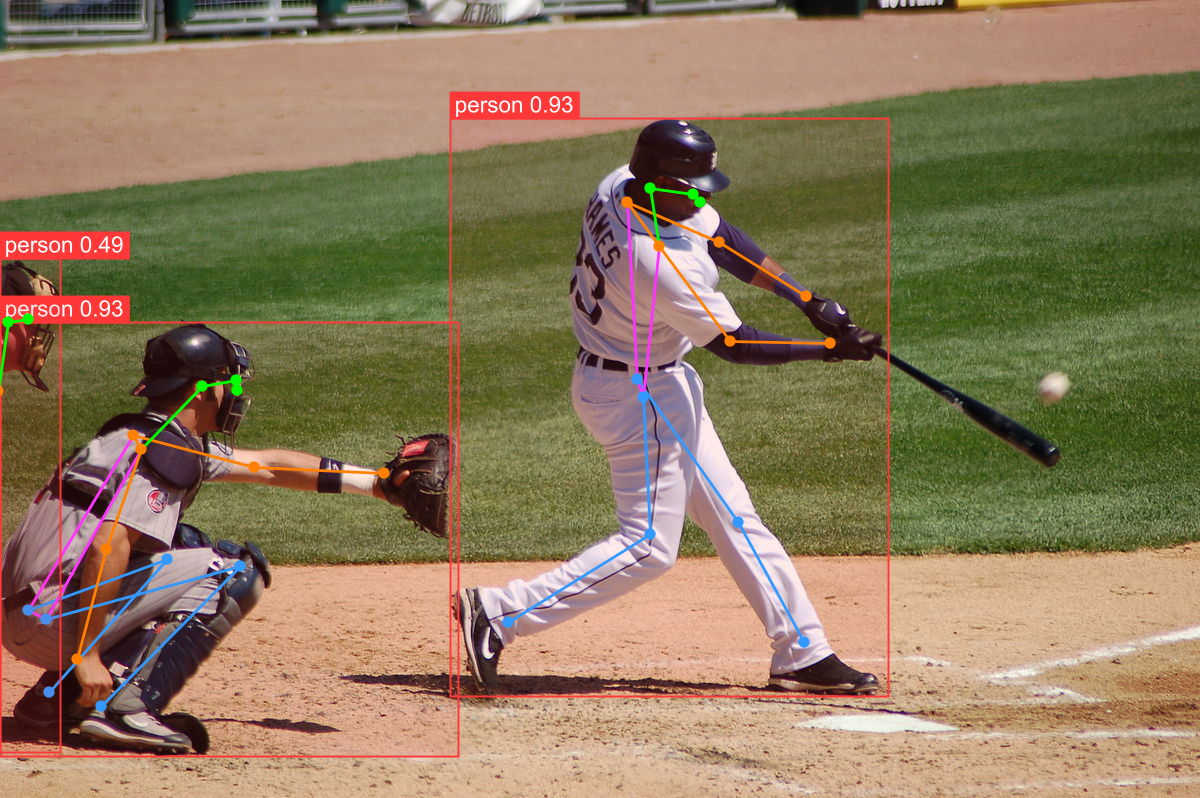
- Plotting Options 📊 Plotting operations for preview of model results on the target image.
- YOLOv10 Support 🔧 Includes additional support for YOLOv10
This project provides two NuGet packages:
- For CPU inference, use the package: YoloV8 (includes the Microsoft.ML.OnnxRuntime package)
- For GPU inference, use the package: YoloV8.Gpu (includes the Microsoft.ML.OnnxRuntime.Gpu package)
For convert the pre-trained PyTorch model to ONNX format, run the following Python code:
from ultralytics import YOLO

# Load a model
model = YOLO('path/to/best.pt')

# Export the model to ONNX format
model.export(format='onnx')Add the YoloV8 (or YoloV8.Gpu) package to your project:
dotnet add package YoloV8Use the following C# code to load the model and run basic prediction:
using Compunet.YoloV8;
// Load the YOLOv8 predictor
using var predictor = new YoloPredictor("path/to/model.onnx");
// Run model
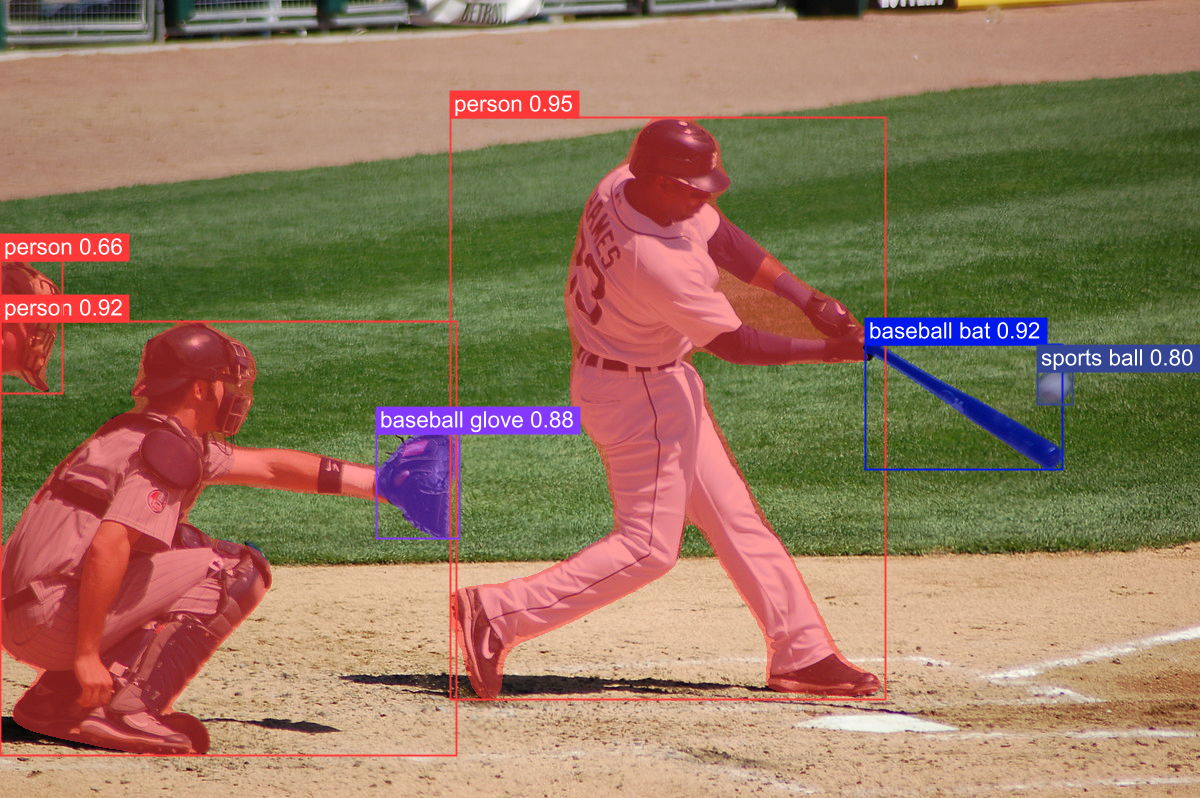
var result = predictor.Detect("path/to/image.jpg");
// or
var result = await predictor.DetectAsync("path/to/image.jpg");
// Write result summary to terminal
Console.WriteLine(result);You can to plot the target image for preview the model results, this code demonstrates how to run a inference, plot the results on image and save to file:
using Compunet.YoloV8;
using Compunet.YoloV8.Plotting;
using SixLabors.ImageSharp;

// Load the YOLOv8 predictor
using var predictor = new YoloPredictor("path/to/model.onnx");

// Load the target image
using var image = Image.Load("path/to/image");

// Run model
var result = await predictor.PoseAsync(image);

// Create plotted image from model results
using var plotted = await result.PlotImageAsync(image);

// Write the plotted image to file
plotted.Save("./pose_demo.jpg")
You can also predict and save to file in one operation:
using Compunet.YoloV8;
using Compunet.YoloV8.Plotting;
using SixLabors.ImageSharp;

// Load the YOLOv8 predictor
using var predictor = new YoloPredictor("path/to/model.onnx");

// Run model, plot predictions and write to file
predictor.PredictAndSaveAsync("path/to/image");
AGPL-3.0 License
Important Note: This project depends on ImageSharp, you should check the license details here