(or how to not be afraid of using AWS Lambda + API Gateway + Serverless Framework with Python 2.7.13)
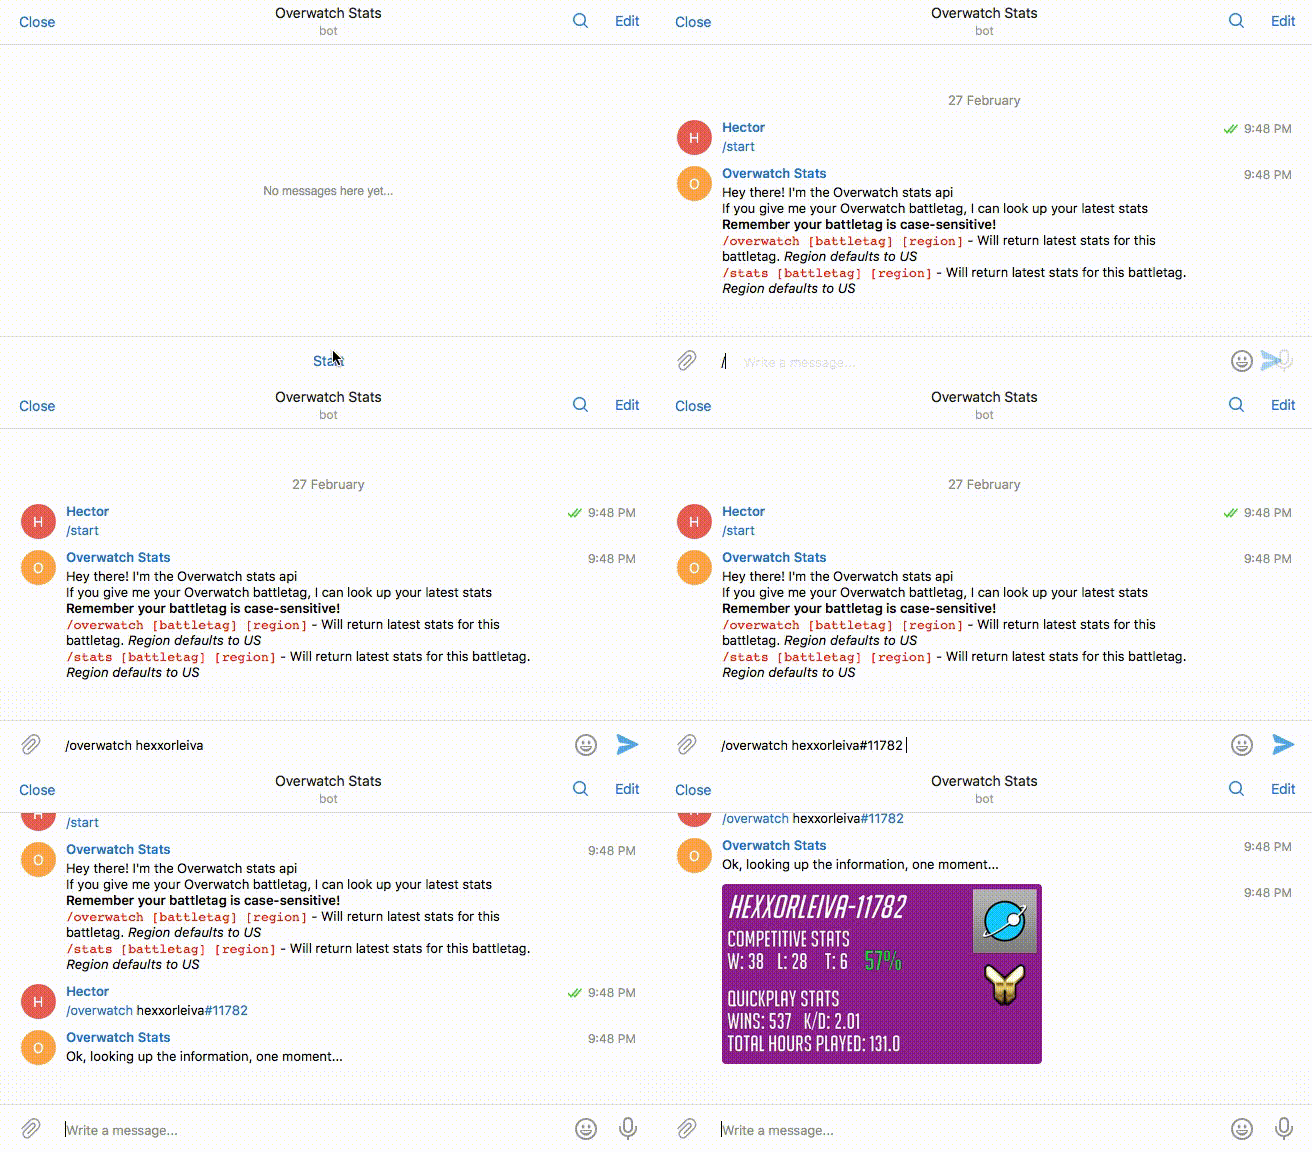
Ask the bot for your current rank information at @owstatsbot on Telegram
This repo is a showcase of how to use these AWS services in order to generate a Overwatch stats bot for the messaging service Telegram.
Special Thanks to the following repos for their resources and inspirations:
chesterhow | Overwatch Telegram Bot written in Node.js
This repo leverages the Serverless framework for deployment and coding development. If you have additional questions about how the deployment process works, you should visit their documentation page.
Yes, this project isn't fully optimized, maximized, realized, etc.., updates may be frequent or occasional - depending on my spare time that is available.
To install the dependencies, the following will read the requirements.txt and install all the dependency libraries within the vendored/ directory.
pip install -t vendored/ -r requirements.txt
You need to have Serverless already installed on your machine and to have all your credentials set-up already. This README will not be covering this since there is already a ton of documentation available.
You will need a .env file ready with the following variables:
TELEGRAM_API_KEY=
This key will be used to instantiate the bot within the codebase and have it configured properly for Telegram to send and accept messages from the bot.
To immediately deploy it, you can simply run serverless deploy and have this up and running to whatever bot's username you want.
This bot runs on the mechanism of webhooks provided by Telegram. Once a webhook for your bot has been established, it should be pointing towards the API Gateway URL that is returned by the Serverless Framework's console or simply check in your AWS console under API Gateway to see which routes have been opened up.
You can manually send basic requests to your Telegram bot via the following method:
curl https://api.telegram.org/bot<token>/getMe
where <token> is the token given to you by @botfather
curl --data "url=https://<your-aws-api-gateway-subdomain>.us-east-1.amazonaws.com/<rest-of-your-api-path>" "https://api.telegram.org/bot<token>/setWebhook"
With the necessary data filled in, this will inform Telegram that this bot is now ready for webhooks and will transmit any and all messages sent to it directly to the url= that is specified.
curl "https://api.telegram.org/bot<token>/getWebhookInfo"
You get information about a none-existent webhook or an already set-up webhook with information about how many updates it has left to process, etc..
curl --data "chat_id=<your-user-id>&text=<testing-text>" "https://api.telegram.org/bot<token>/sendMessage"
Sends a message to yourself with the text= being the actual text that will transmitted to yourself. The message should be sent and received nearly instantly.
curl -F "chat_id=<your-user-id>" -F "photo=@image.png" "https://api.telegram.org/bot<token>/sendPhoto"
Sends a photo to yourself if there's a image.png in the current directory you are in for curl to send it out from.
There is one big issue with this repo and its implementation for AWS Lambda, and that is in the compilation of the binaries for some of the Python required libraries (specifically Pillow). Due to the complexity and versatility of this library, it has become OS specific in how the binaries are generated. You will, dear developer, need to get your own container/image/server that matches the type of instance that is on the AWS Lambda stack and compile the binaries there to then deploy it using Serverless.
A suggestion from me-to-you is to use Docker and the amazonlinux container to mount your work directory and pip install from within there and proceed to deploy from your local machine via serverless deploy.
I know that this is a roundabout way to get the binaries to work on Lambda, but I think that this works better than spinning up an EC2 instance to generate and then copy binaries back - but that's how I did it.
License
See the LICENSE.txt file for license rights and limitations (MIT).
