| Build |
|---|
Connect your code with your project management in Jira. A separate Jira subscription is required. With two of your most important tools connected, you'll spend less time managing projects and more time working on them. This integration is an open source project, built and maintained by GitHub (however, we're currently in the process of migrating the ownership from GitHub to Atlassian).
- Installation and setup
- Using the integration
- Migrating from the DVCS connector
- Need help?
- Contributing
- License
This app officially supports GitHub.com and Jira Cloud. Support for integration of GitHub Enterprise Server with Jira Server, Jira Data Center and/or Jira Cloud as well as of GitHub.com with Jira Server and/or Jira Data Center may be considered in the future.
You can install this app from the Atlassian Marketplace, from your Jira instance or from the GitHub Marketplace. The instructions are below, you can choose whichever you prefer.
- Go to https://marketplace.atlassian.com/apps/1219592/github-for-jira?hosting=cloud
- Click Get it now, choose the Jira instance you want to install your app, click Install app and follow the steps on screen.

- Next you'll need to Connect your GitHub Organization to Jira.
- Sign in to your Jira Cloud account.
- From the top menu bar in Jira, select Apps -> Find new Apps.
- For older versions of Jira, you won't have Apps at the top menu bar. Instead, open the left sidebar by clicking on Personal Settings, if the left sidebar is not already open. From the left sidebar in Jira, select Jira Settings -> Apps -> Find new Apps. For an even older version of Jira, you won't have the left side menu. Instead, click the Gear Icon in the top-right corner and select Settings. From there, select Manage add-ons from the left sidebar.
- Search for GitHub for Jira and Click Get app

- Click the Get Started button to connect your GitHub account.
- Next you'll need to Connect your GitHub Organization to Jira.
- Go to https://github.com/marketplace/jira-software-github
- Complete the (free) order for your GitHub Organization
- On the installation setting screen, choose which repositories you want to use with the Jira Integration and press Save:

- Once installation completes, you will be redirected to https://jira.github.com/github/setup. Enter the site name for your Jira instance here and click Continue
- Once on the Atlassian add-on page, click Install.
- Once the add-on is installed, click the Get Started button.
As part of the installation flow you should be directed to install the Jira app on GitHub to your organization. You can also manage existing connections or add additional organizations any time within the Manage Apps section of your Jira settings:

If you originally gave the app access to "All repositories", and you've created a new repository on GitHub after installing the GitHub integration for Jira, your new repository will automatically work with the integration. If you installed the app on a subset of repositories, the app will need to manually edit your repository selection by:
- Sign in to your Jira Cloud account
- From the top menu bar in Jira, select Apps -> Manage your apps -> GitHub -> Get started
- Select Configure next to the relevant organization you want to manage.
By granting the app access, you are providing the following authorizations to your GitHub and Jira accounts:
Read, Write, and Admin for Development Information (branches, commits, and pull requests)
| Permission scope | Why we need it |
|---|---|
| Read access to code & metadata | To sync development information to Jira |
| Read and write access to actions, deployments, issues and pull requests | To power Smart Commit actions and unfurl Jira URLs |
When a developer makes a commit, they should add a Jira Software issue key to the commit message, like this:
git commit -m "PROJ-123 add a README file to the project."
Jira Software uses the issue key to associate development data with an issue, so it can be summarized in the Development panel of the Jira Software issue.
See Integrating with development tools for more information.
Smart Commits allows you to add a comment on a Jira issue from commit messages, branches, and pull requests. For example: [JRA-123] fix typo will be sent through to Jira and appear in the Development Information section of the Jira issue with the key JRA-123.
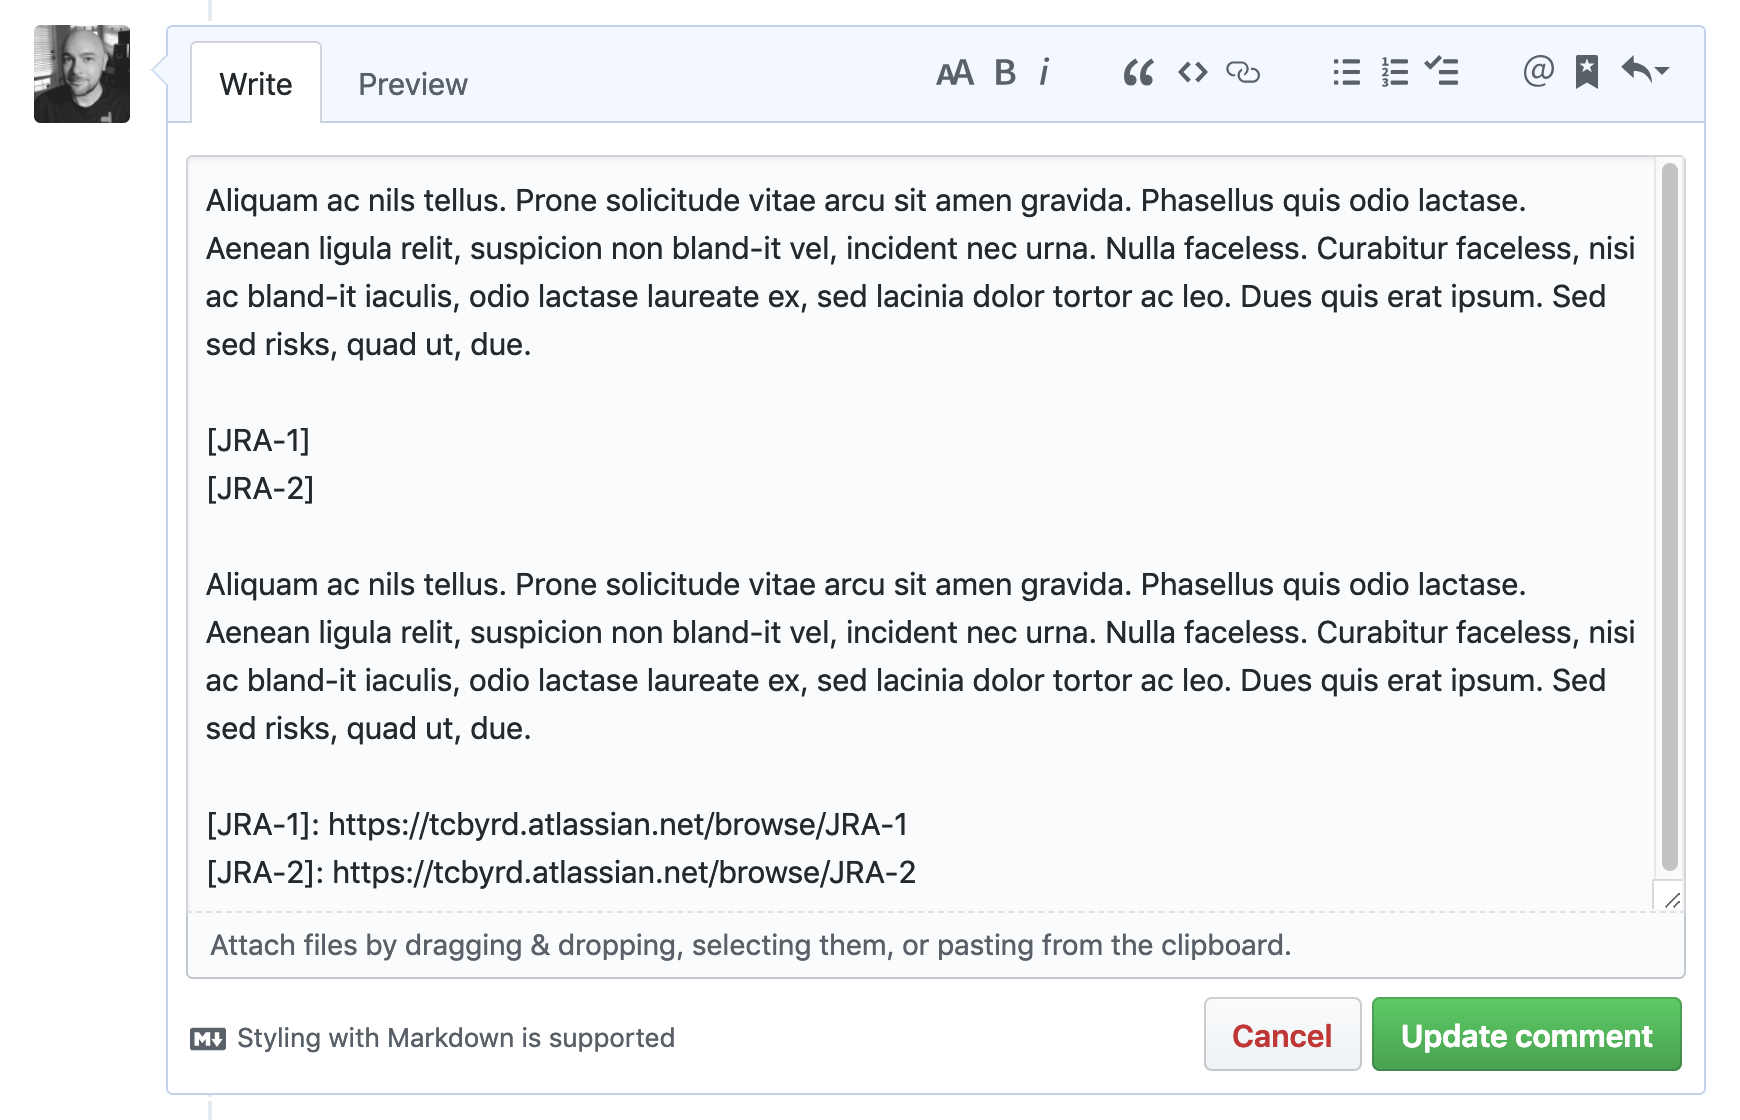
If an issue body contains a valid Jira issue key on your instance, the integration will automatically expand it into a reference link when surround in brackets []. For example: [JRA-123] will be turned into a link to https://<your-instance>.atlassian.net/browse/JRA-123 . Markdown references are only visible when editing an Issue/PR comment, and appear at the bottom of the text area:
This makes it so Jira issues can be linked inside a comment without it interrupting the flow of the comment as a whole.
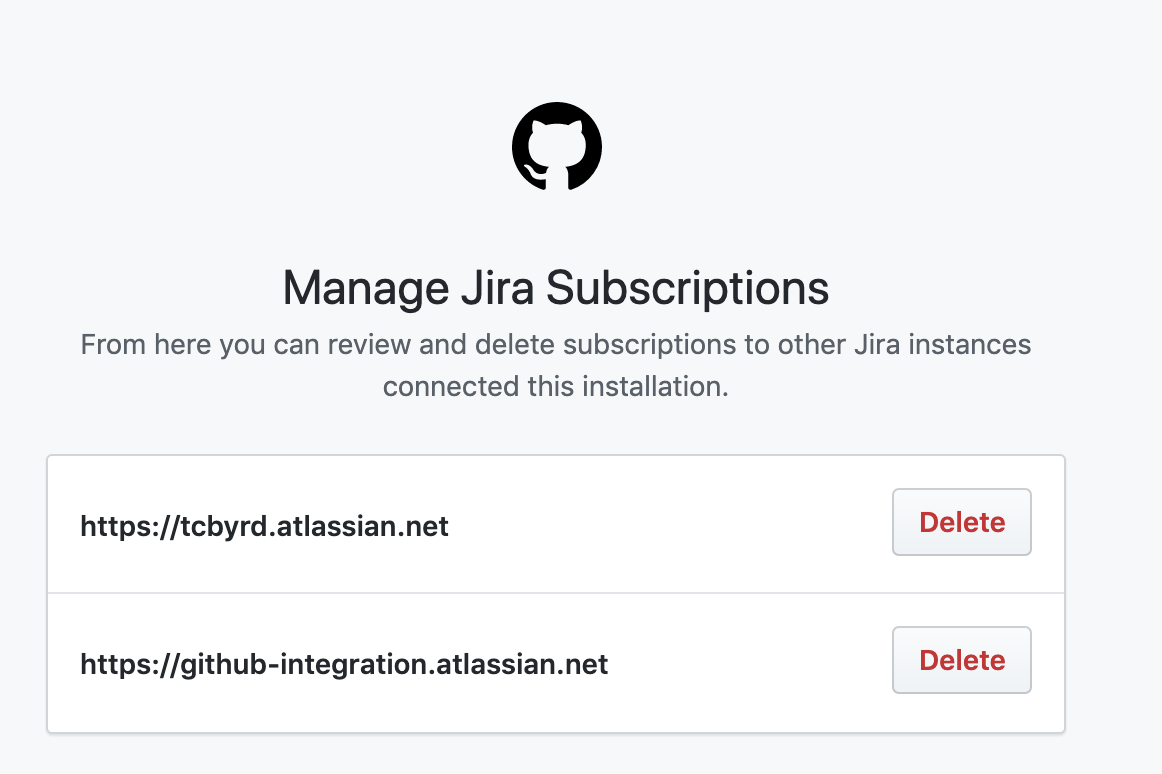
Admins of an installation can view and delete subscriptions to other Jira instances, without having to log in to the Jira instance itself:
This is useful if your installation is setup to send Development information to an instance you no longer have access to, or to audit instances other admins in your org may have previously configured. This only gives you the permission to delete the connection, and will not give you access to the instance itself. You will still need to be granted access in Jira if you want to be able to view the Development information that's been sent to that instance.
We have just added support to GitHub Actions in Jira! You'll now be able to see your builds and deployments from GitHub Actions in the dev panel.
Existing users of Jira's built-in DVCS connector that meet the requirements should migrate to this integration. If you've not yet been prompted to do so, you can manually kick off the migration by:
- Sign into your Jira Cloud account
- From the left sidebar in Jira, select Jira Settings -> Applications -> DVCS accounts.
- Follow the prompt to upgrade your GitHub connection
Take a look through the troubleshooting steps in our support guide.
Want to help improve the integration between GitHub and Jira? Check out the contributing docs to get involved.
The project is available as open source under the terms of the MIT License.
When using the GitHub logos, be sure to follow the GitHub logo guidelines.


