Quick start
Start by installing the Seed plug-in in your Jenkins instance.
The rest of the page shows you how to define a seed job for a whole class projects hosted at GitHub and driven through GitHub hooks.
Any number of seed jobs, for different purposes and classes of projects can be created.
The whole configuration settings are described in the Configuration page.
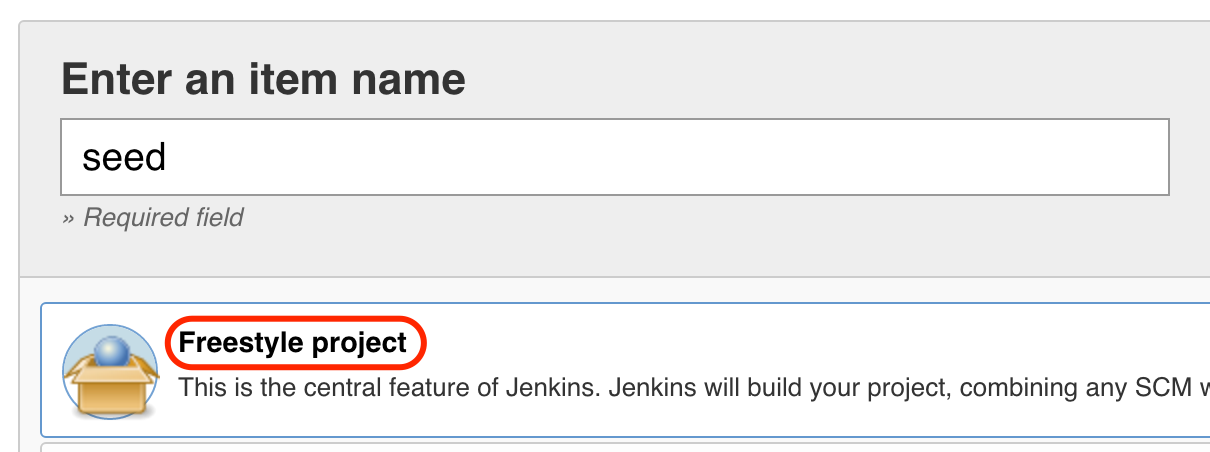
Create a free style seed project:
Create two parameters:

Add a small Groovy script to extract the project name from the GitHub full name:
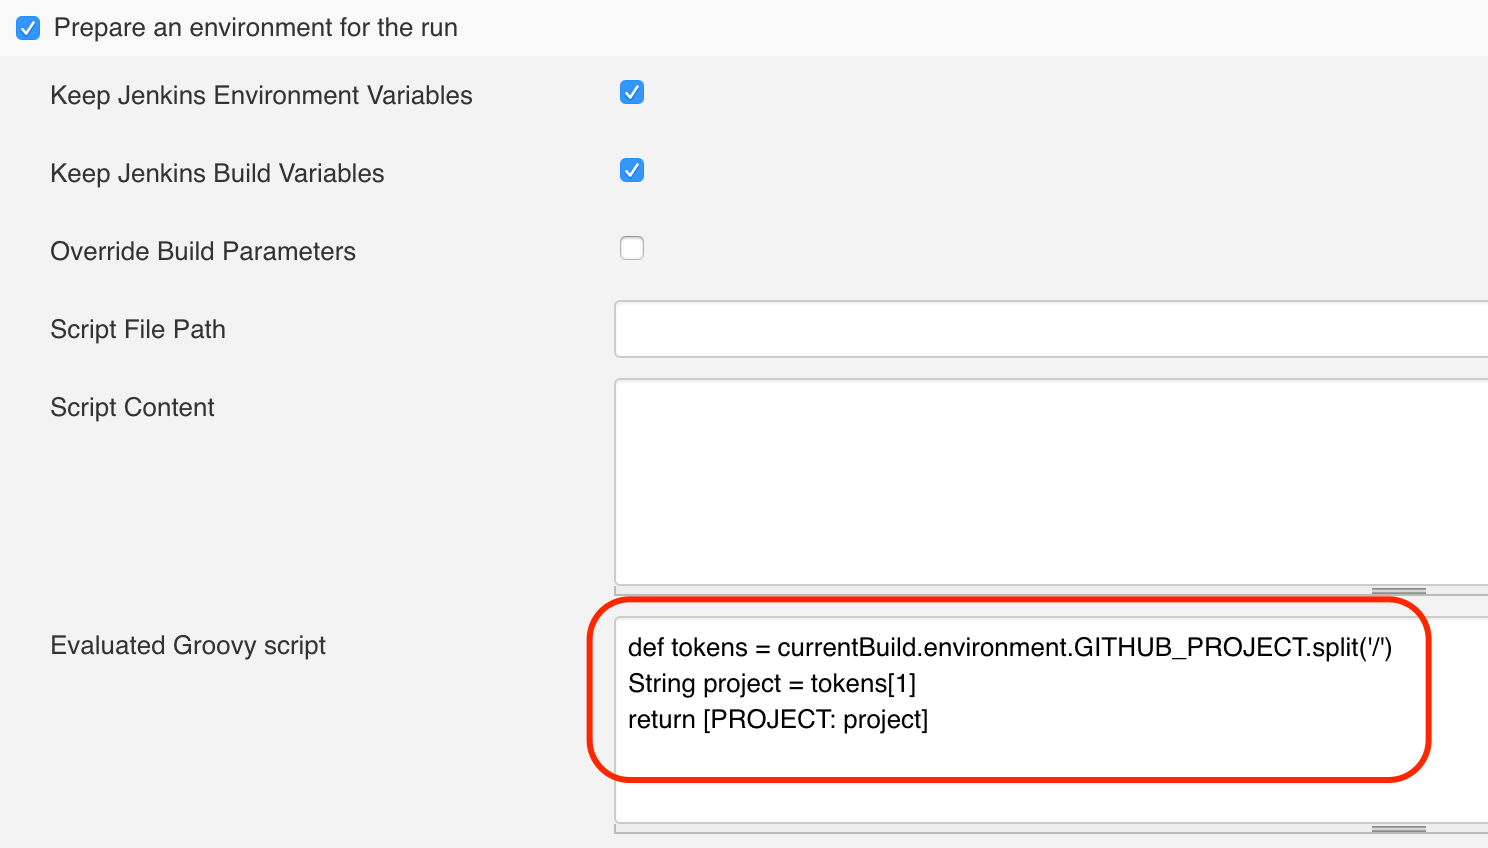
Of course, this is not required, and you could also do the opposite, like adding a prefix to the project name in order to get the full GitHub name, or ask the user to enter both parameters. It is up to you.
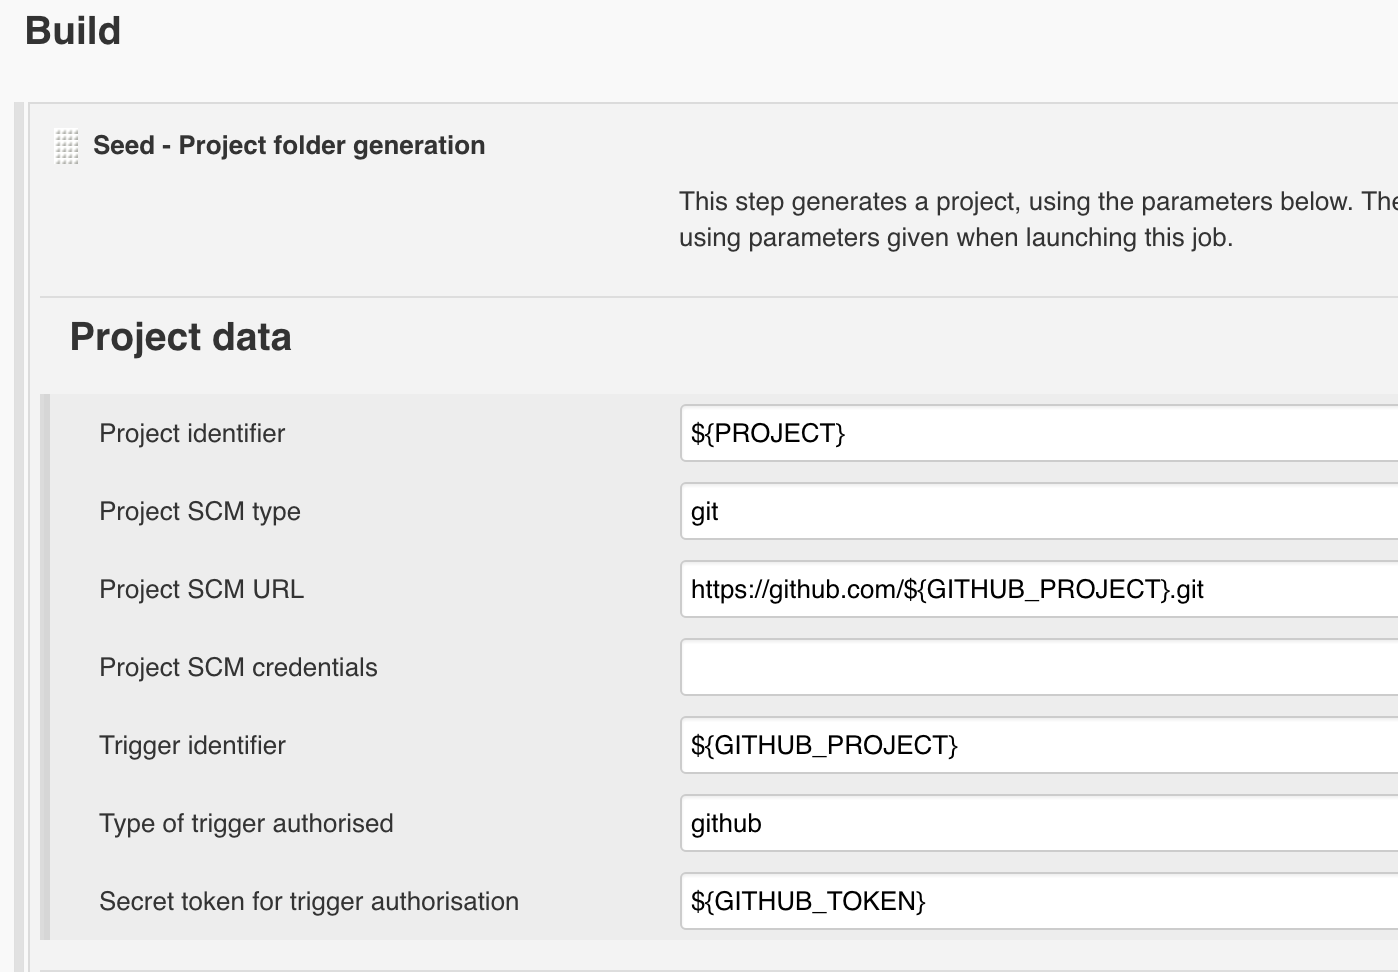
Add a Project generation step, configure the Project data and leave all the other parameters with their default values:
Save the seed job.
In the samples below, I'm using a fictitious
nemerosa/my-projectGitHub project.
Run the seed job with the following parameters:
-
GITHUB_PROJECTis obviously the GitHub full name of the project:nemerosa/my-project -
GITHUB_TOKENis a secret token that you need to generate and to use in the hooks of the GitHub repository. See the GitHub configuration page for more details.
Do not forget to enable and configure the service hooks for your GitHub repository.
This will create a my-project folder which contains one my-project-seed job.
The branches for which a pipeline must be generated must contain some pipeline description files:
- a
seed/seed.groovyfile which describes the pipeline using the Jenkins Job DSL - OR a
seed/seed.propertiesfile which refers to and configures an external pipeline library - OR a combination of both
See the Generation page for more information about the pipeline description files.
For this sample, we'll start with a very simple file. Just add in your project, in a test branch for example, a seed/seed.groovy file with the following content:
job("${SEED_PROJECT}-${SEED_BRANCH}-build") {
   description "Building the ${BRANCH} branch."
   parameters {
      stringParam('COMMIT', 'HEAD', 'Commit to build')
   }
   scm {
      git {
         remote {
             url PROJECT_SCM_URL
             branch '${COMMIT}'
         }
         extensions {
             wipeOutWorkspace()
             localBranch BRANCH
         }
      }
   }
   steps {
      shell "Look! I'm building ${BRANCH}!"
   }
}
Commit and push this file on GitHub before generating the pipeline.
Since the pipeline description files are committed together with the code, they will shared and merged with other branches like any other piece of code.
Now that your branch, let's call it feature/test and the , does contain the pipeline descriptor files, we can generate a pipeline for it.
Run the project seed job with the branch name as a parameter.
With feature/test as a branch name, this would:
- create a
my-project/my-project-feature-testfolder - which contains a
my-project-feature-test-seedjob - which is triggered automatically
- and creates a
my-project-feature-test-buildjob
If you want to trigger the build upon pipeline (re)generation, you can update the seed.groovy file and add:
queue "${SEED_PROJECT}-${SEED_BRANCH}-build"Commit and push. If the GitHub repository has been correctly configured, the branch pipeline will be automatically be regenerated and the build job will be triggered automatically.
If the GitHub repository has been correctly configured, any time there is a push event in the repository, the build job will be triggered automatically for the corresponding branch.
If the GitHub repository has been correctly configured, if the branch is deleted in the GitHub repository, the corresponding pipeline will be deleted.