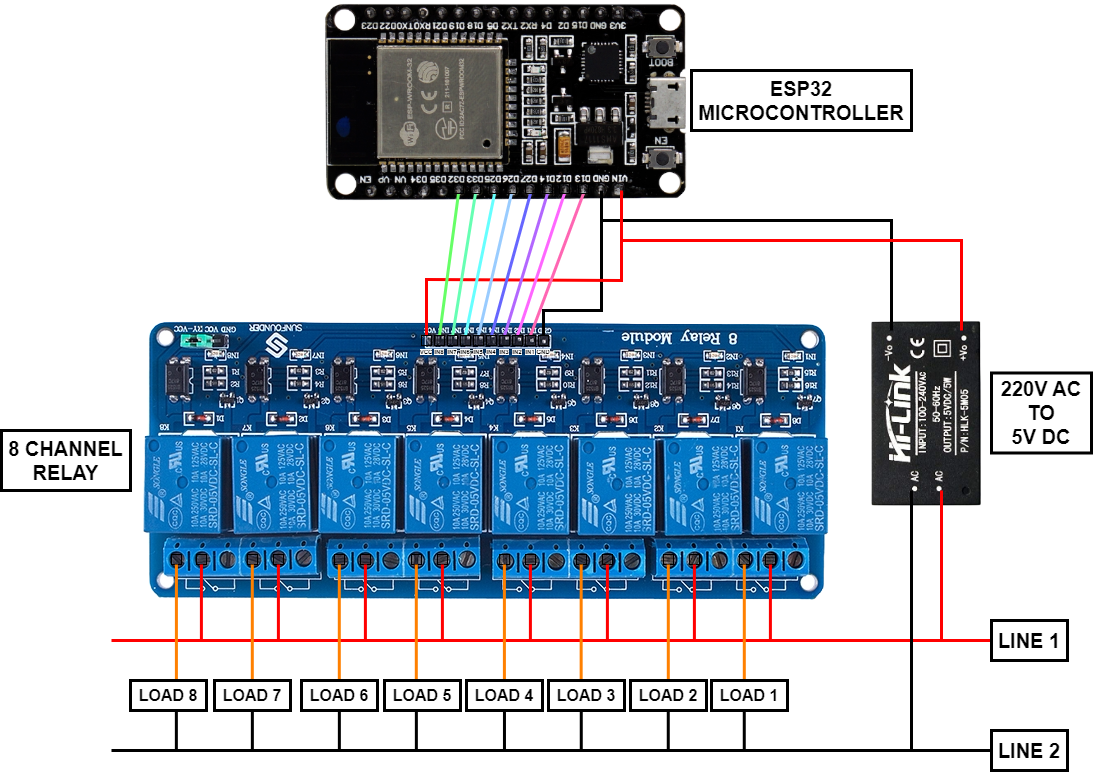
A device developed with an ESP32 microcontroller and relay modules. This device forms the backbone of a centralized remote control system for electrical equipment.
- Centralized Control
- Remote Control
This device was built with ESPHome and is intended to work with Home Assistant.
- ESP32 DevKit V1 MCU
- 8 Channel Relay Module 5V
- HiLink HLK-5M05 AC/DC Buck Converter 100-240 VAC to 5 DC 1A(5W)
❗❗❗ The esp32c3-switches.yaml config file contains pin mapping for the ESP32-C3, which you can modify depending on your ESP32 development board variant.
| 8 CH Relay Module | HiLink AC-DC Pin | ESP32 Devkit V1 Pin |
|---|---|---|
| IN1 | ❌ | D13 |
| IN2 | ❌ | D12 |
| IN3 | ❌ | D14 |
| IN4 | ❌ | D27 |
| IN5 | ❌ | D26 |
| IN6 | ❌ | D25 |
| IN7 | ❌ | D33 |
| IN8 | ❌ | D32 |
| VCC | VOUT➕ | VIN |
| GND | VOUT➖ | GND |
- Ensure ESPhome and File Editor add-ons are installed on your Home Assistant instance.
- Ensure that your ESPHome
secrets.yamlfile is up to date. - Using the File Editor add-ons, upload the
esp32c3-switches.yamlconfig file to theconfig/esphome/directory. - Using the ESPHome dashboard, modify the
esp32c3-switches.yamland replace the redacted part of the config file. - Build and upload the firmware to your device.
- Now, you can integrate the device into your Home Assistant.
