-
Notifications
You must be signed in to change notification settings - Fork 10
GitHub Pages
You can host your site for FREE at GitHub pages. After you have your site up and running, you can even use a custom domain (your own URL) that you can purchase at GoDaddy.com.
These instructions assume that you have a GitHub account and that you have downloaded and installed GitHub Desktop. If you don't have an account, sign up for FREE at https://github.com. You can download GitHub Desktop for free from https://desktop.github.com/ after you've created an account.
To set up your site on GitHub Pages, first create a new repository for your site. Go to https://github.com/ and sign in.
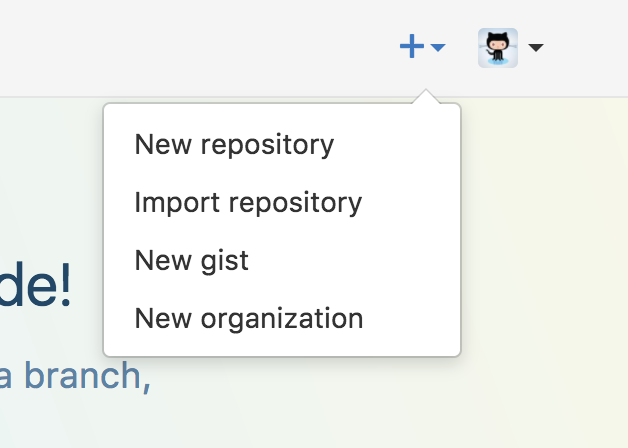
Then, click the plus sign to the left of your profile image on the far right of the page header. Don't jump ahead. There is a very special way you'll need to name your site in the next step.
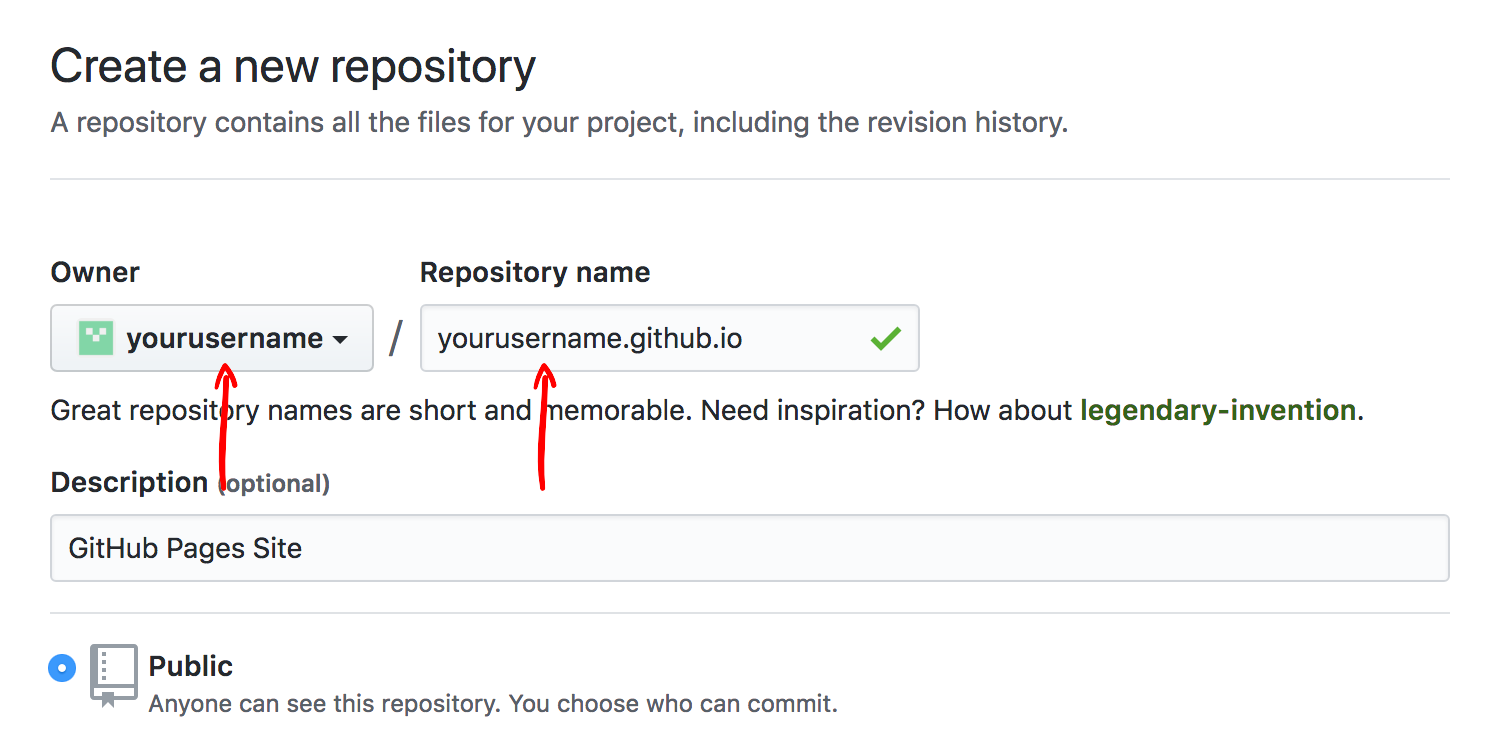
On the Create a new repository page, enter the name for your repository as yourusername.github.io. Make sure that the username exactly matches your GitHub username. Optionally, you can give the repository a description.
Check the checkbox for Initialize this repository with a README file. Just to be sure, check the name of your repository one more time and make sure it follows the naming convention in step 2 above, then click the green Create repository button.

Your repository is created and you should see the README file displayed in the Code tab.

Click on the Settings tab.

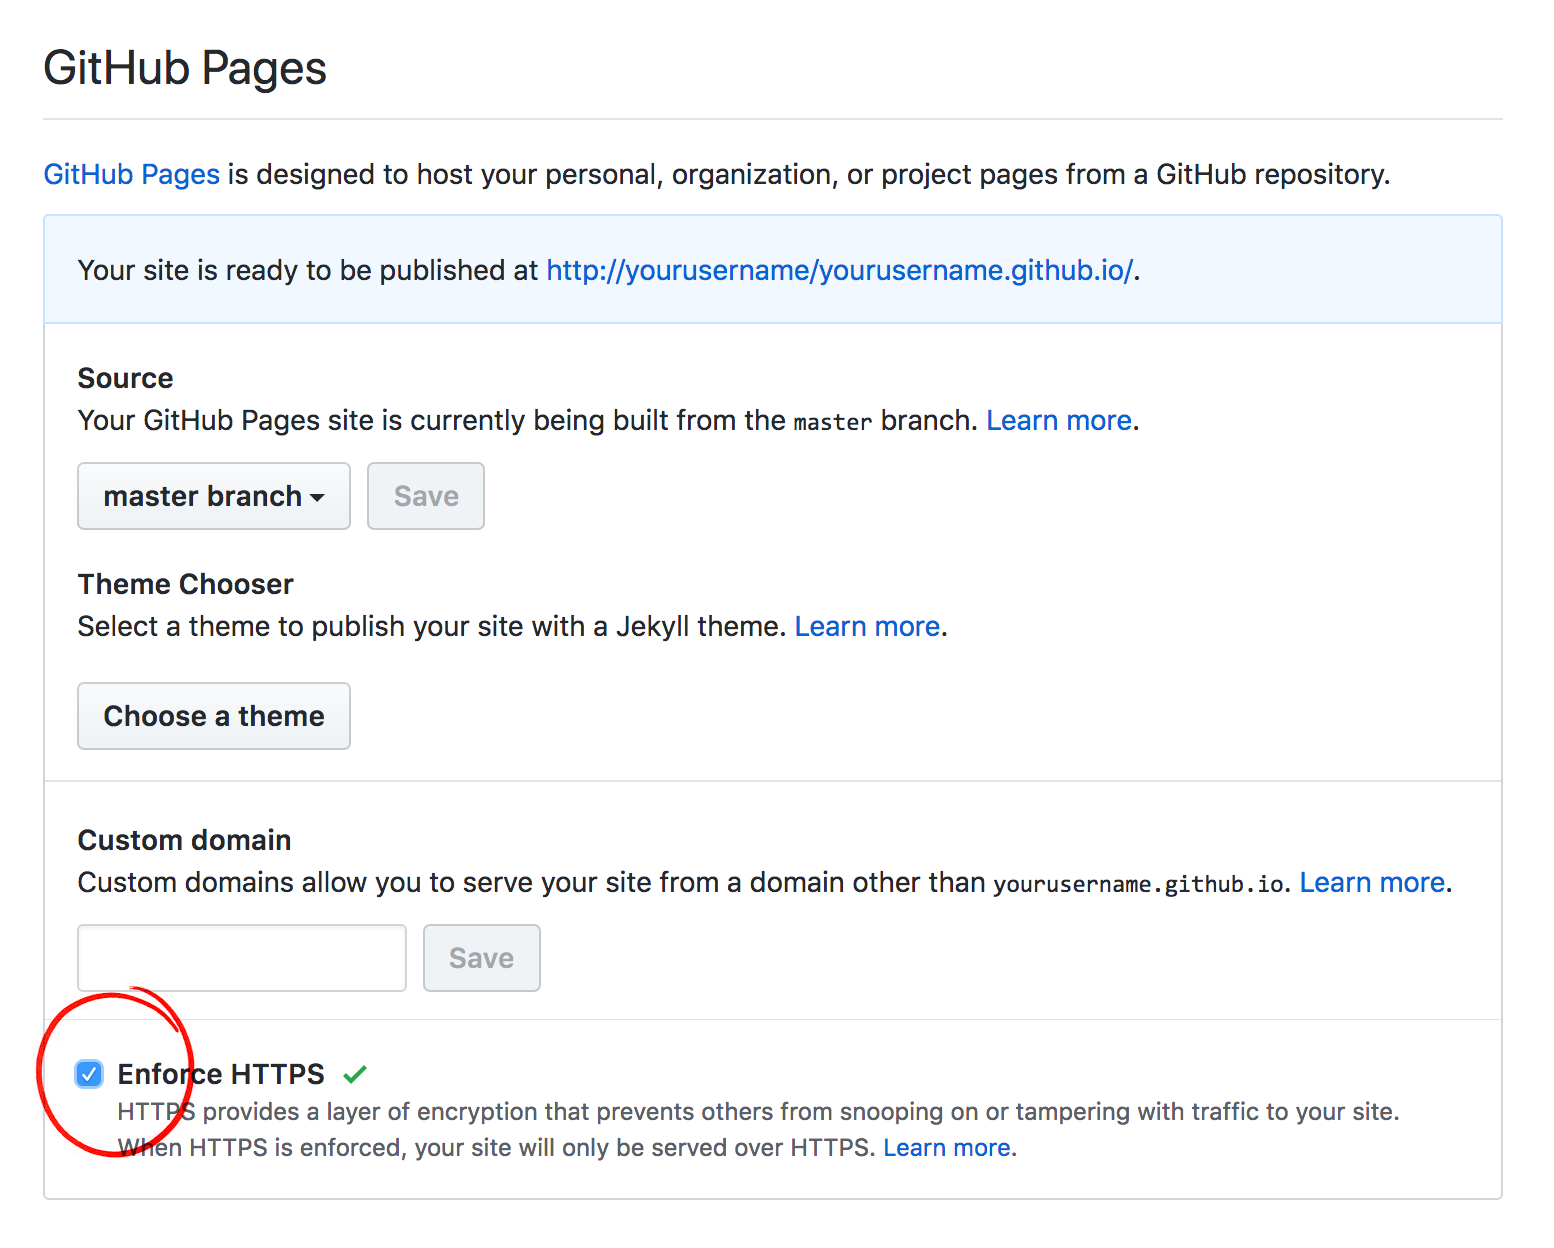
On the Settings tab under the GitHub Pages section, check the box for Enforce HTTPS. This will make sure that our site is served in a secure way to our site visitors.
Back on the Code tab, click the green Clone or download button and choose Open in desktop from dropdown that appears.
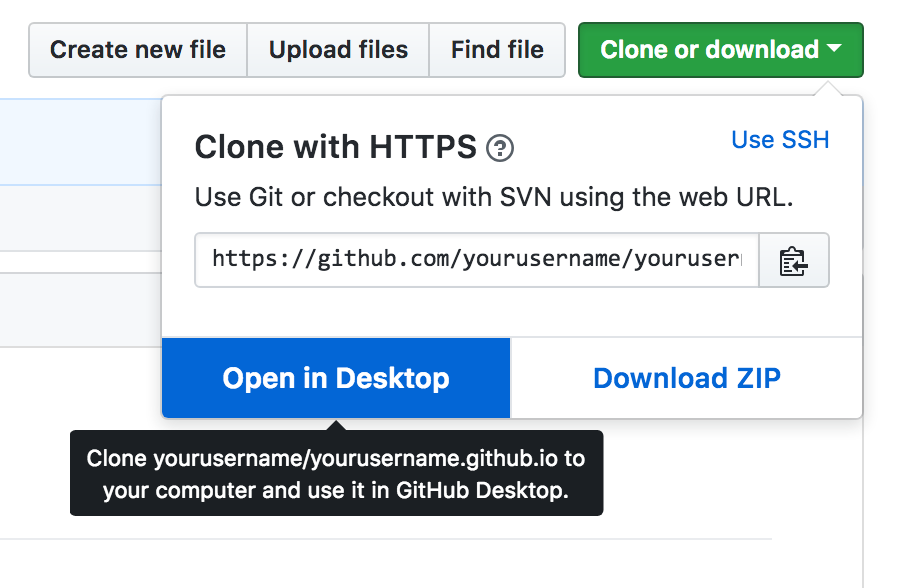
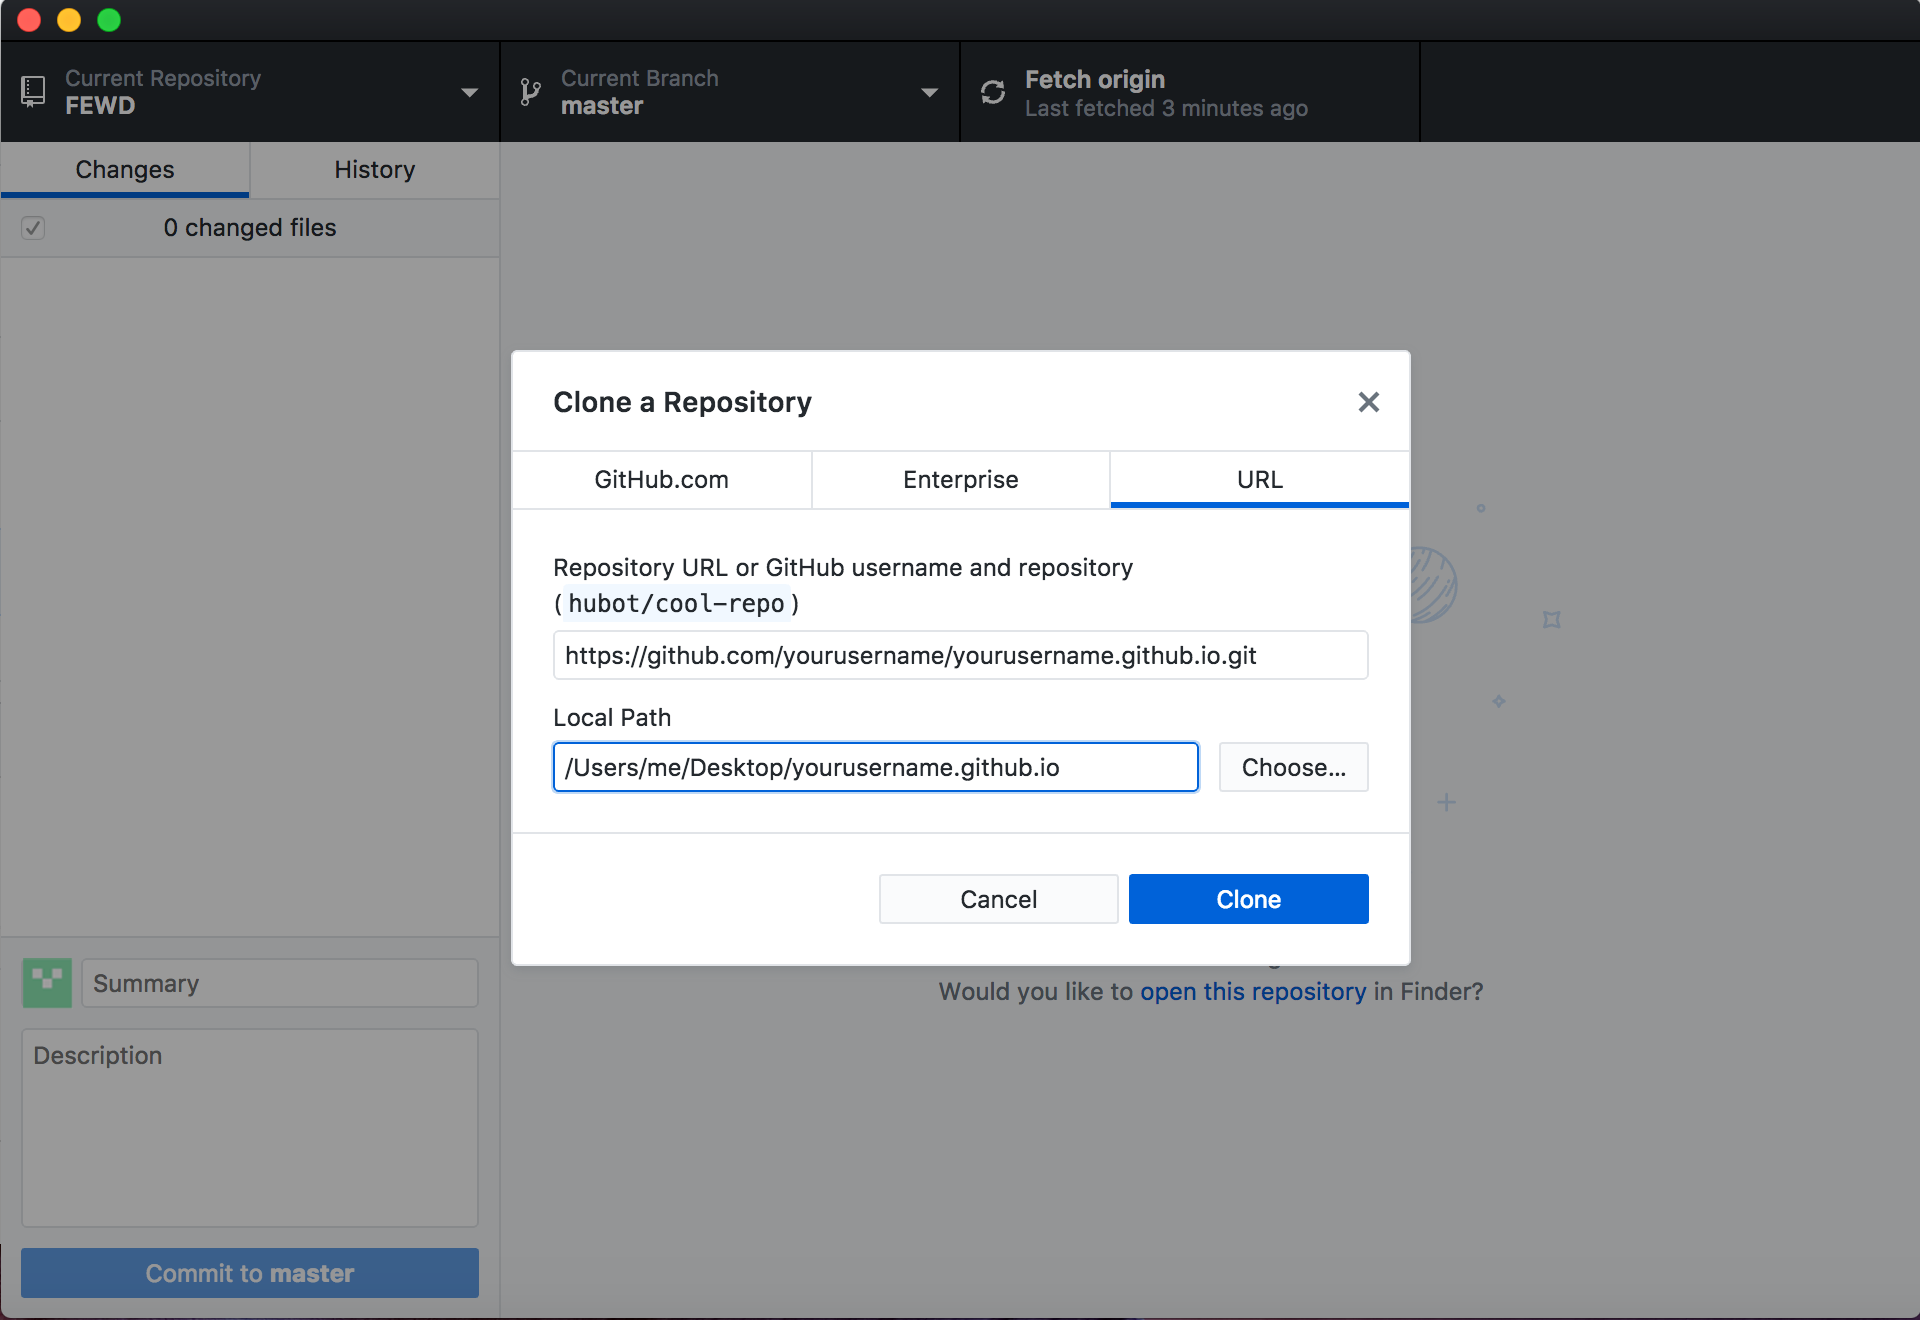
You may be prompted by your browser to allow access to your desktop. Make sure to allow access. When you do, GitHub Desktop will launch with a prompt to choose a location for your new repository locally. GitHub Desktop will create a new folder locally on your machine for your local clone of your repository at the location you specify. Once you've specified the file path for the new folder, click the Clone button.
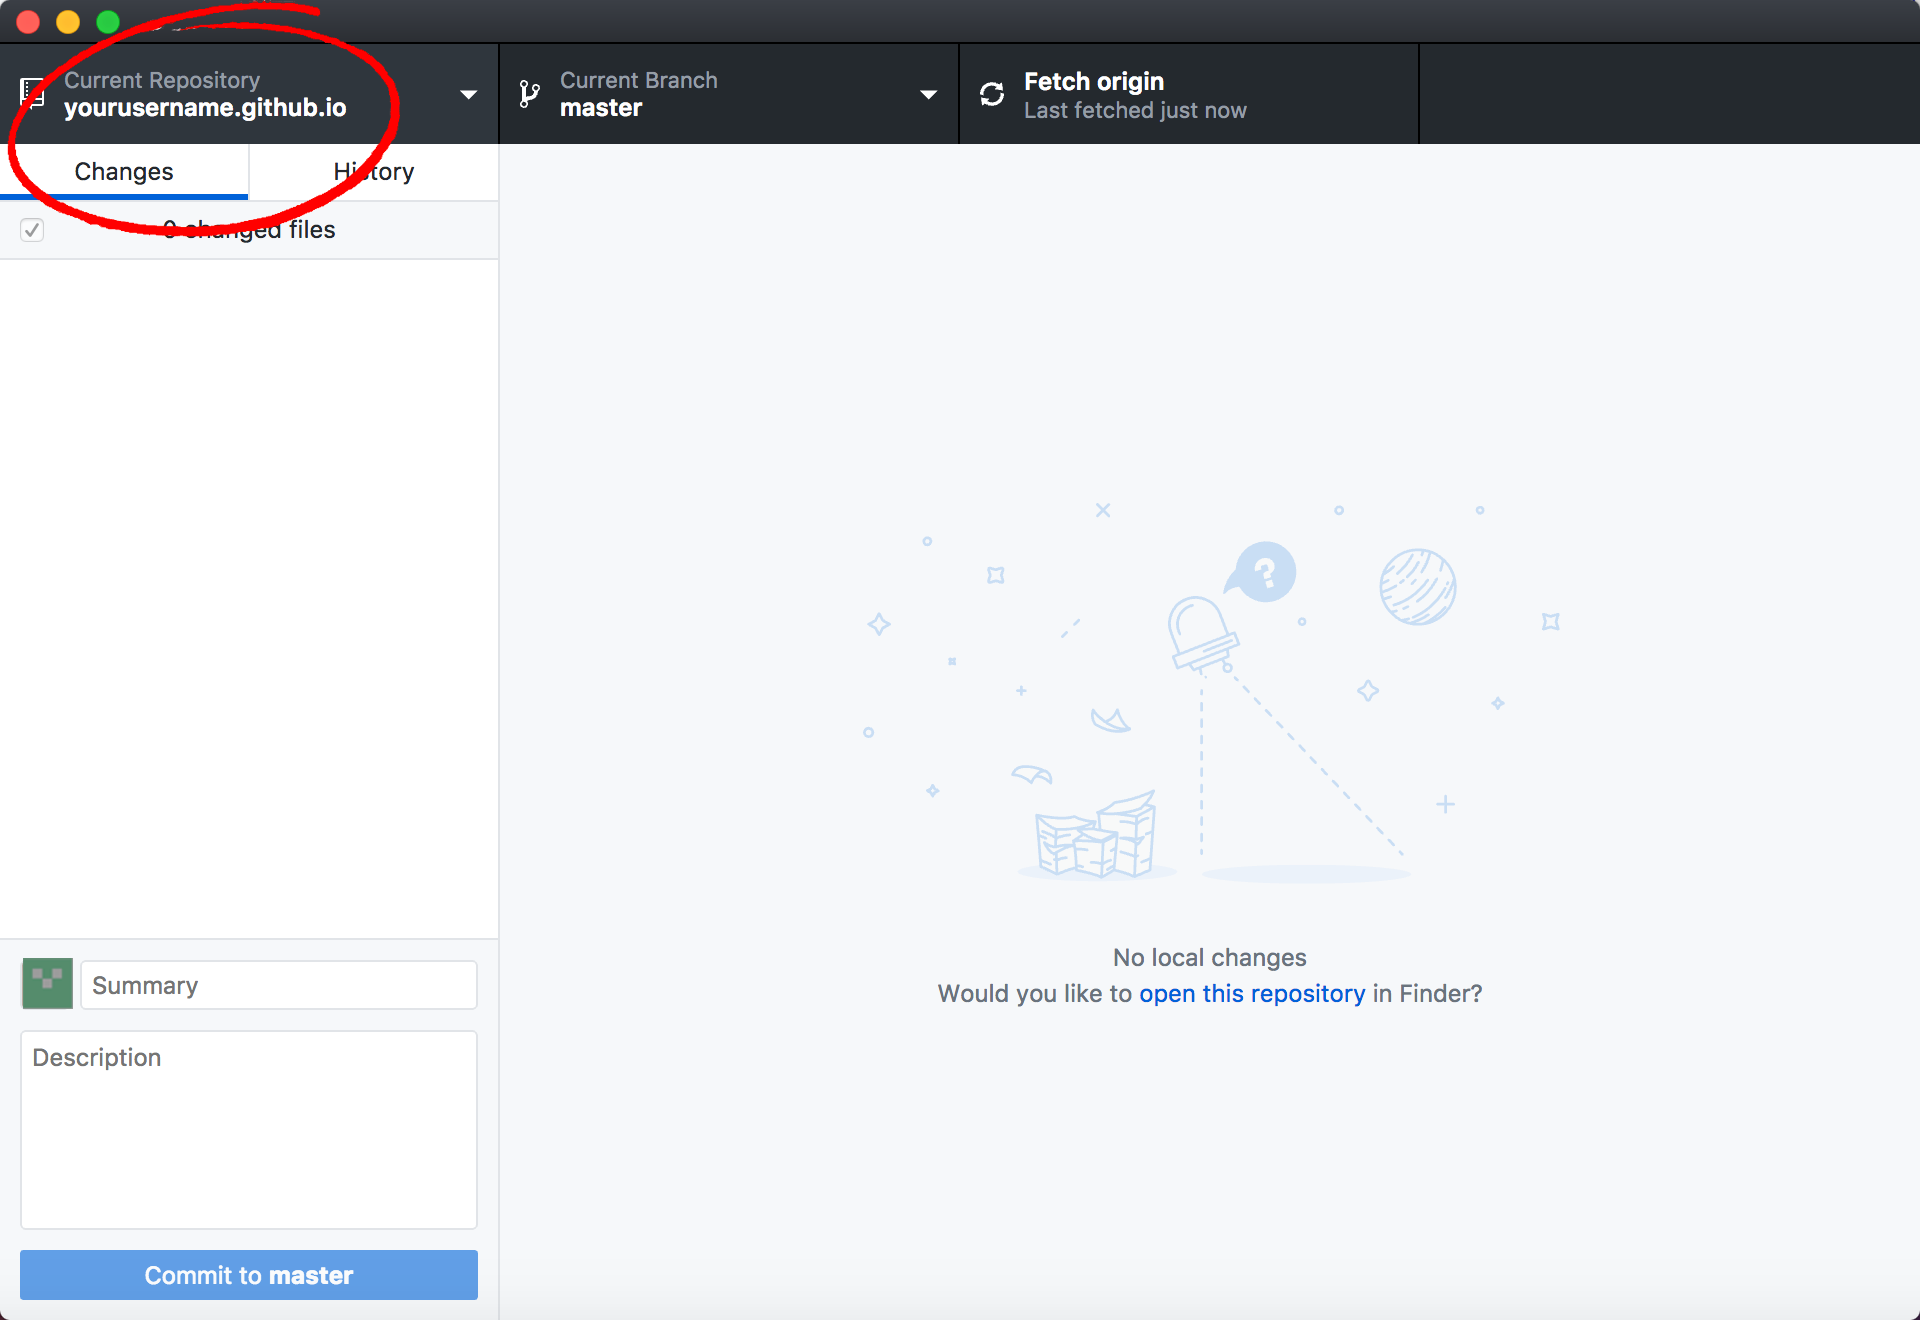
Once you click the Clone button, the new folder is created where you specified and the local repository is opened in GitHub Desktop. In the upper left corner of GitHub Desktop, you should now see the Current repository is set to the name of your new repository.
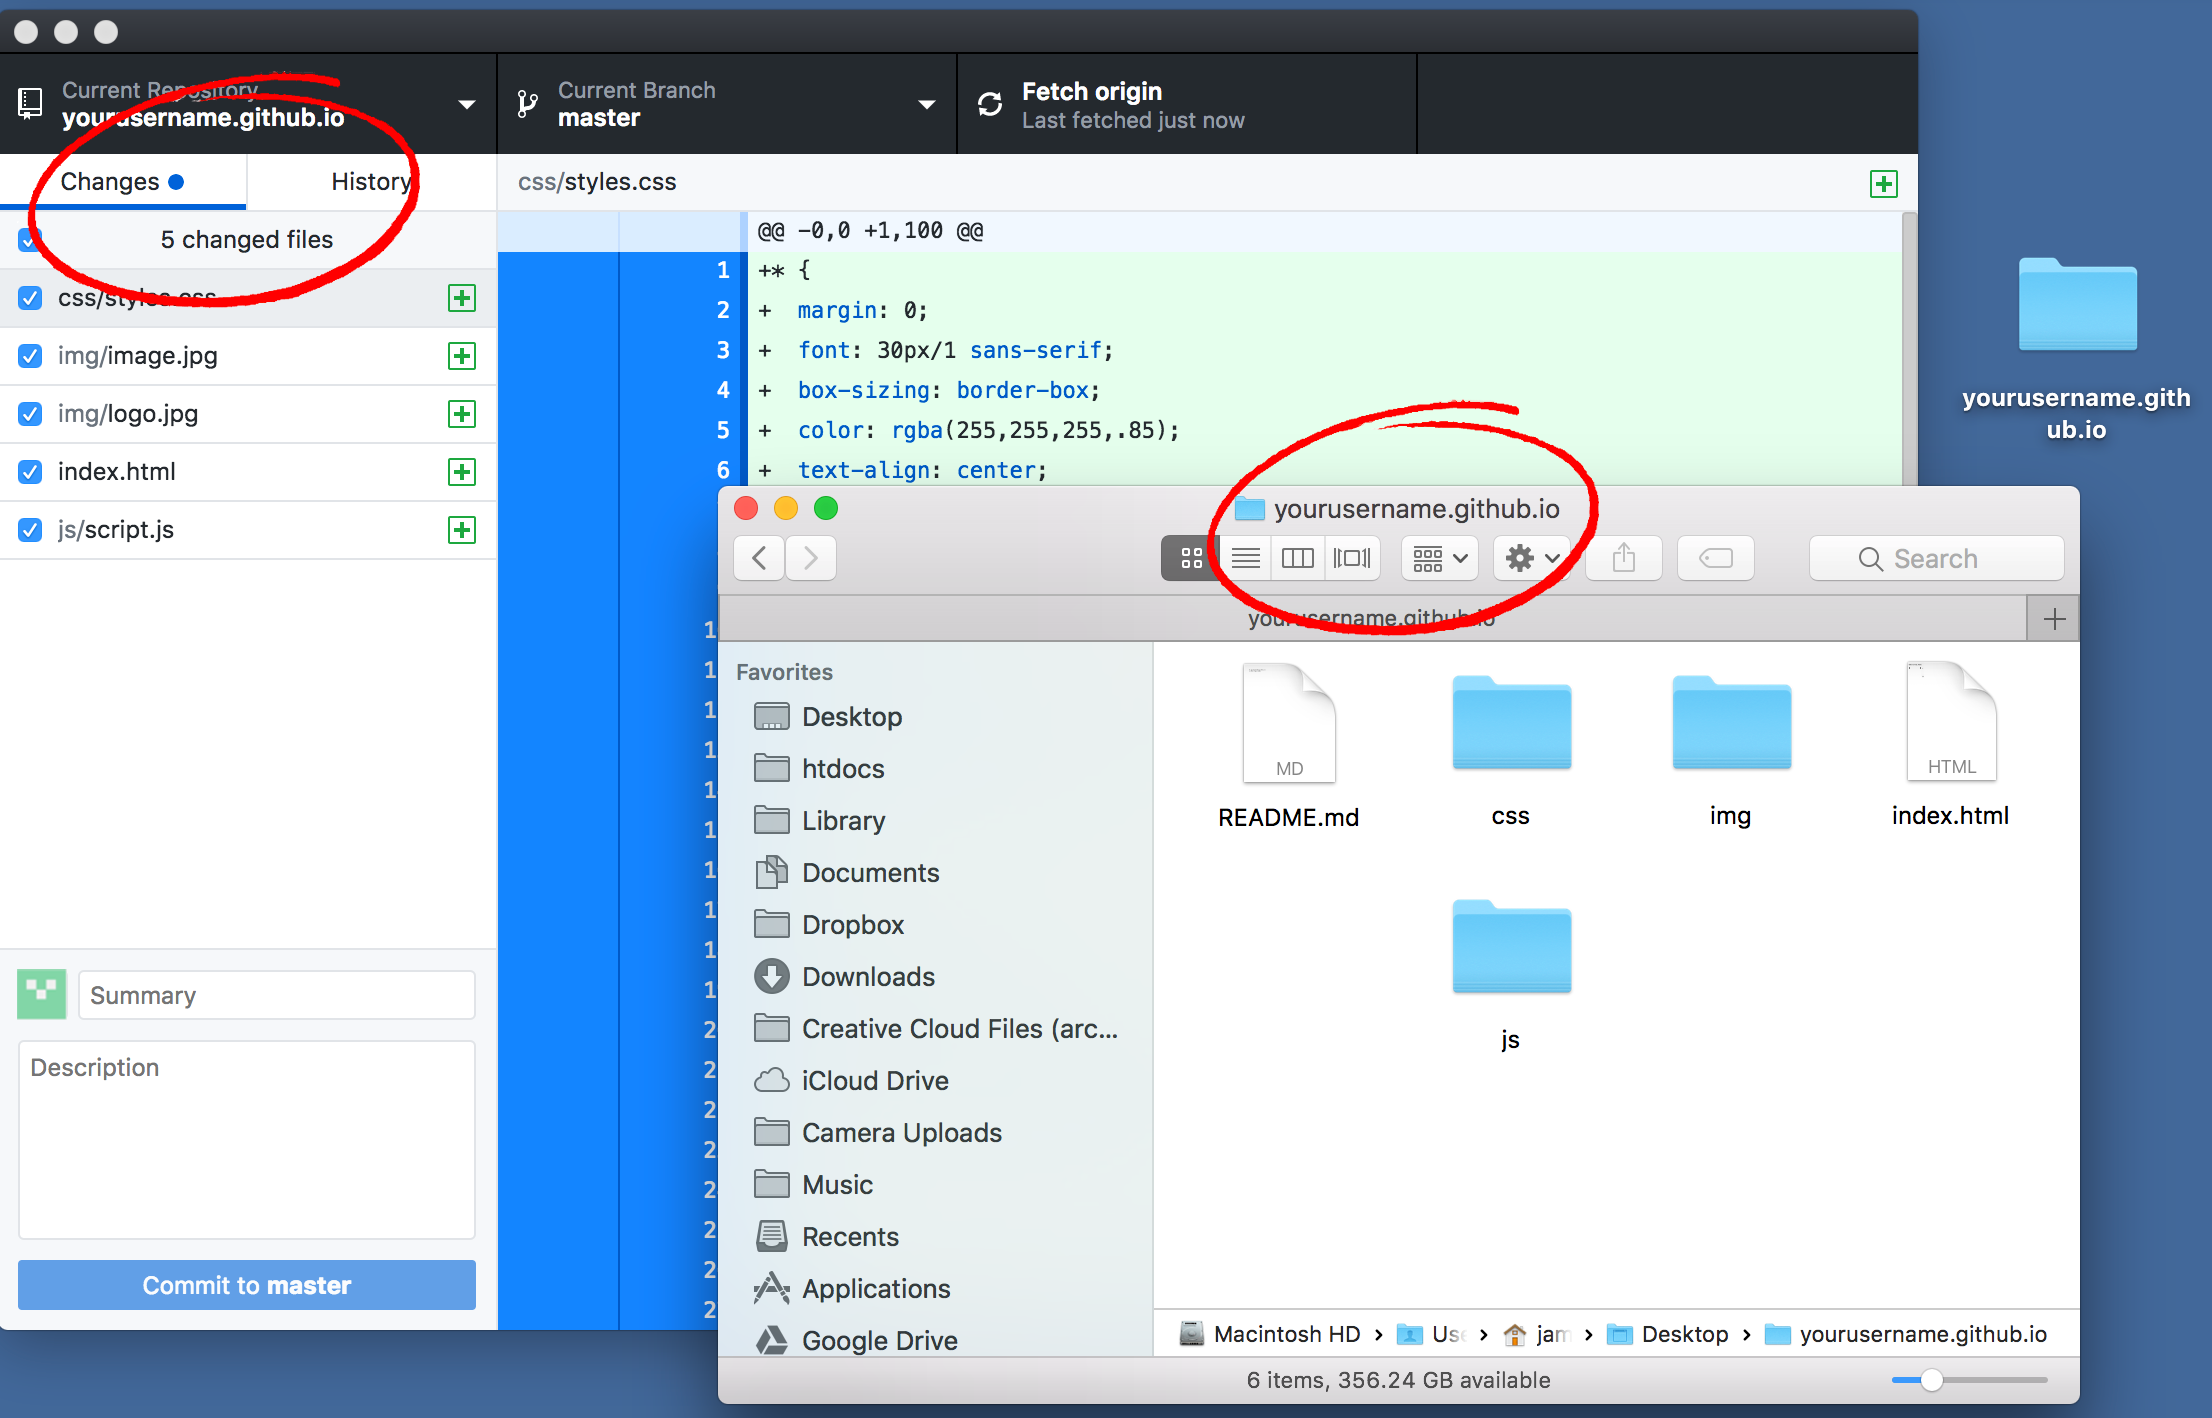
Okay, now we need to add our website files. Open the folder that was created at the location you specified in step 8 when you cloned the repository locally on your machine, and copy (or move) your website files to this new folder. Make sure that you have your index.html file directly in the root of this folder (not in a subfolder) and that all of your images and stylesheets are properly linked to the index.html file. Once your files are inside the folder, you will see that they will appear in GitHub Desktop in the Changes tab.
Now your files are ready to be uploaded to your GitHub repository. We need to take two steps to do this. First, we commit the files, and then we push the files. To commit the files, simply write a commit message in the Summary field at the bottom left of GitHub Desktop. Once your message is added the Commit to master button will be activated and you can click it.

Now, we're going to push our files. Click the Push origin button in the GitHub Desktop toolbar area.

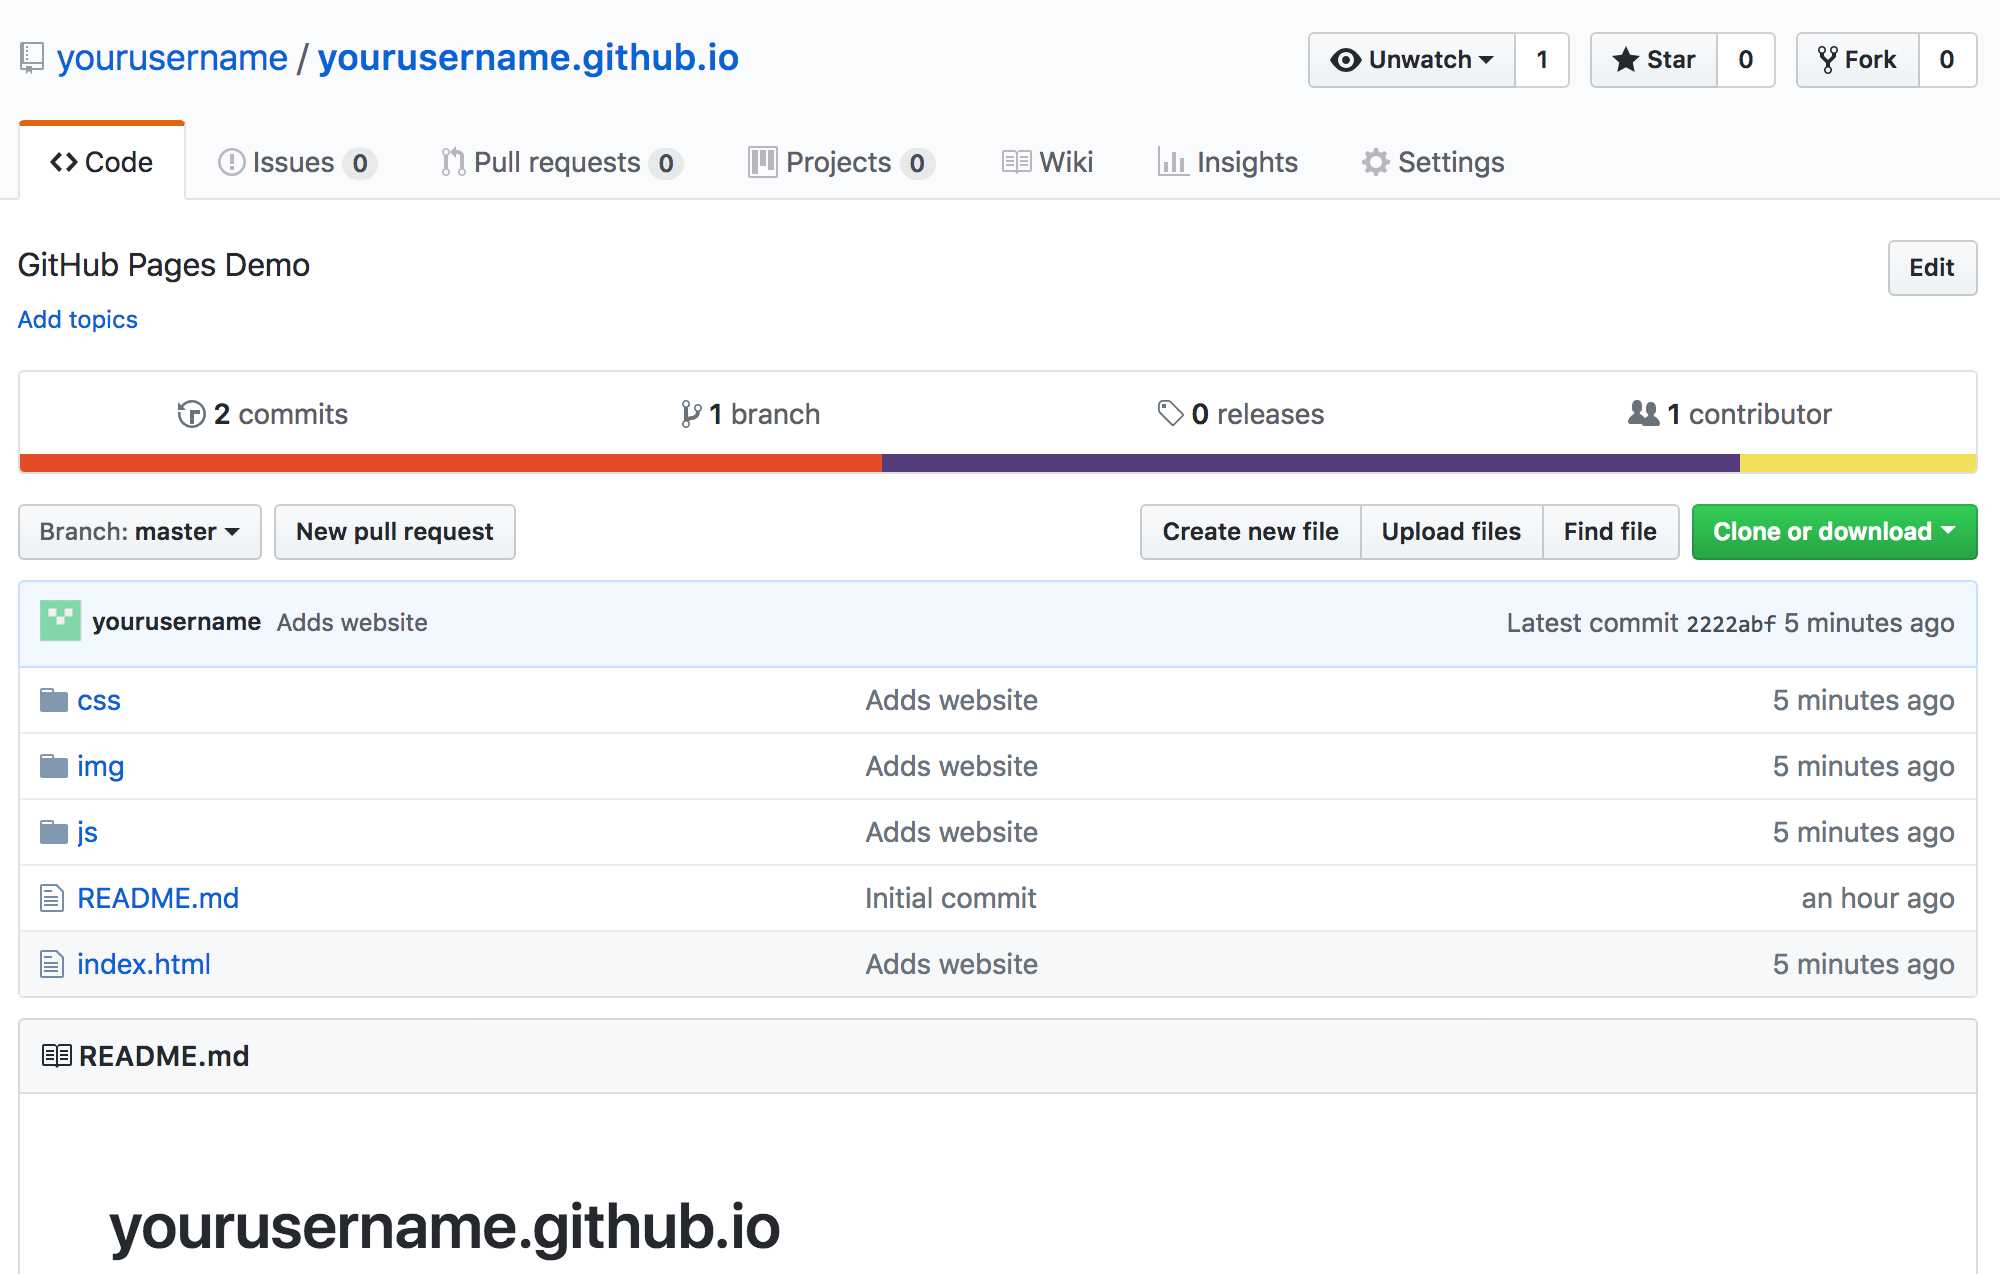
Back to GitHub in your browser, refresh the browser page to see that your files are now in your GitHub repository!
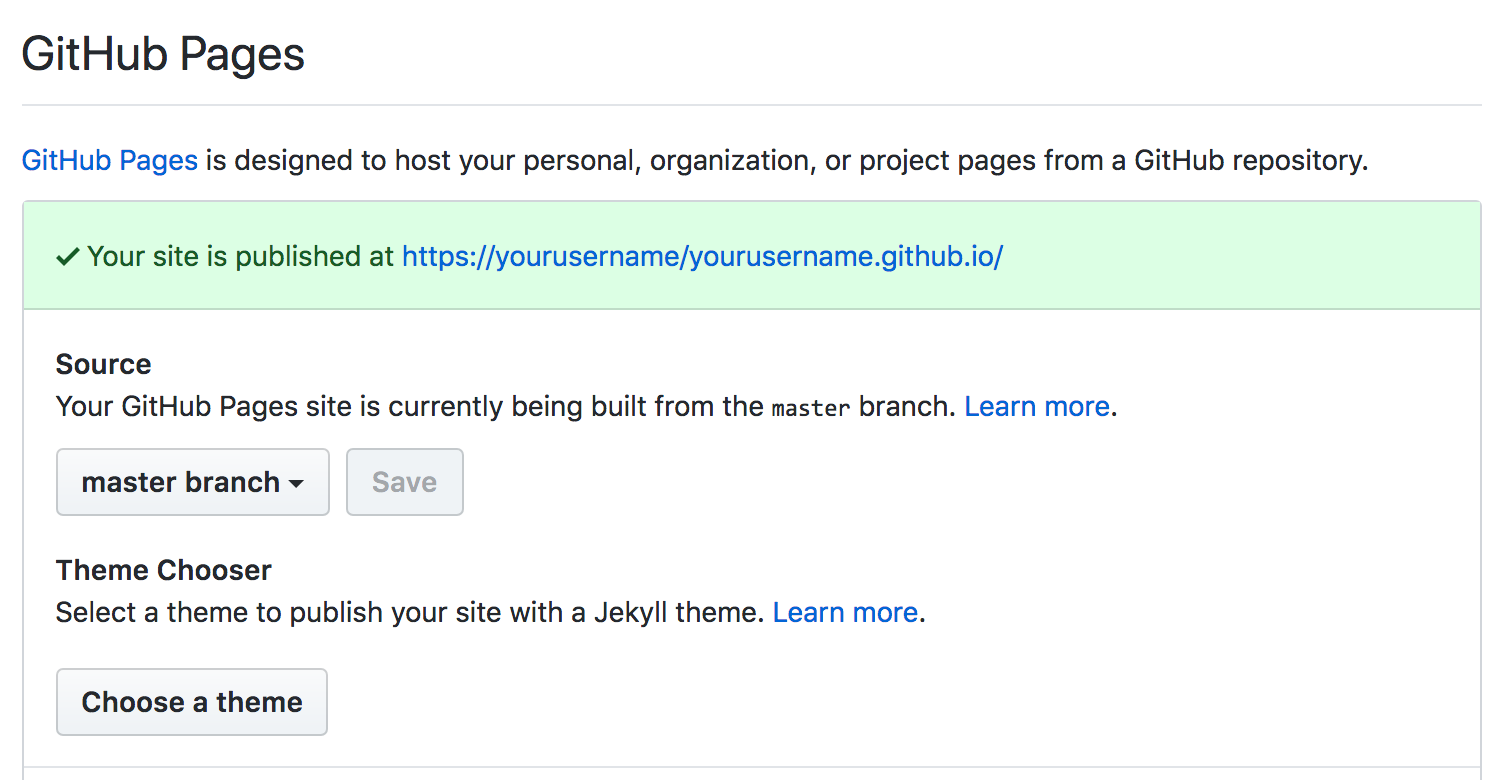
Back in the Settings tab under the GitHub Pages section, the banner will indicate that your page has been published. Congratulations, you've published your site! Click the link in the banner to see how your page will appear to site visitors.
