Grippers cameras
First of all, you need to connect to YuMi's internal controller, by doing the following:
- Turn on YuMi and wait for the home screen to come up on the FlexPendant
- Connect YuMi to your computer using an Ethernet cable from the XP23 Service Port
- Open RobotStudio 6.0 or newer, 32Bits version (the 64 bit version doesn't have the integrated vision module)
- Click Online, then click Add Controller
- In the "Remote Controller" box, type: 192.168.125.1
- Click Add, controller should appear above
- Click the controller, then click OK
- Request Write Access from YuMi
- Click the Grant button in the popup window on the FlexPendant screen
Once you have connected to the internal controller, you need to run the integrated vision module from the Online tab:

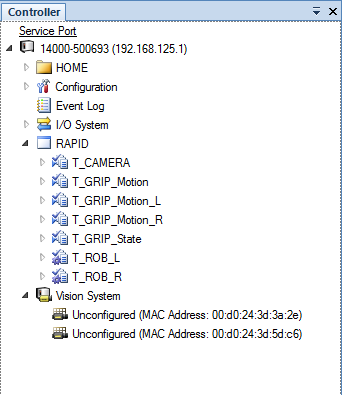
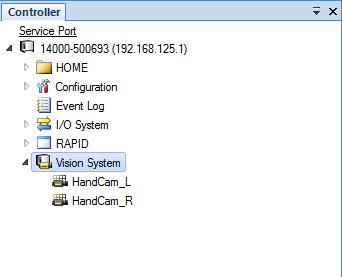
When the integrated vision module opens, go to the left panel (where the controller components are shown), and click on the arrow near to "Vision System". If the gripper cameras are working correctly (and haven't been configured yet), you should see the following:
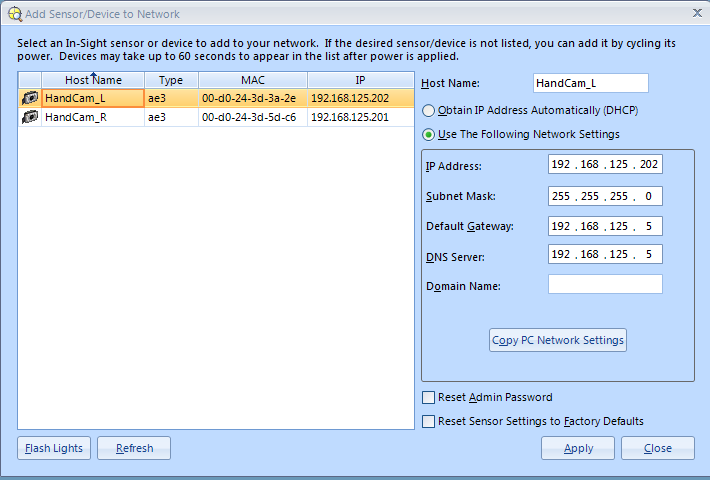
The first thing that we should do, is to add the cameras to the internal controller network, by going to the top panel, and clicking on the option "Add sensor to network" below "Connect". Once there, you should fill the fields in the window that appears with the following parameters:
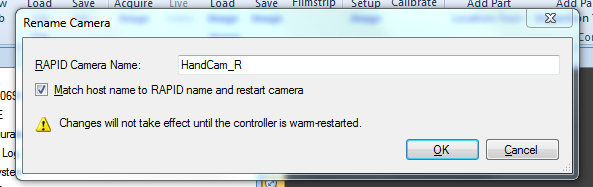
Next, you should change the cameras host names, by right-clicking each of them and choosing the option "Rename".
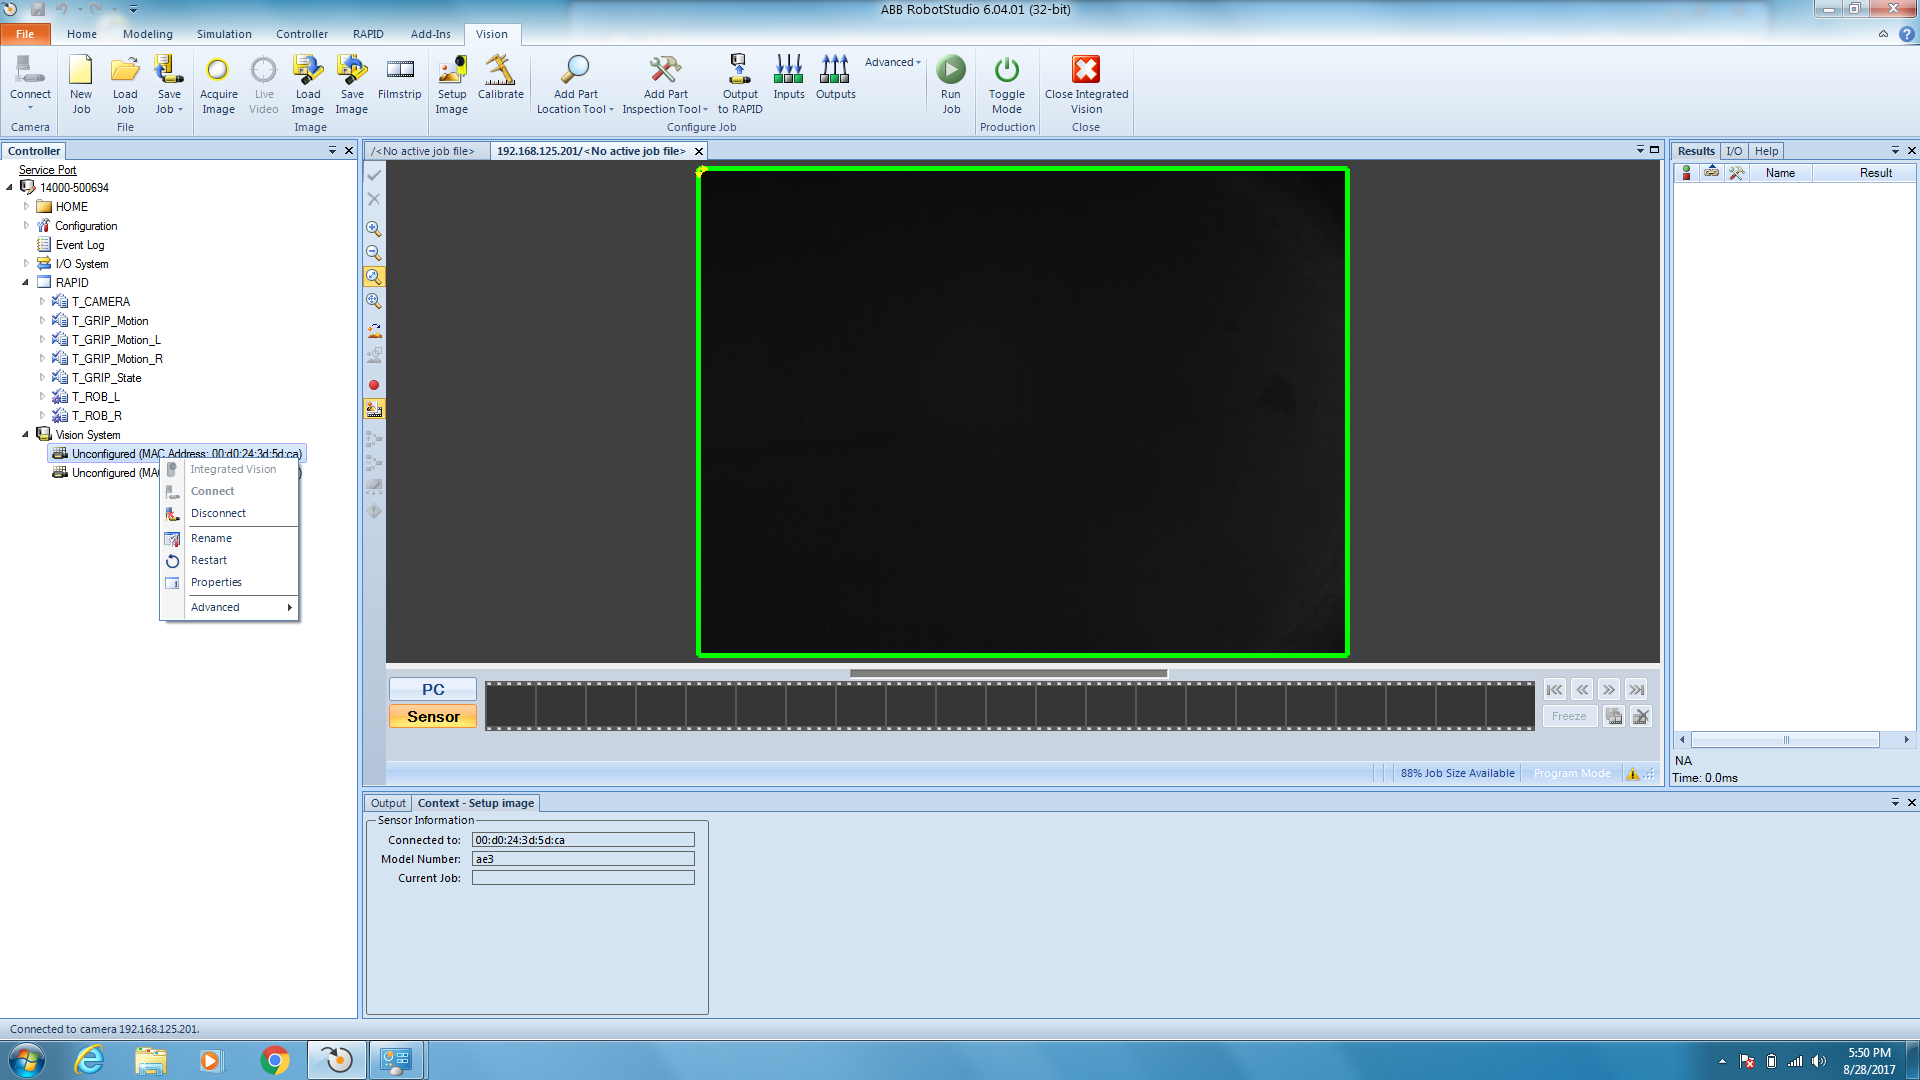
The left camera name should be HandCam_L, and the right camera HandCam_r:
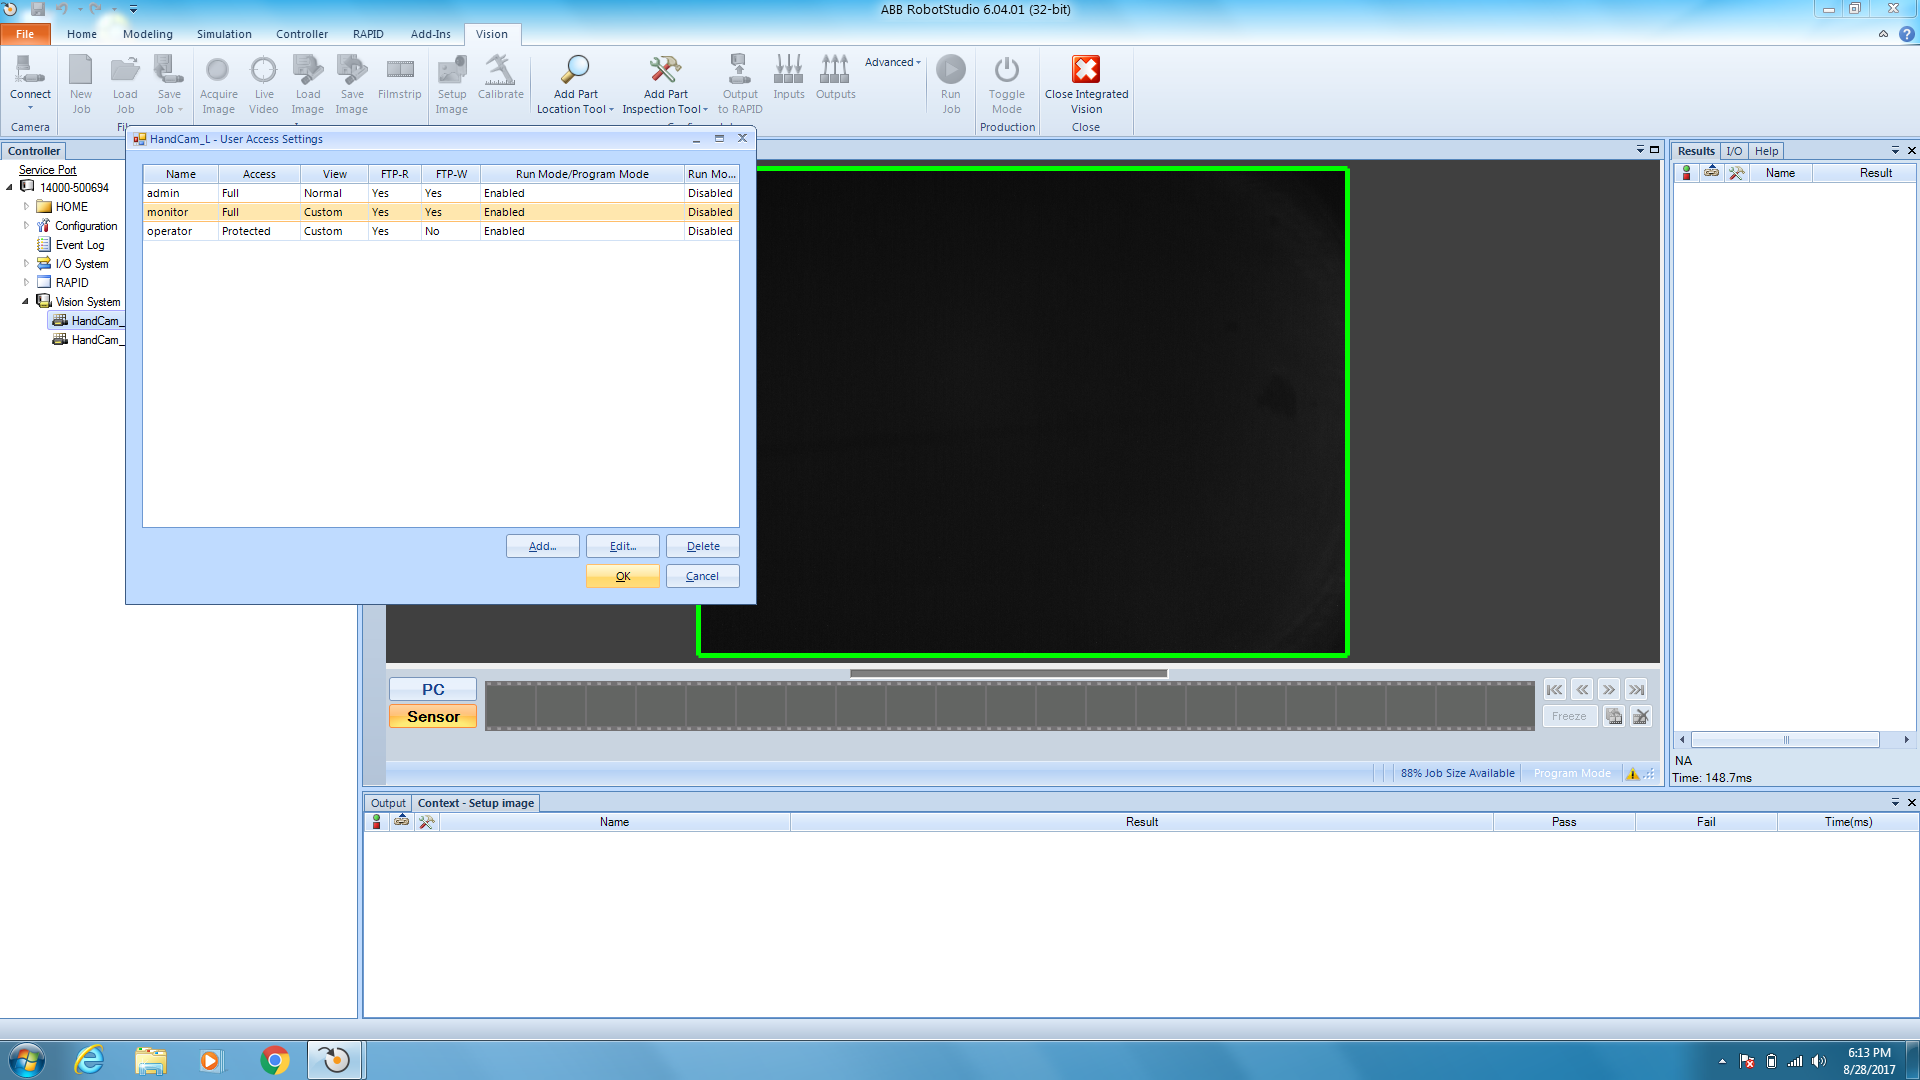
Now, for each camera you should click on the option "User access settings", and copy this configuration to allow FTP transfers:
Finally, you should do a warm-restart of the internal controller. If everything went well, when the internal controller restarts you should be able to visualize the cameras with their respective host names:
We have provided a set of camera jobs with everything set on the folder yumi_cameras/CameraJobs. If you want to us our default setup, just load the corresponding camera job for the left and the right camera using the integrated vision interface.
If you, on the other hand, want to set up the camera jobs by yourself, we will indicate how this should be done in this guide. Note: You need to run the following set of steps for each camera.
First of all, click on the camera of your choice, and then on "New job" (top panel). Then, click on "Setup Image", and set the image/trigger parameters as follows:

After that, you should click on the thumbnail "Advanced" in the top panel, and then on "View spreadsheet". After that, you should be able to visualize the camera configuration as a spreadsheet:

The FTP tag that appears is from a camera that has been already configured. In order to make this appear, type in one of the spreadsheet cells "WriteImageFTP", and press ENTER. You should see a window like the following:
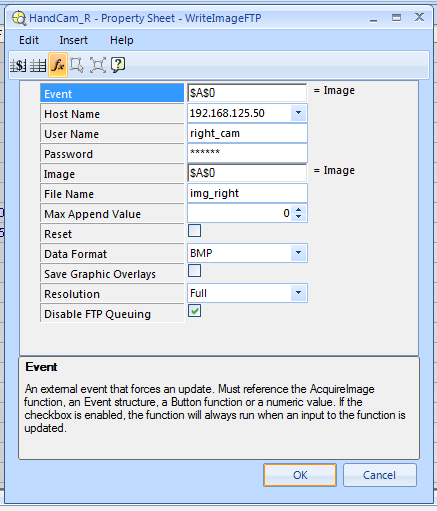
Copy the parameters shown on the previous image, making the exception that for the right cam the user name should be right_cam, and for the left cam left_cam. The password for both should be yumiPC
Finally click on "Save job". For the left camera, set the job name to L_CaptureAndFTP.job, and for the right camera to R_CaptureAndFTP.job. (Unless you want to put different names, but then you would need to modify the RAPID module provided in this repo for interfacing the cameras)
IMPORTANT: Without this module you won't be able to trigger the cameras externally, employing RWS. Be sure to load it into the controller.
Now, in order to setup the RAPID module for the cameras, load the script yumi_cameras/rapid/TCameraMain.mod on the task T_CAMERA.
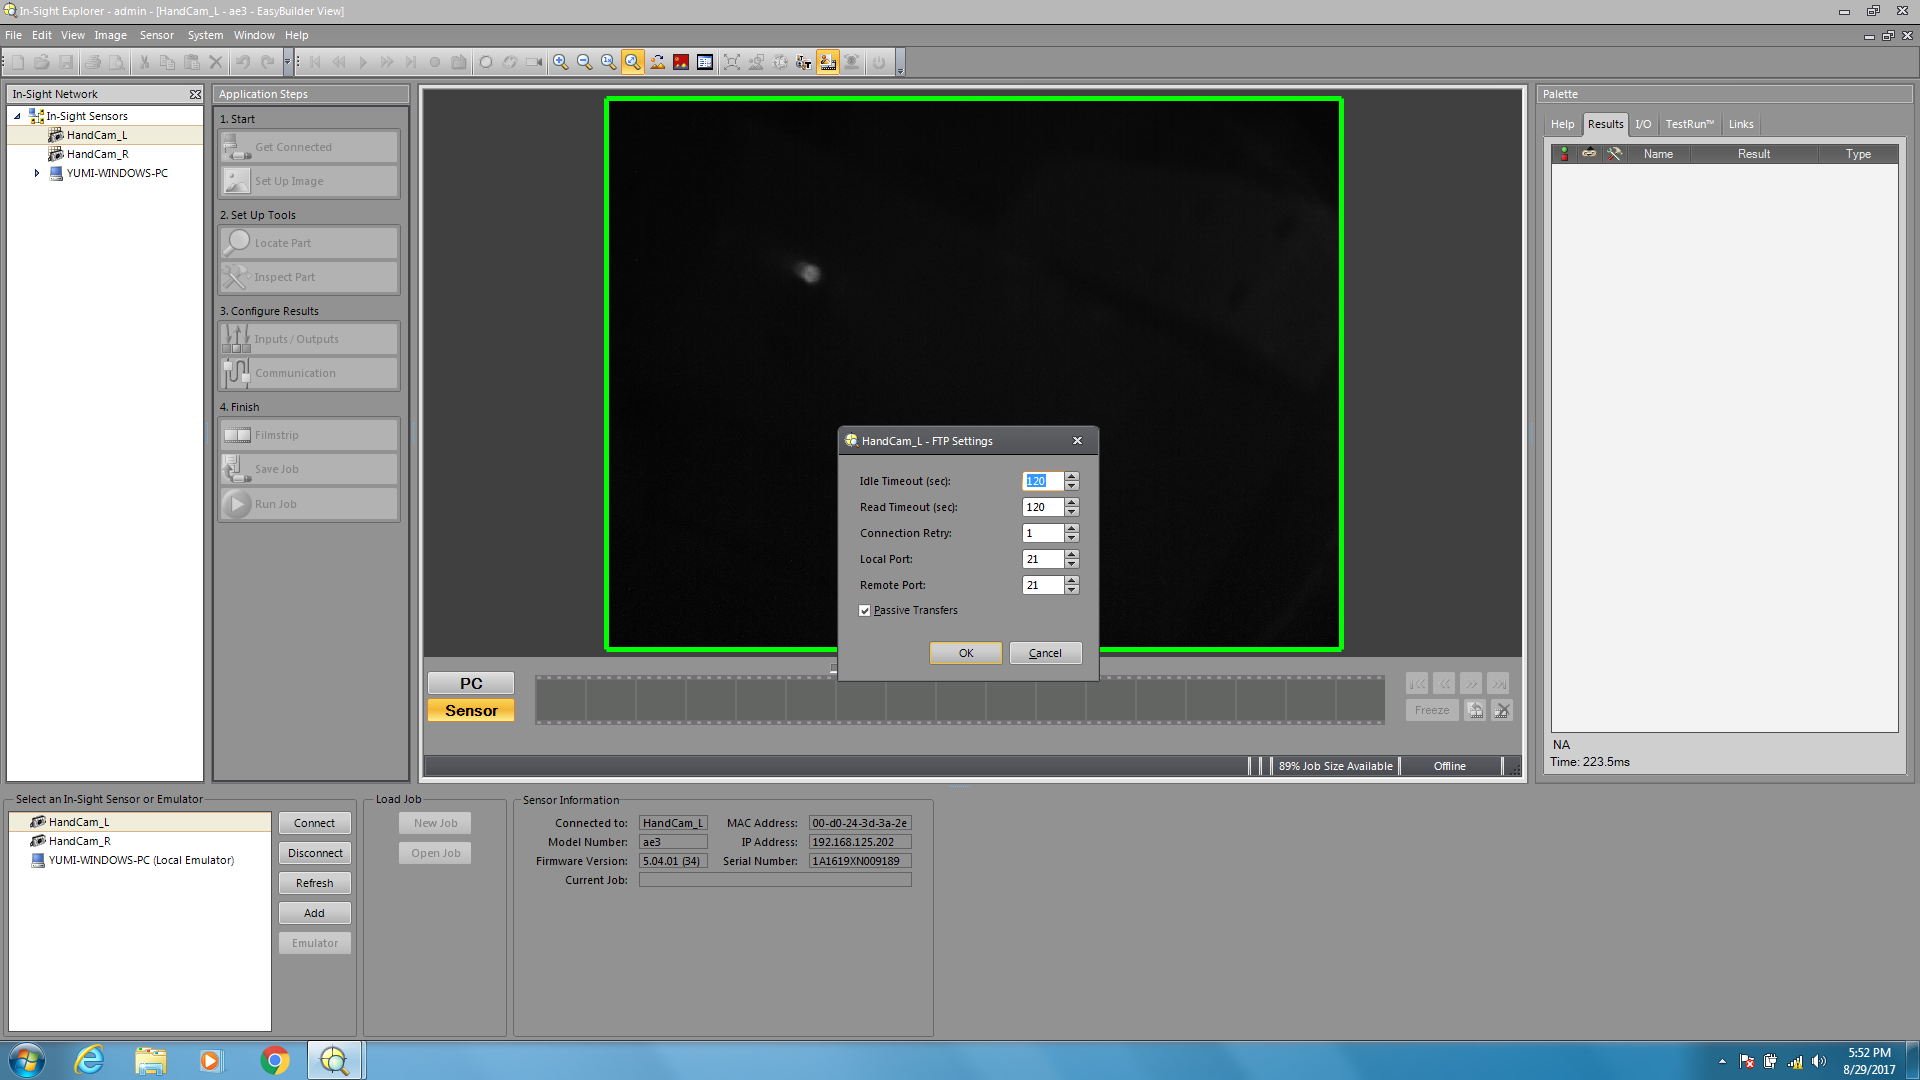
The gripper cameras firmware can be a bit picky regarding the type of FTP server you are deploying on your remote PC. To prevent any issues, install the latest version of Cognex In-Sight Explorer, run it, and for each camera, click on the "Sensor" menu, then on "FTP Settings" and allow passive FTP transfers:
Once everything is set on RobotStudio and In-Sight Explorer, you should be able to ping both cameras at 192.168.125.201 and 192.168.125.202.
On the remote PC where you want to stream images, run the following command:
sudo iptables -t nat -A PREROUTING -p tcp --dport 21 -j REDIRECT --to-ports 2121
In order to start the FTP server that will receive and stream images from the cameras, run the following command in a terminal:
rosrun yumi_cameras ROS_cameras_FTP_server.py
In a different terminal run the following script to send a periodic trigger to the cameras:
rosrun yumi_cameras rws_continuous_trigger
You should now be able to visualize the images by streaming the topics /yumi/left_cam_image and /yumi/right_cam_image