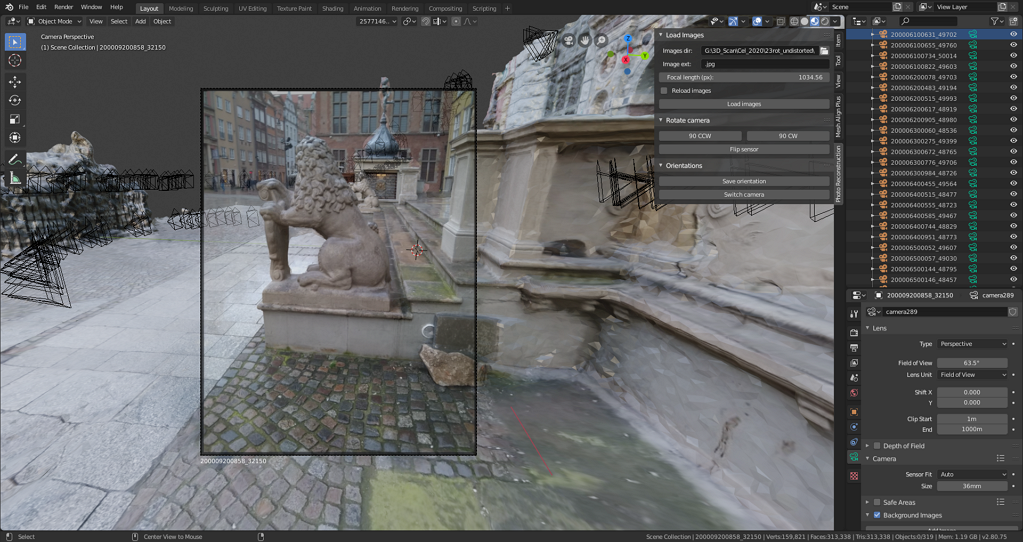
This plugin provide tools to:
- import and setup cameras + photos from photogrammetry software AgiSoft Photo Scan
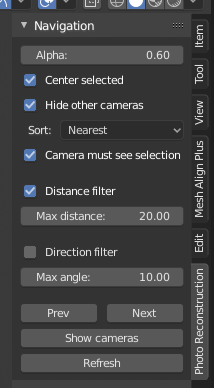
- easy navigate between all imported cameras using hot keys and automatically filtering cameras for current selection only
- some tools to simplify reconstruction process
There is two camera export options available in Photo Scan:
- Export cameras as .xml
- Export .DAE model with included cameras
An .xml file contain all information regarding cameras including focal length and image orientation. Using .xml file you can update existing cameras.
The .dae model contains only camera position/orientation so you has to provide focal length manually.
Both methods work fine but .xml requre less manual setup
At Photo Scan:
- export cameras to .XML
- export undistorted images: Export -> Undistort Photos, filename template {camera}.{fileext}
At Blender:
- Open "Photo Reconstruction" panel -> Import camera. Choose .xml file, press "Load Cameras"
- Open "Photo Reconstruction" panel -> Load Images. Select folder with saved undistorted photos, press "Load Images"
** "Photo Reconstruction" panel is located at the rigth side of 3D view (can be folded under [<] thing)
If your photo set contain both vertical and horisontal captured photos it can be convenient to rotate such cameras to preserve general scene orientation on screen.
Use "Rotate image" section of "Import Camera/Image" tools to adjust image rotation.
This effect is achieved by rotating both camera and image. But this also require to adjust render area for such rotated cameras. If camera sensor/image does not fit scene try to use "Navigation" panel->"Refresh" button
The existing PhotoScan marker export function only exports the marker references not the calculated marker positions. If you create marker with "Place marker" instead of "Add marker" then it will not have reference but still have position.
To export marker positions use the marker_positions.py which wil export markers to CSV file
Import markers CSV file with "Photo Reconstruction" panel -> Import markers
- Navigate through cameras with Ctrl-Left / Ctrl-Right
- Toggle photo visibility with Ctrl-Down
- Toggle imported mesh visibility with Ctrl-Up ("mesh1")
Change photo transparency
Put selection center in the middle of viewport
Hide all cameras except the active one
Criteria to choose next camera. Keep in mind that 'sorted' camera list is not reversable as it is different for each selected camera.
- None: use cameras order within scene data
- Distance: choose closest camera in selected direction
- Camera X/Y/Z: choose camera which have closest X/Y/Z coordinate within current camera space
Distance: filter out too large jumps between cameras while navigating
Angle: filter cameras with view direction too different from current camera
Allow one click export objects from export list.
Silently overwrite selected file by exporting listed meshes in OBJ format. File format is tuned to import back in to photogrammetry software to apply textures.
- Axis: Z up, Y forward
- No materials and UV
- Apply modifiers, write edges, triangulate faces
Camera orientation:
- Save current view orientation with Photo Reconstruction -> Save Orientation
- Switch to camera according selected saved orientation Shift-Home
Miscellaneous:
- Change selected object local axis orientation to current with "Set obj orientation"
- Measure selected edge lentgth with "Edge length"


