run task checklist
Just before starting the task, say every item on this list out loud and respond with "Yes".
(Assembly test setup)
- Is the fixation empty?
- Are the parts in the tray?
- Tray on AGV?
- Is the current assembly status correct? (tray carry? base plate?)
(Taskboard test setup)
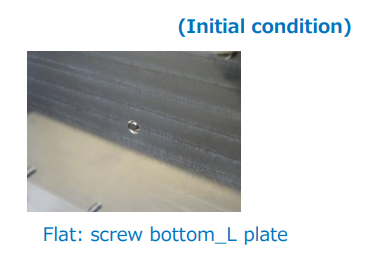
- Is the setscrew screwed into the taskboard correctly and not too deep?
- Are the M3 and M4 screw removed from the taskboard?
- Are the 5 parts in the tray?
- Tray on AGV?
- Is the base fixed?
- Is the setscrew tool aligned with the hole?
- Is the setscrew adapter on the tool at correct distance?
BEFORE PREPARATION PHASE:
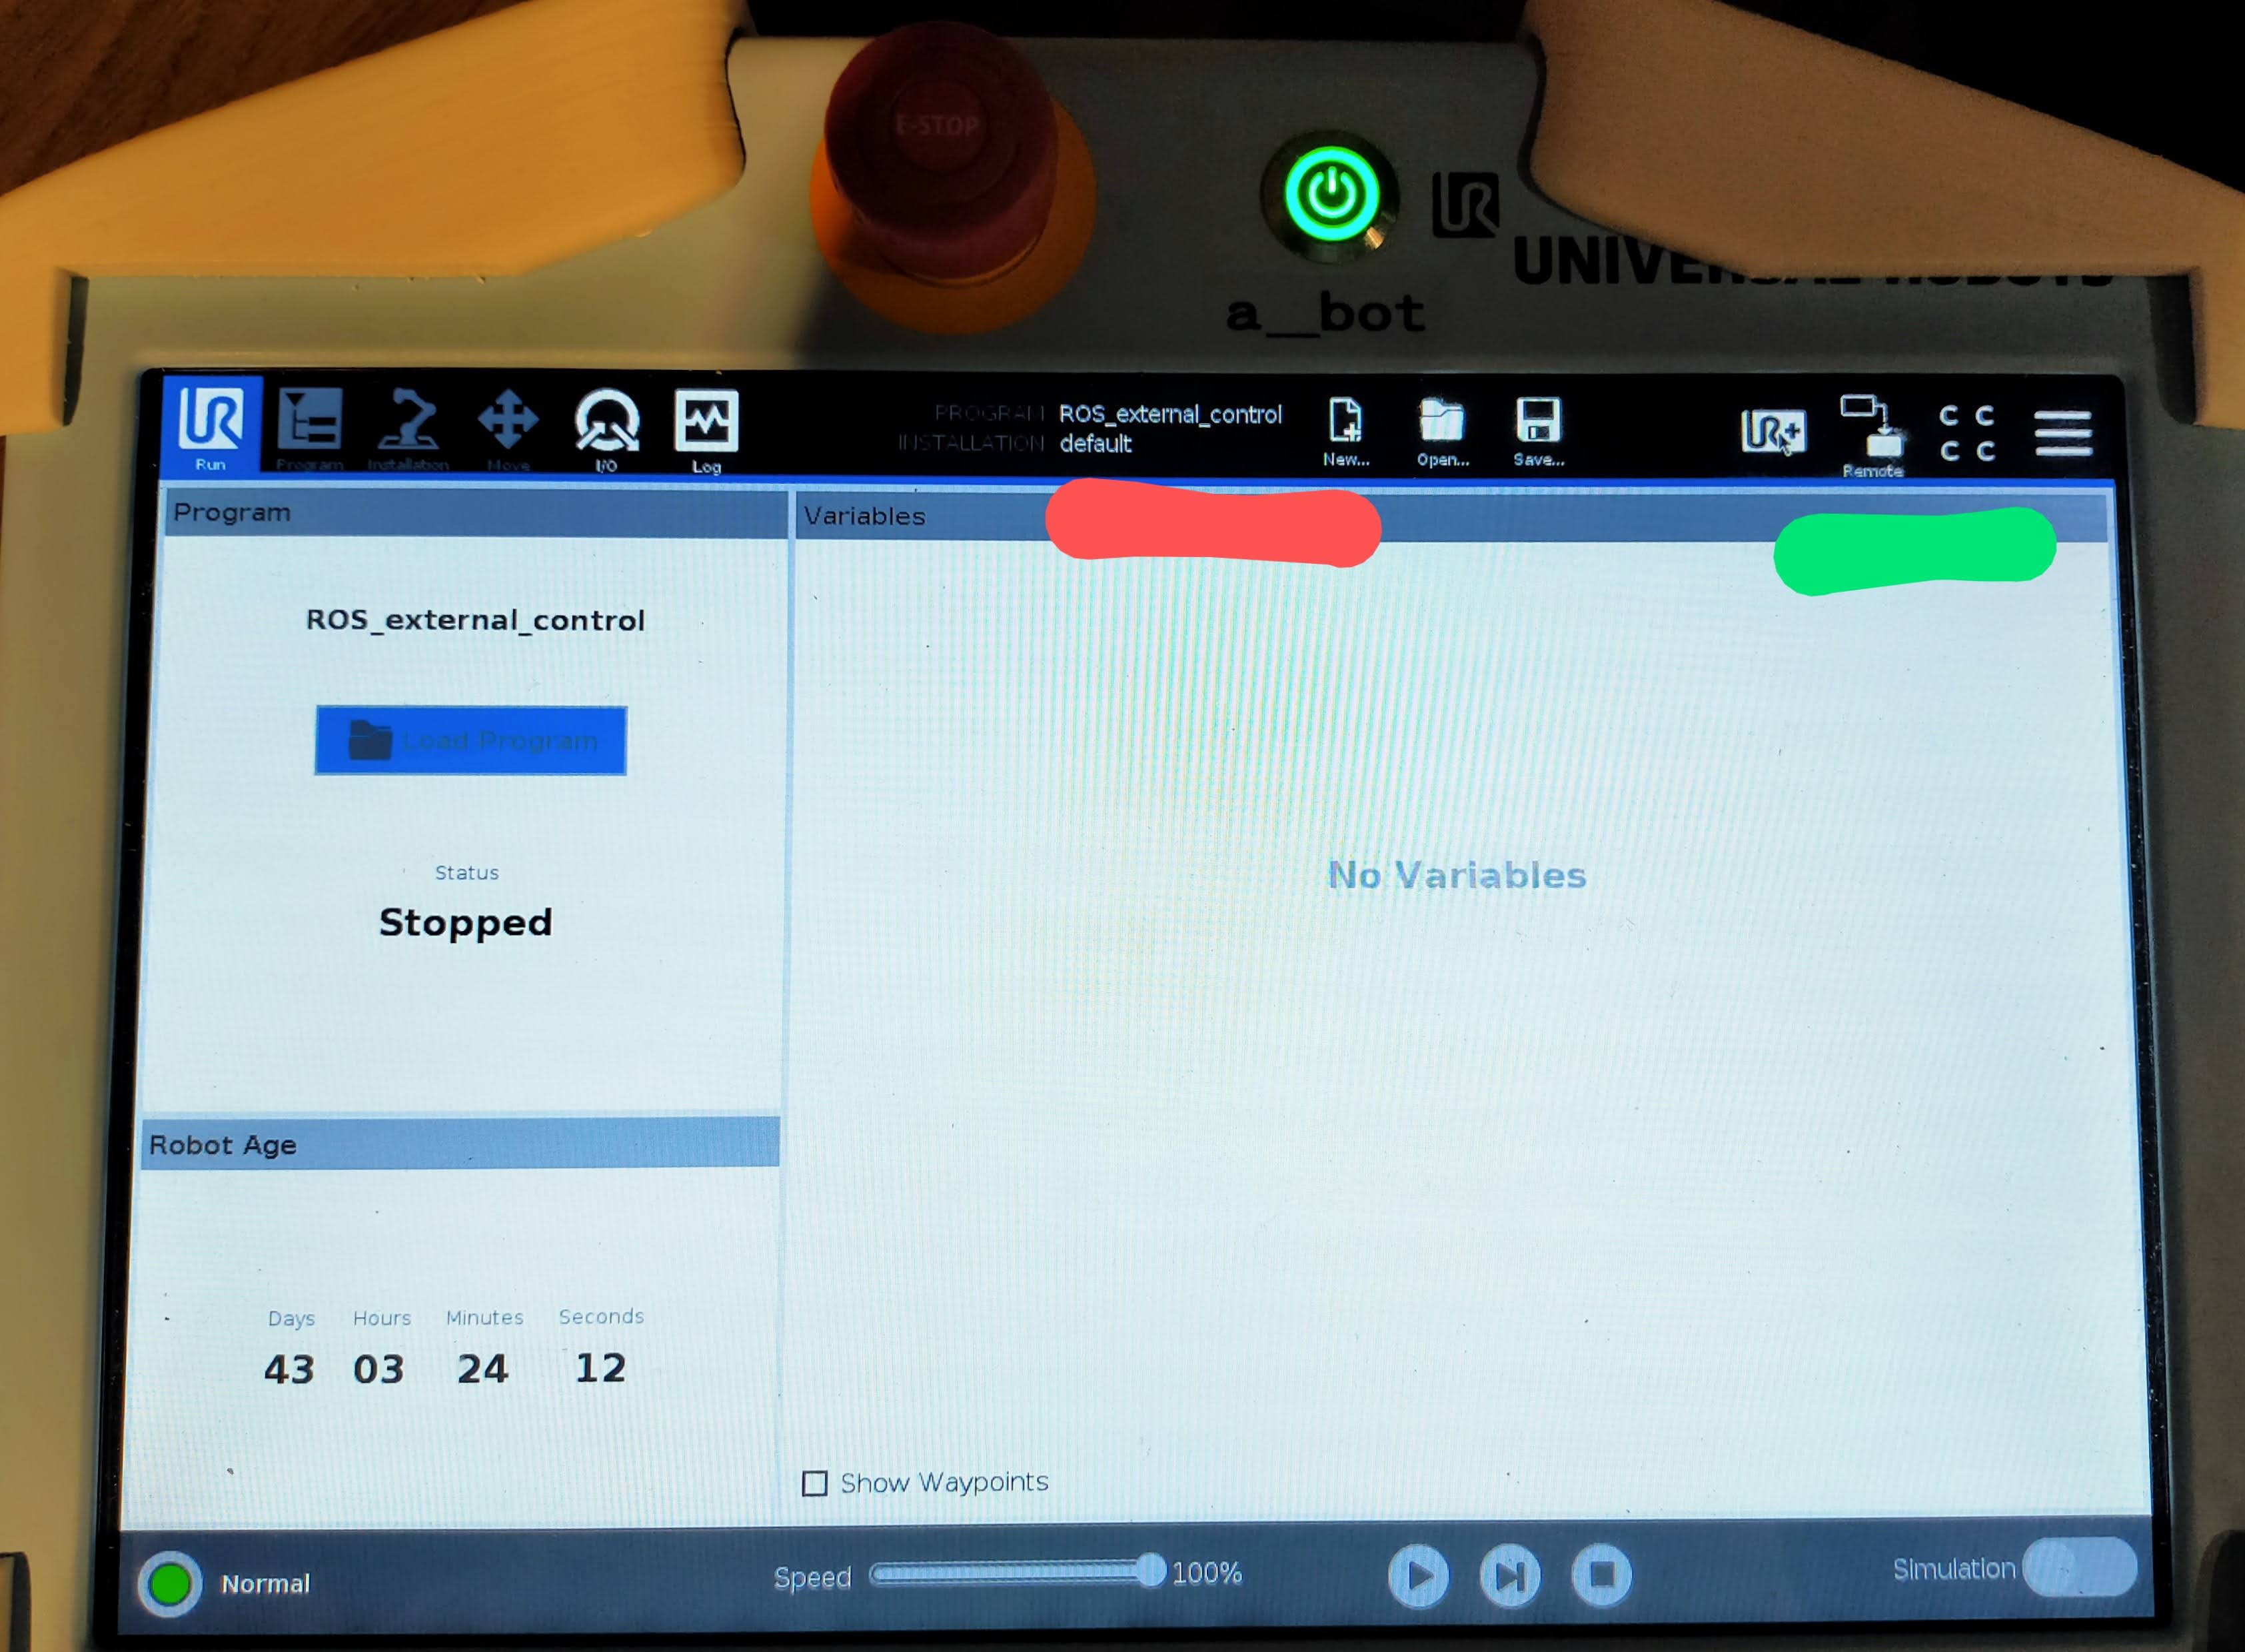
- Are the robots on (is the bottom left button green)?
- Are the robots in Remote Control mode?
- Is speed 100%?
- Are the grippers activated?
- Are the robots in the correct starting position?
- Auto mode on?
- Are all lights in the Rviz panel green?
- Is the vision server running?
- Are all cameras alive?
- Are the screw tools cleanly placed in the holder (touching the magnets and sitting flush)?
- Is the compressor filled and on?
- Is the belt hook tool in the holder and points towards a_bot?
- Is the TV visualization running?
- Are the screw feeders on?
- Are there no screws stuck in the screw feeders?
- Are the M3, M4 reset wrenches ready?
- Are the nuts in the nut holders?
START OF PREPARATION PHASE:
- Check insertion and flush screwing of ALL parts and threads
DURING PREPARATION PHASE:
-
Is the taskboard in the target position?
-
Are the robots in the starting position?
-
Is the tray at the corner of the AGV?
-
Did the AGV go to the target position?
-
Is the timer set? (link)


- Turn on the compressor
- Start up the robots physically via the teach pendant (press On/Off switch, wait until boot is complete, then click on red button in the bottom left to enter the menu to complete transition to
Normal Mode) - Set the UR teach pendants to
Remote Control(near the top right, instead ofLocal Control), pendants should be loading a program calledROS_external_control. - Activate the grippers. Make sure the grippers can open and close fully. This validation uses the UR + menu in the upper right corner
- Power on U2D2 Dynamixel motor controller and Realsense cameras
- M3/M4 screw feeders should be power on
- Start up Terminator via
LAUNCH-TERMINATOR-TERMINAL.sh. This should start up a Terminator window with separated terminals. If this does not work, use Ctrl-E and Ctrl-O to split the window into new terminals. Keep all terminals in one window so all are visible at the same time.
Start up the following processes in order, in separate terminals (remember that pressing tab auto-completes commands):
roscoreroslaunch o2ac_scene_description connect_real_robots.launchroslaunch o2ac_moveit_config o2ac_moveit_planning_execution.launchroslaunch o2ac_skills o2ac_skill_server.launchroslaunch o2ac_vision o2ac_vision.launch-
rosrun o2ac_routines taskboard.pyorrosrun o2ac_routines assembly.py
If everything is working correctly, an Rviz window with a testing panel has started up, where all indicators are green. If the robots' light is red, click the "Activate robots" button and wait for a while. If any other light is red, check the error messages in the terminals and the troubleshooting section. If all else fails, restart all processes and rebuild the workspace.
- Test screw feeder/tool alignment: In the Rviz window, click the button to equip the M4 tool. After it is successfully equipped, click the "Pick" to pick a screw from the feeder. Align the feeder so that the pick is successful, then click the "Unequip" button to put the tool back.
- Repeat the process for the M3 screw tool.
- Place the items in the tray
- Lock/fix the taskboard by using the IO panel in the b_bot teach pendant to activate the pneumatic cylinder or Rviz window
O2AC Setup Panel->Base->Open/Close - Arrange the tools in the holder (from left-to-right: empty, M3, M4, set screw)
- In the terminal running taskboard.py, enter
prepand press enter to let the robot prepare. After executionprep, a_bot and b_bot equip the set screw tool and M3 fastening tool, and move to the position before task start. - a_bot position is front of setscrew hole, b_bot position is on the robot base.
- Place the items in the tray
- Arrange the tools in the holder
Check every item on the list at the top of the page
- Start a timer for 20 minutes (link)
- In the terminal running
taskboard.pyorassembly.py, enterstartand press enter to start the task. No further interaction should be necessary. - Let the robot execute the task as far as possible. If a problem occurs, use a Reset as described in the rulebook and attempt to fix the problem.
- While observing the robot, take note of any problems, issues and things we should fix.
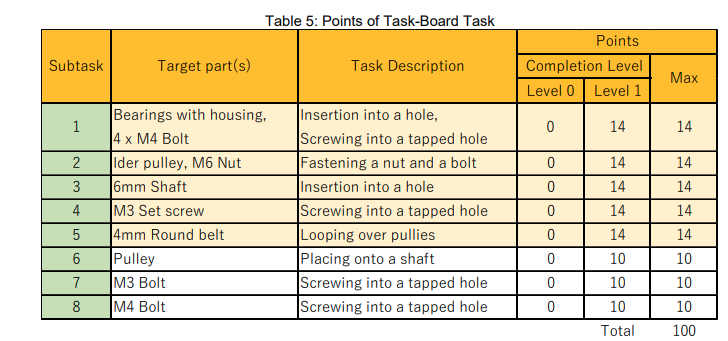
- After the robot is finished or the time has elapsed, count the points achieved and report the results in the Slack.
The current Rulebook is here