Version: 2.0.0
Release date: 2021-08-03
www.pololu.com
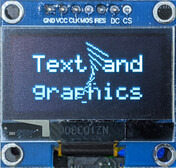
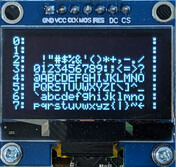
This is a library for the Arduino IDE that allows you to control a 128x64 SH1106 OLED display with an SPI interface. The library supports two modes of operation: drawing arbitrary graphics using a pixel buffer that is compatible with high-level libraries such as the Adafruit GFX Library, and efficiently writing blocks of text to the screen using a built-in LCD-style font. There are several text formats available, and text can be combined with pixel graphics, making it easy to achieve a variety of effects.
If you are familiar with the
PololuHD44780 LCD library,
it should be easy for you to get started with the text mode of this library or
to port your existing applications to it, since it provides the same clear,
gotoXY, write, print, and loadCustomCharacter functions.
For advanced applications, you can customize the low-level hardware access functions, for example if your SPI pins are shared with other peripherals that you must disable during communication.
This library should work on any Arduino-compatible board.
This library is intended for the following Pololu products:
You will need to connect your Arduino's GND pin to the ground pin of the display module, and you will also need to provide an appropriate power source to the display. Consult your display's documentation to learn how to power it.
Consult your display module's documentation to see what voltage levels its I/O pins require, and add level shifters if your Arduino I/O voltages are outside of that range.
Choose two I/O pins of your Arduino and connect them to your module's CLK/SCL/D0 (clock input) pin and its MOSI/MOS/SI/D1 (data input) pin, using level shifters if required.
If your module is configured for 4-wire SPI mode, choose another I/O pin and connect it to your module's DC/A0 (data mode / not command mode) pin, using a level shifter if required.
If possible, chose another I/O pin and connect it to your module's RES (reset) pin, using a level shifter if required. This pin is optional, but connecting it will make this library more reliable because it will be able to reset the OLED to known state.
You can also connect another I/O pin to your module's CS (chip select) pin. This is optional, but it allows you to use the clock and data pins for other purposes while you are not updated the OLED.
You can install this library using the Arduino library manager:
- In the Arduino IDE, open the "Tools" menu and select "Manage Libraries...".
- Search for "PololuOLED".
- Click the PololuOLED entry in the list.
- Click "Install".
If this does not work, you can manually install the library:
- Download the latest release archive from GitHub and decompress it.
- Rename the folder "pololu-oled-arduino-xxxx" to "PololuOLED".
- Drag the "PololuOLED" folder into the "libraries" directory inside your Arduino sketchbook directory. You can view your sketchbook location by opening the "File" menu and selecting "Preferences" in the Arduino IDE. If there is not already a "libraries" folder in that location, you should make the folder yourself.
- After installing the library, restart the Arduino IDE.
Several example sketches are available that show how to use the library. You can access them from the Arduino IDE by opening the "File" menu, selecting "Examples", and then selecting "PololuOLED". If you cannot find these examples, the library was probably installed incorrectly and you should retry the installation instructions above.
For complete documentation of this library, see https://pololu.github.io/pololu-oled-arduino.
In particular the documentation of the PololuSH1106Main class gives a good overview of how the library works and lists all the functions you can call to display graphics or text.
- 2.0.0 (2021-08-03): Changed 10x4 layout mode to 11x4 to make better use of the available area.
- 1.0.0 (2021-07-23): Original release.

