Plugin integration guide
As the initial step, please clone the git repository to download the XVPDemo project containing the XVP plugin using the following link:
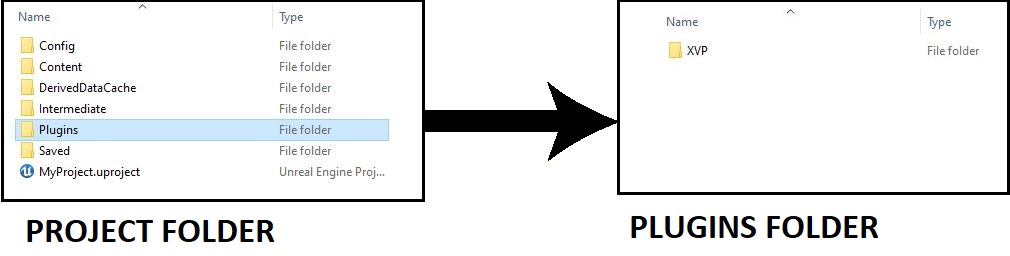
To install the XVP plugin, copy the plugin folder from the XVPDemo project (containing the XVP.uplugin file) to your project's Plugins folder and then restart the editor.
Visual Studio is required to use the plugin in the source form, if it's missing the editor will fail to launch with a "modules missing" error message. Recommended Visual Studio versions:
- Visual Studio 2022 for Unreal Engine 5
- Visual Studio 2019 for Unreal Engine 4 (VS2022 has 2019-compatible build tools which might work as well)
We can also provide you with a link to download a precompiled version of the plugin. This way you can launch the editor with the plugin even without Visual Studio.
Using the Git version is recommended over using the precompiled binaries as they have a lot limitations:
- Only launching the editor will work without the compiler installed. Packaging the project will still require it.
- They support only the Development and Shipping configurations (trying to use DebugGame will likely require the compiler anyway).
- They can only be used with the exact Unreal Engine version they were compiled for. This is indicated by the distribution name, for example
XVP_Plugin_b2021.08.75_UE4.26.2is a build for Unreal Engine 4.26.2 and cannot be used with any other version. The engine version we use depends on our internal needs and might change without warning. - They only support 64-bit environments.
- They're only provided on demand, whereas Git version is always up to date.
To install the XVP plugin, copy the plugin folder to your project's Plugins folder and then restart the editor. The plugin folder can be found:
- In the source version: inside XVPDemo project (
XVPDemo/Plugins/XVP) - In the precompiled version: inside the distribution folder (
XVP_Plugin_<version>/XVP)
The correct folder has an XVP.uplugin file inside.
To update the plugin you must close the editor and first remove the entire XVP folder from Plugins, and then copy the new one. Otherwise the project might fail to compile or work properly.
You can enable or disable the plugin through the Plugins window ("Settings" -> "Plugins" -> "Project" -> "Physics"):

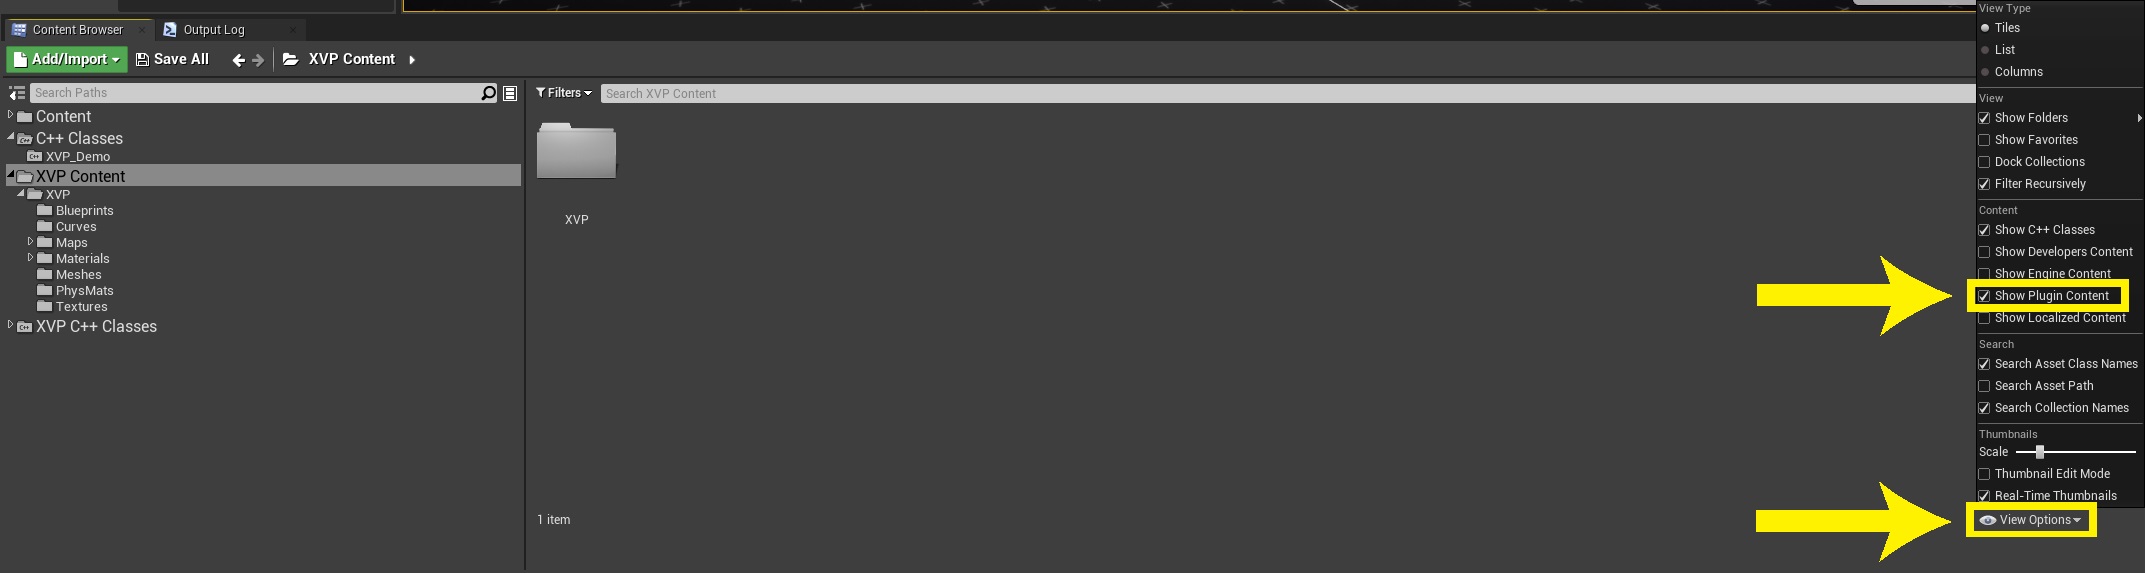
To make the plugin content visible, press "View Options" in Content Browser, then toggle on "Show Plugin Content":
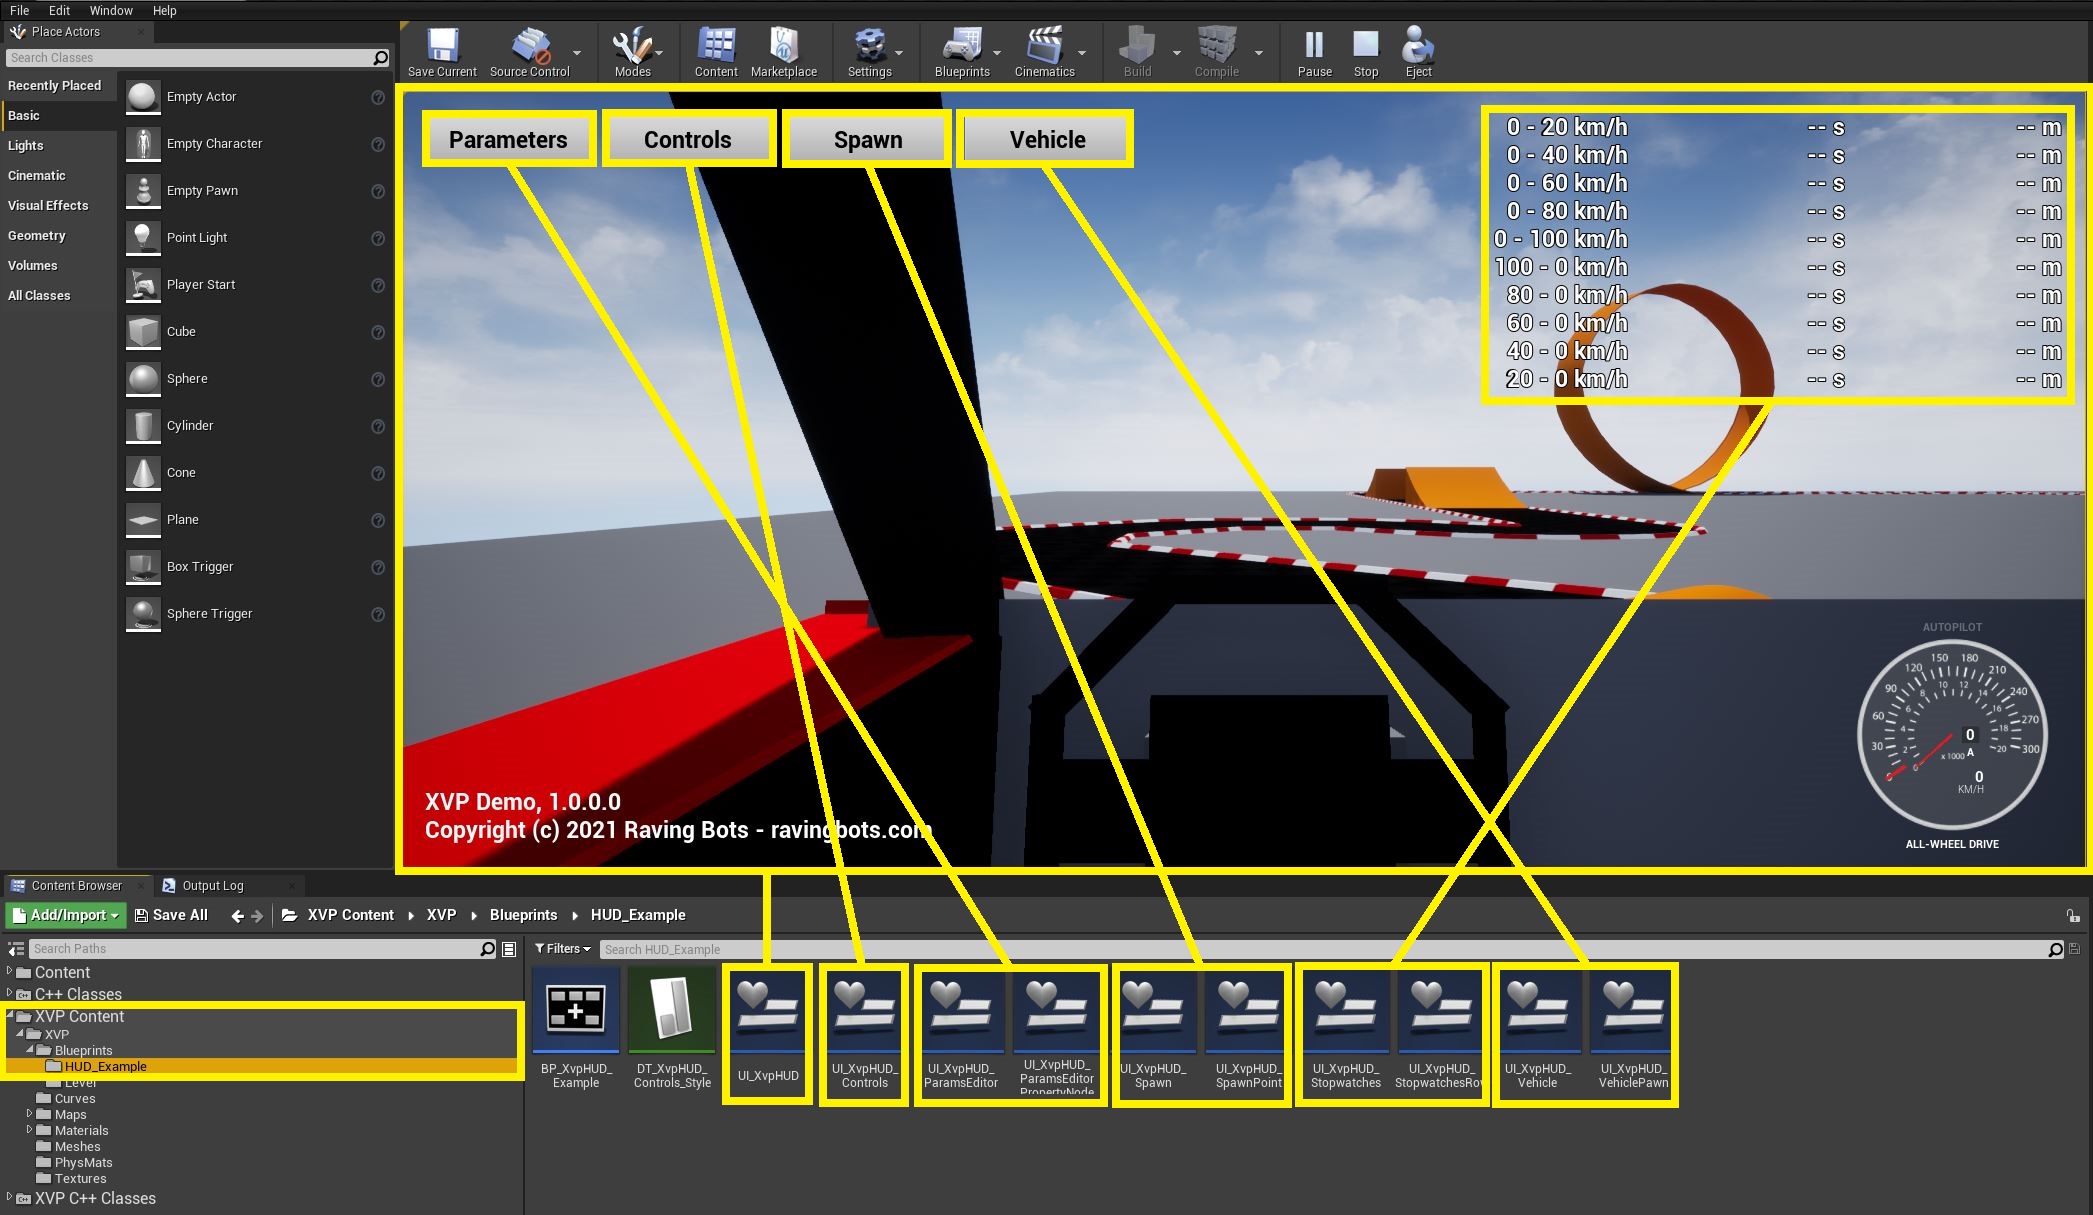
To test the plugin with the example content:
- Copy the contents of
Plugins/XVP/Config/ExampleInput.inito your project'sConfig/DefaultInput.ini(if you already have mappings, you can append the lines at the end of the each section instead of overwriting the entire file) - Open the
LV_XvpDemomap - Set the HUD class in your GameMode to
BP_XvpHUD_Example - Set the pawn class in your GameMode to
BP_XvpPawn_ExampleRedorBP_XvpPawn_ExampleBlue - Start the game

Alternatively you can add the the BP_XvpWorld_Example blueprint to your own map.
NOTE: the plugin includes several example assets that you can use as a base for your own. To do that, always duplicate them into your project Content folder. While the engine might let you edit them inside the plugin, you will risk losing your changes on plugin updates.

The plugin contains several source modules:
-
XVPis the core ECS framework and simulation code -
XVP_DirectInputis the DirectInput integration that enables steering wheel input and Force Feedback support (see also I/O system) -
XVP_UIis the example UI code that provides a parameters editor and a simple HUD -
XVP_Utilsis the support code for other modules -
XVP_Editoris the Unreal Engine editor integration module
The project also uses several open-source libraries:
-
EnTTis used as the core of the ECS framework -
Taskflowis used to implement parallel execution of the ECS jobs -
MSGSLis a utility library that provides several useful types that aren't available in the C++17 standard library
The simulation is managed entirely by this actor, and it must be added to the world before any XvpPawns are spawned. This is where the entity registry lives, and where the execution of the ECS systems takes place.
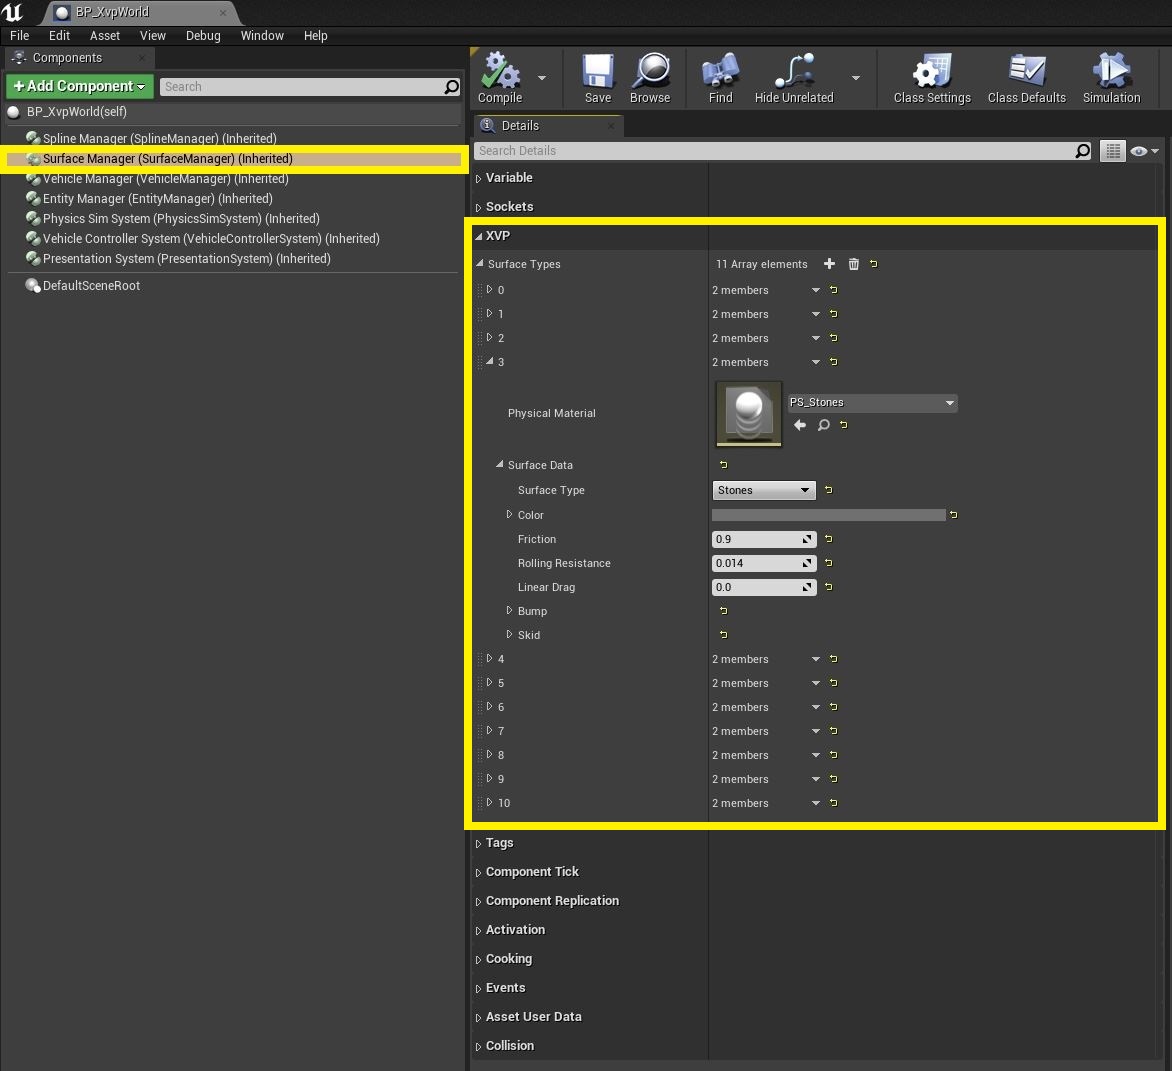
The class constructor already adds necessary components to the actor. In the blueprint there are 4 things of interest that can be changed to suit the project:
"Surface Manager" contains a list of surface types (friction, rolling resistance, bump, skid etc.). The example blueprint contains the standard definitions that use the included physics materials.
"Vehicle Manager" contains a list of vehicle pawns and theirs displayed names. This is used only by the example UI code, and can be safely ignored if you have your own.

"IOManager" contains a list of I/O binding library assets to be used. See I/O system for details.
TODO: screen
Additionally on the XvpWorld itself there's are few properties that configure the simulation behaviour:
- "Max Parallelism" that determines how many worker threads are used for the ECS simulation. Two special values are 0 (uses the number of cores - 1) and 1 (which runs all jobs on the game thread and doesn't use the Taskflow library at all)
- "Steering Wheel Config" that configures how the steering wheel I/O behaves (input rotation range and output force scales)

TODO: screen
The simulation looks for the IXvpPlayerControllerIO interface on the pawn's controlling AController to get the input and send Force Feedback state to the device. Your AControllers must implement this interface to be usable with XVP (both player and AI ones). For convenience we provide AXvpPlayerController and AXvpAIController that implement the default boilerplate. See I/O system for the details on how to use them.
The example UI code also uses the IXvpPawnUI interface and the FXvpPawnUpdateContext class to interact with the ECS system. The pawn has to implement IXvpPawnUI if you want to use the included HUD classes or blueprints, otherwise they'll be non-functional. This interface is optional otherwise.
If you don't have any special requirements for the pawn class, you can simply use the AXvpPawn actor as a base. The included example pawn blueprints inherit from this class.
See Configuring a new vehicle model for the blueprint documentation.
The plugin includes a few classes that implement a simple HUD, a runtime parameters editor window and a stopwatch widget (for measuring acceleration and deceleration).
Using these classes and blueprints is entirely optional. You can safely ignore this if you want to use your own UI. Reading the source should give you an idea on how to extract HUD information from the simulation.
Most of the UI is implemented in native code with blueprints providing layout and bindings:
-
BP_XvpHUD_Example(AXvpHUD) is the example HUD actor -
UI_XvpHUD(AXvpHUDWidget) implements the main HUD: here you can find buttons opening various windows, the code that manages visibility of those, and the general informational widgets -
UI_XvpHUD_Controls(AXvpControlsWidget) implements the I/O controls mapper (see I/O system) -
UI_XvpHUD_WheelBinding(AXvpWheelBindingWidget) implements a single row in the I/O controls mapper (see I/O system) -
UI_XvpHUD_DashboardGauges(AXvpDashboardGaugesWidget) implements the vehicle dashboard -
UI_XvpHUD_Multiplayeris the simple multiplayer host/join menu for testing -
UI_XvpHUD_ParamsEditor(AXvpParamsEditorWidget) implements the vehicle parameters editor. The tree is constructed dynamically insideAXvpHUDWidget::UpdateParametersmethod -
UI_XvpHUD_ParamsEditorPropertyNode(AXvpParamsEditorPropertyWidget) implements the UI for a single node in theTreeViewused inBP_XvpHUD_ParamsEditor -
UI_XvpHUD_Spawn(AXvpSpawnWidget) implements the spawn selection window. To add new a spawn points add aAXvpSpawnPointactor to the map (which inherits fromAPlayerStartand contains some extra information from the UI) -
UI_XvpHUD_SpawnPoint(AXvpSpawnPointWidget) implements the UI for a single row on the spawn point list -
UI_XvpHUD_Stopwatches(AXvpStopwatchesWidget) implements the UI for stopwatches widget -
UI_XvpHUD_Trailer(AXvpTrailerWidget) implements the UI for spawning trailers. To add a new trailer add it toVehicleManagerin theXvpWorldblueprint -
UI_XvpHUD_TrailerActor(AXvpTrailerWidget) implements the UI for a single row on the trailer list -
UI_XvpHUD_Vehicle(AXvpVehicleWidget) implements the vehicle selection window. To add a new vehicle add it toVehicleManagerin theXvpWorldblueprint -
UI_XvpHUD_VehiclePawn(AXvpVehiclePawnWidget) implements the UI for a single row on the vehicle list
Parts of the parameters editor are implemented entirely in native code using Slate. You can find this code in XvpParamsPropertyWidgets.h.
The project uses Taskflow library to implement parallel execution. If you're targetting platforms that don't support threading, you can change the SetTaskflowEnabled() invocation in the XVP.Build.cs file to skip Taskflow compilation altogether.