Here's the parts I used to construct this. I'm linking to Adafruit, who runs out of stock a lot, but there should be equivalent parts on Amazon or what have you.
- Raspberry Pi Zero W
- Micro USB Host
- HDMI Mini Adapter
- HDMI Cable
- 5V 2.5A MicroUSB Power Supply
- GPIO Headers - for a solderless version see these GPIO Hammer Headers
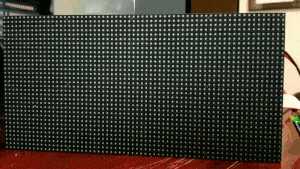
- 64x32 RGB LED Matrix - 4mm pitch
- RGB Matrix Bonnet
- 5V 4A Switching Power Supply
- 16GB MicroSD card
- Flash your MicroSD card with Raspbian Buster Lite. This is a minimal CLI only install of Raspbian (performance is critical for this).
- Put the card into the Zero and boot up.
- Set up WiFi and SSH.
- Change your Zero's password:
passwd - Set up a static IP address for your Zero on your router.
- Confirm that you can SSH into your Zero. You can use PuTTY on Windows or the terminal on OSX/Linux.
- You can now stop using the Zero's power supply, HDMI cable and USB host. We're going to plug it directly into the bonnet, which will provide power. We will now control it entirely through SSH.
- Solder the GPIO headers into the Zero. If you bought the solderless option, check out the Adafruit page for a video tutorial on how to hammer them in.
- Connect the bonnet to the matrix and the Zero:

- Connect the bonnet and Zero. The Zero will be underneath the bonnet.
- Notice the alignment of the matrix in relation to the zero in this photo:
- Connect the ribbon on the matrix to the bonnet
- Connect one of the white connectors to the matrix. We don't need to worry about the other.
- Connect the pitchfork connecters to the bonnet, aligning the colors so they match this photo (red positive/black negative). Tighten with a screwdriver so they don't fall out.
- Plug the Matrix power supply into the bonnet. Yea!

Once the Zero is booted up, SSH in.
-
Disable on-board sound - our primary matrix library needs it:
dtparam=audio=offin/boot/config.txt -
Disable unnecessary resources like bluetooth to provide performance:
sudo apt-get remove bluez bluez-firmware pi-bluetooth triggerhappy pigpio -
The above tips are from the RGB LED Matrix Troubleshooting section. Other tips are available, but I didn't need any more than those.
-
Install everything:
sudo chmod +x install.sh
sudo ./install.sh
Once your install is complete, go into matrix/bindings/python/samples/ and paste: sudo ./runtext.py --led-gpio-mapping=adafruit-hat. There are other
samples in there too - play around!
If it doesn't work properly, check to ensure your wiring and headers are making good contact. If that doesn't work, check out the RPI RGB LED Matrix library for troubleshooting tips.
Create a Slack app on https://api.slack.com/apps/
- Add a bot user to your app
- Give your bot permissions (under 'Scope' in 'OAuth and Permissions'):
reactions:readusers:readusers:profile:readchannels:read
- Install the app on your team
- Authorize the app
- Add your bot's tokens to
emojiscroller.pylocated underinit: You will need:SLACK_BOT_TOKENSLACK_SIGNING_SECRETSLACK_BOT_OAUTH_TOKEN
We'll use ngrok so that Slack can communicate with our local server.
To start ngrok: ./ngrok http 3000
Copy and paste the https address for your local server, then go to your Slack app and click on 'Event Subscriptions'. Enable events and paste your ngrok https address to the 'Request URL' with /slack/events. Save your changes
Make sure the ngrok server is running and type:
sudo python emojiscroller.py --led-gpio-mapping=adafruit-hat --led-cols=64 --led-rows=32 --led-pwm-lsb-nanoseconds=280
Include these flags every time. These options assume you're using the same matrix hardware as listed above.
Follow the instructions in emojiscroller.py under reaction_added to find your user ID and add that value to the userID variable. Restart emojiscroller.py.
Get your bot to a public channel, then you or someone else give emoji reactions to your messages.
🎉🎉🎉
-
What about custom emojis?
You can certainly add custom emojis, and it will work. To prevent the app from failing to load a missing image, I print out the emoji name if the image doesn't exist.
-
Where did you get your images?
Oh, thanks for asking:
- I got the images from iamcal/emoji-data.
- I created a batch action to convert all files to
24x24with a black background. Because there are over 3,000 emojis, this took over 45 minutes 😆. Image size and transparency is a huge bottleneck when run in conjunction with the Python Slack Events API. - Slack only returns the emoji name instead of an ISO codepoint (like all emoji images everywhere are named). To get around this, I wrote a node script to rename and move all my images based on mapping the ISO name and the
short_name. If you'd like to use a different set of images: Twitter, Google, etc. I put that script up for download as well. - Where are all the skin color emojis? Some system emoji sets don't support this, so it will default to the standard emoji.
-
Why didn't you do X in Python?
This is my first Python project, so I have no idea what I'm doing 😆