Author: Sherif Rahim
Original Post: Link
We are setting up a Wazuh SIEM Homelab to mimic a real-world Windows incident and virus detection scenario by integrating Wazuh with Microsoft Defender.
Start by downloading and setting up the Wazuh OVA from their website and booting it on our VM.
Virtual Machine (OVA) - Download Link
User manual, installation, and configuration guides are here. Download link
Boot or Install Windows 10/11 in the VM as well while at it. Just keep in mind that the Windows should have a fully working Defender (i.e., not debloated).
The default credentials for the Wazuh OVA are wazuh-user:wazuh.
Verify Wazuh Services
The Wazuh services will auto-start upon login. We can double-check it by using the command:
sudo systemctl status wazuh*If any service is shown as inactive or has errors, wait for a while and check its status again. If the status still appears problematic, use this command:
sudo systemctl stop wazuh* && sudo systemctl start wazuh*Retrieve the IP Address for Wazuh
Retrieve the IP address for Wazuh using ifconfig. (Make sure to set both Wazuh and Windows as bridged connections so they can communicate internally).
Enter the IP into your host/main machine, and wait for some time because it takes a little while for Wazuh’s dashboard to load. Once loaded, the login page will appear. The credentials are admin:admin.
Navigate to Endpoint Summary
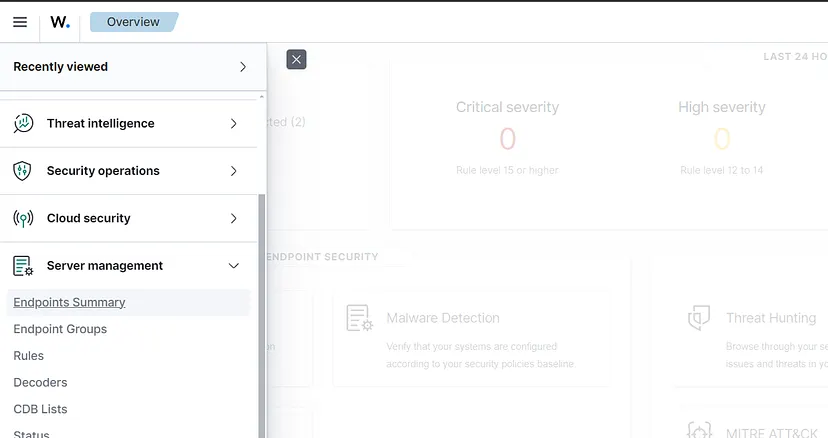
Once logged in, click on the hamburger menu on the top left and select Server Management > Endpoint Summary. On the next screen, we can see the agent list, which is now empty. Click on the Deploy Agent button to open the agent deployment wizard.
Deploy Agent for Windows
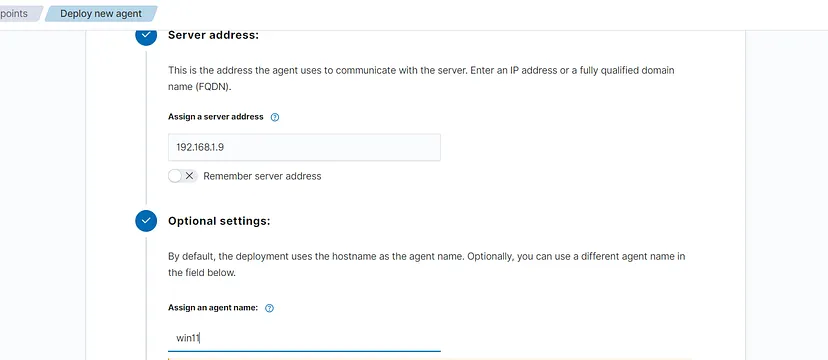
Set the target machine as Windows, name the agent, and enter your Wazuh IP into the Server Address column. Now, the server config command will appear at the end of the page, which you must run on your Windows system to finalize agent deployment (turn on guest additions and clipboard sharing for easy setup).
Configure Agent on Windows Machine
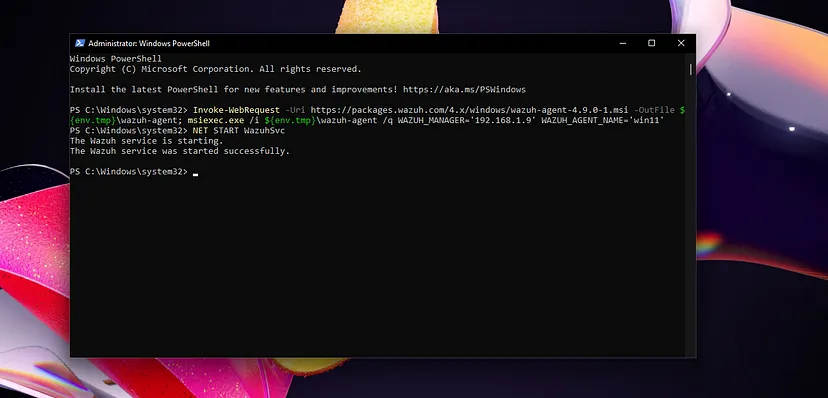
On the Windows machine, open PowerShell as admin and copy-paste the commands shown in the wizard.
After this step, close the wizard. When you go back to the agent list, you will see your agent listed there, showing as active.
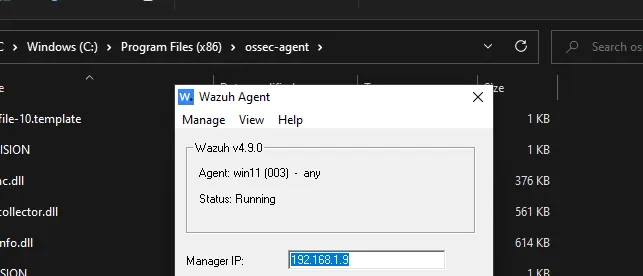
If the agent does not appear as active, manually start/restart the agent by navigating to:
C:\Program Files (x86)\ossec-agent
Run the wazuh32.exe agent and use the Manage dropdown to restart/start/stop the agent.
Integrating Wazuh with Microsoft Defender
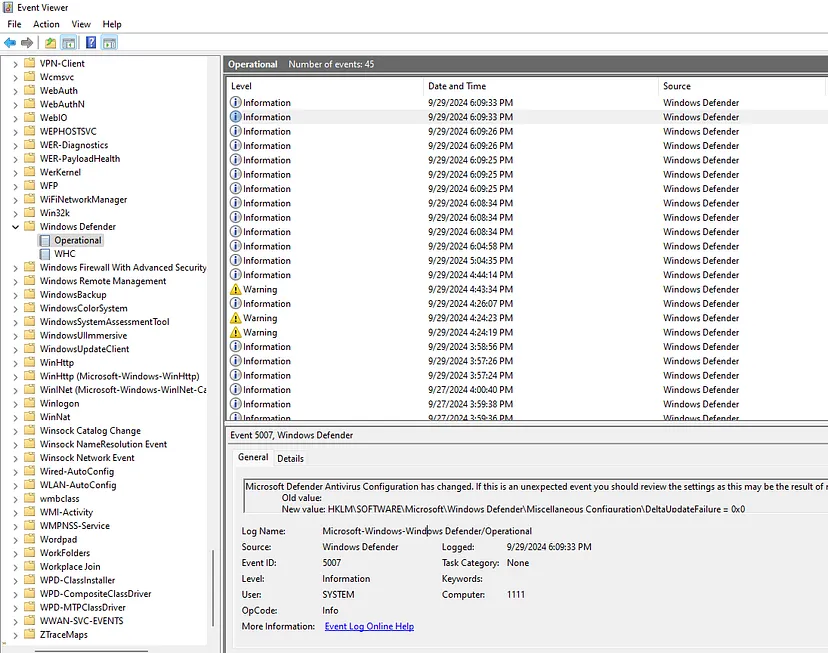
To integrate Microsoft Defender, we need the Defender log ID or log name. To find this, open Event Viewer in Windows and navigate to:
Application and Services Logs > Microsoft > Windows > Windows Defender > Operational Logs
Here, you will find the Log Name: "Microsoft-Windows-Windows Defender/Operational". We will need this to integrate Defender into Wazuh.
Set Wazuh Rules for Defender
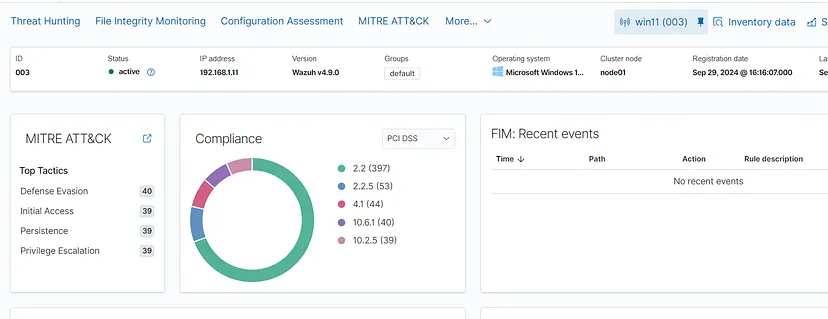
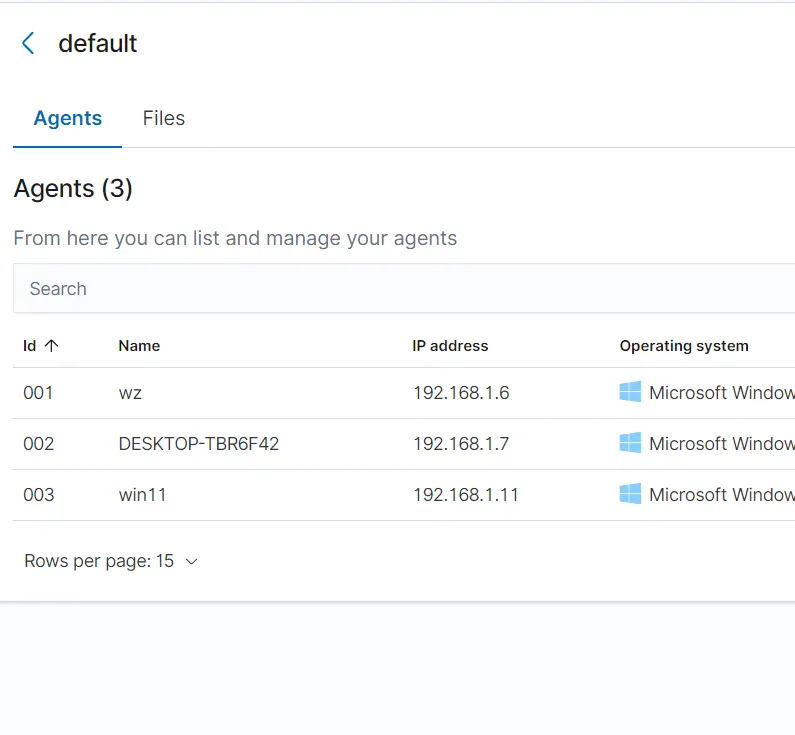
Now, we need to set rules so Wazuh reads from our agent and showcases the logs on the dashboard. From the Wazuh dashboard, click on the agent we created. This will take you to the agent overview page. Click on the group the agent is under, which will likely be defaults.
From here, select the Files submenu. You will see the files associated with the agent, including one named agent.conf. Click on the edit (pencil) button to start writing the rules. Initially, the file will be empty or have zero rules set. For our use, configure it like this:
<agent_config>
  <client_buffer>
    <!-- Agent buffer options -->
    <disabled>no</disabled>
    <queue_size>10000</queue_size>
    <events_per_second>1000</events_per_second>
  </client_buffer>
  <localfile>
    <location>Microsoft-Windows-Windows Defender/Operational</location>
    <log_format>eventchannel</log_format>
  </localfile>
</agent_config>
Save and go back to the agents list page. Select our agent from there and we will be taken to the Overview page, from there select the Threat Hunting Option like this:
Trigger Defender Warnings
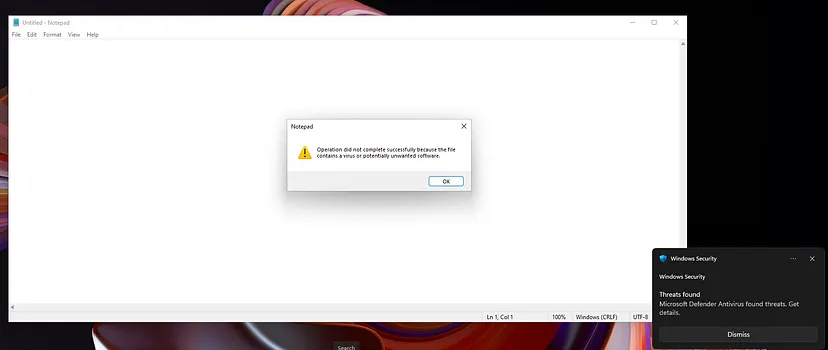
Once the agent is up and running, we can test it by triggering warnings in Microsoft Defender. On the Windows machine, visit EICAR Anti-Malware Test Files or any other Anti-Malware test site.
The EICAR test file has four variants: .com file, .txt file, and two .zip files.
Try to download or open these files, and Defender will trigger warnings for virus detection (you may need to lower the Defender security level to download the files, as they will be flagged as dangerous by browsers and Windows SmartScreen). Alternatively, you can copy the contents of the .txt or .com file and create a .txt file yourself.
Once the virus is detected, head over to Event Viewer and navigate to the same location as before:
Application and Services Logs > Microsoft > Windows > Windows Defender > Operational Logs
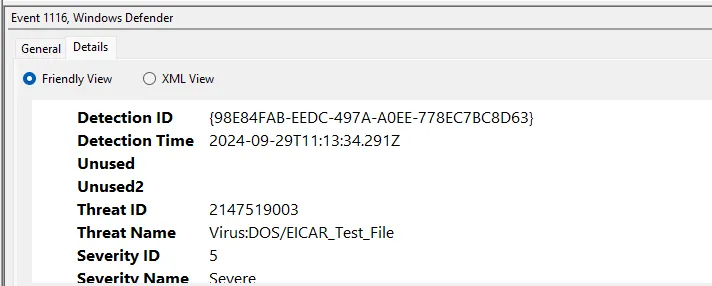
You will see the events logged by Defender
This includes details such as the detection origin, virus path, detection ID, severity, etc.
Verify Wazuh Threat Detection
Head back to Wazuh and check if the threat was logged. On the Threat Hunting page, scroll down to see that the malware detection event was logged seconds after Defender caught it.
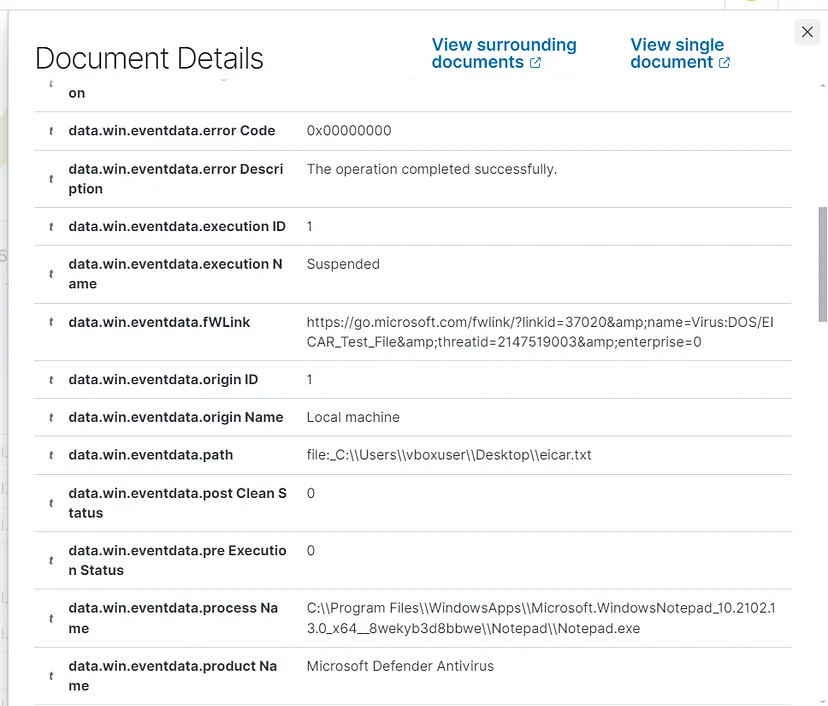
Click on the magnifying glass icon next to the event, and you will see a detailed report showing what the Defender did.
We can see that there is nothing more to be done, Defender already took action: Suspended the file execution and quarantined the file to prevent any further damage.
This way we integrated and made a bridge from Defender to our SIEM Wazuh from which we can easily monitor and have a good detailed view of the events real-time.
NOTE: Defender’s logs are not limited to malware detection — Wazuh can read and visualize any logs on Windows activities. For example, you can check your login attempts and see whether they were successful or not.
By adding more rules, you can customize what Wazuh monitors within Windows, depending on your needs.
