Home
The vsdk-job-service-sample project demonstrates the usage of the Vault SDK job service Interface. The job service interface allows for the creation of custom job processors and execution of asynchronous jobs. These jobs can be triggered as shown in this sample project or on a schedule.
This project will demonstrate the usage of the Vault Job Service to create Custom Job Processors. To do this, a MDL Jobmetadata component will be associated with a custom job processor. This job processor will be run by a trigger executing on an After Insert event.
Custom Job Processors allow SDK extension code to be run asynchronously and can be beneficial in situations require bulk data processing that can cause triggers and actions to run into the memory limit if processed synchronously. Additionally, custom job processors can be used to group related asynchronous tasks. Lastly, custom job processors can be run on a schedule such as on an hourly or daily interval. This interval can be specified via the Jobmetadata MDL component.
 )
)
The project contains two separate vault packages (VPK) in the deploy-vpk directory with the necessary Objects, Triggers and Messages required for this project.
-
Clone or download the sample Maven project vSDK Job Service Sample project from Github.
-
Run through the Getting Started guide to setup your development environment.
-
Log in to your vault and navigate to Admin > Deployment > Inbound Packages and click Import:
-
Locate and select the following file in your downloaded project file:
Deploy vault components: Select the \deploy-vpk\components\vsdk-job-service-sample-components.vpk file.
-
Open the package and expand the Steps section where you can see a list of all the components in the package.
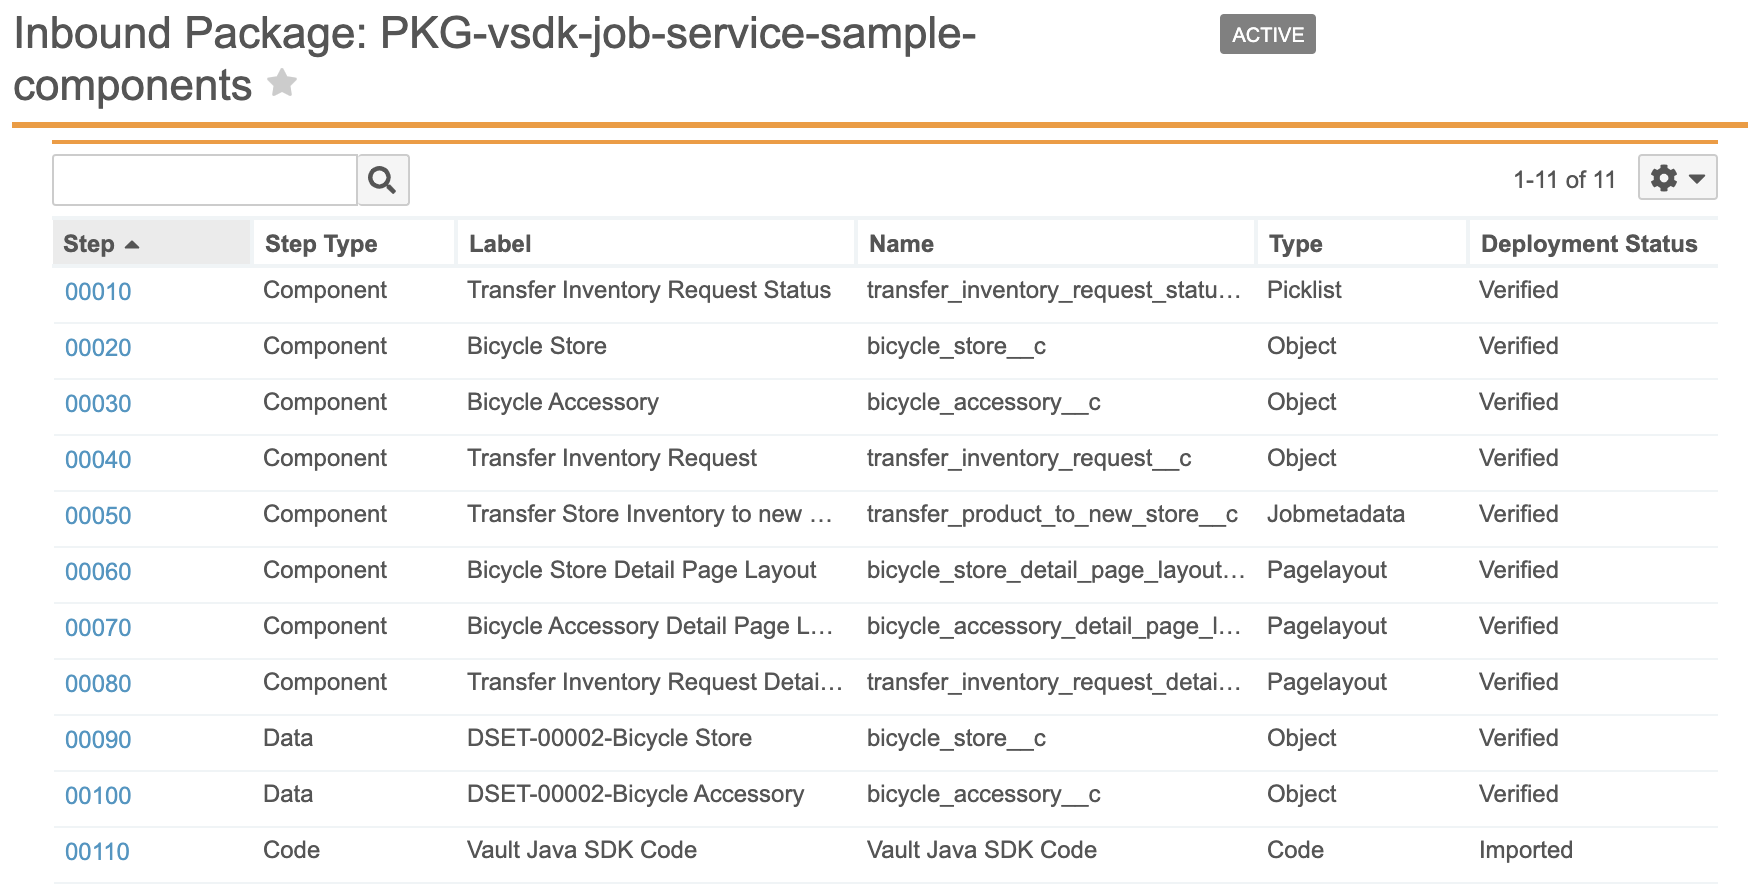
-
From the Actions menu (gear icon), select Review & Deploy. You will notice all of the components will have a Deployment Status of
Verified. -
Click Next followed by Finish to deploy the package. You will receive an email when vault completes the deployment.
-
Repeat steps 3-7 for the vault code:
Custom Trigger code: \deploy-vpk\code\vsdk-job-service-sample-code.vpk file.
Once the packages have been deployed, you will want to review the configuration and understand the normal behaviour so you can observe the effects of the sample code. Any warnings in the deployment logs can be ignored.
Below is a rundown of the included components.
- Bicycle Accessory (bicycle_accessory__c)
- Bicycle Store (bicycle_store__c)
- Transfer Inventory Request (transfer_inventory_request__c)
- Transfer Inventory Request Status (transfer_inventory_request_status__c)
- Bicycle Store Detail Page Layout (bicycle_store_detail_page_layout__c)
- Bicycle Accessory Detail Page Layout (bicycle_accessory_detail_page_layout__c)
- Transfer Inventory Request Detail Page Layout (transfer_inventory_request_detail_page_l__c)
- Transfer Store Inventory to new Store (transfer_product_to_new_store__c)
- Record Trigger: JobServiceSampleRunTransferInventoryRequest.java
- Job Processor: JobServiceSampleTransferProductsToNewStoreJob.java
- Job Metadata (MDL): JobServiceSampleCustomInventoryRequest.mdl
The Jobmetadata component required to setup the job processor can only be created via MDL. This can be done using Postman or any other REST Client. More information about MDL can be found in the Developer Portal.
Start by checking the location of the bike store inventory by navigating to Admin > Business Admin > Bicycle Accessories and clicking the User Action Edit Columns:

Then select the Bicycle Store column and press Save:

You will notice that all the Bicycle Accessories are in the Nu Bicycle Store:

Now, create a new Transfer Inventory Request by navigating to Admin > Business Admin > Transfer Inventory Request and create a new transfer inventory request from Best Bicycle Store to Nu Bicycle Store and press Save as shown in the image below, which will trigger the job service sample code to execute:

Return to Bicycle Accessories by navigating to Admin > Business Admin > Bicycle Accessories, where you will see all the all Bicycle Accessories are in the Best Bicycle Store:
