


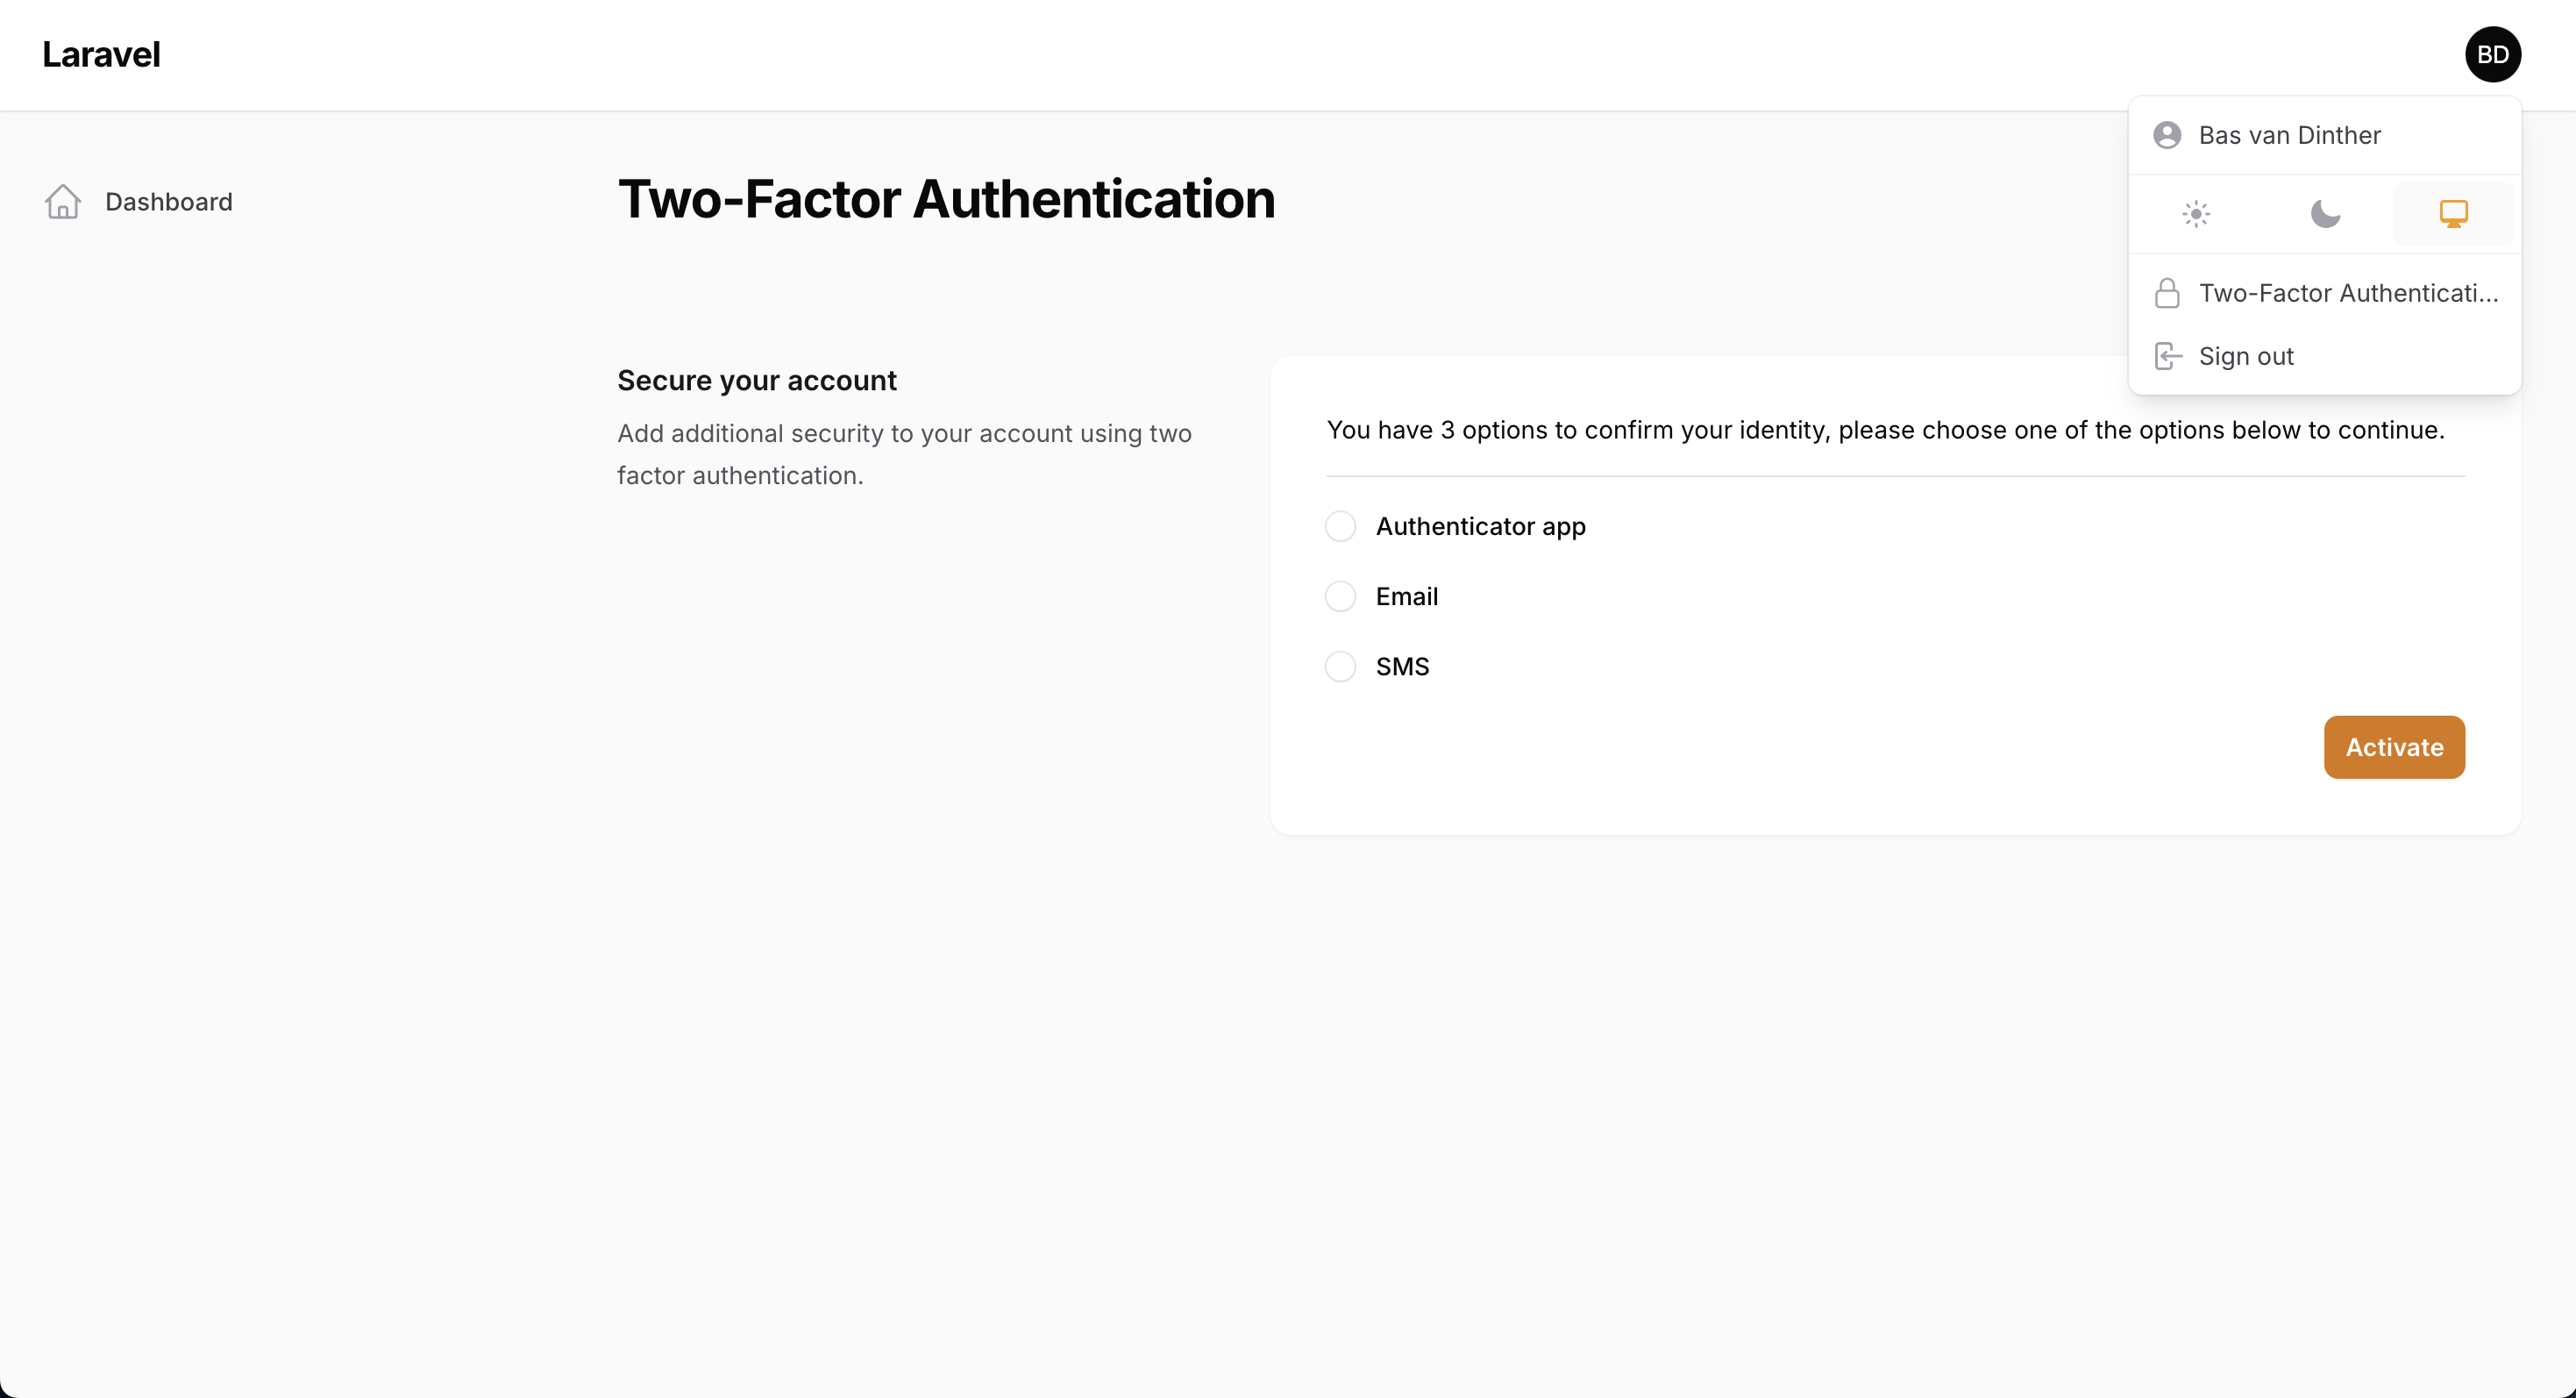
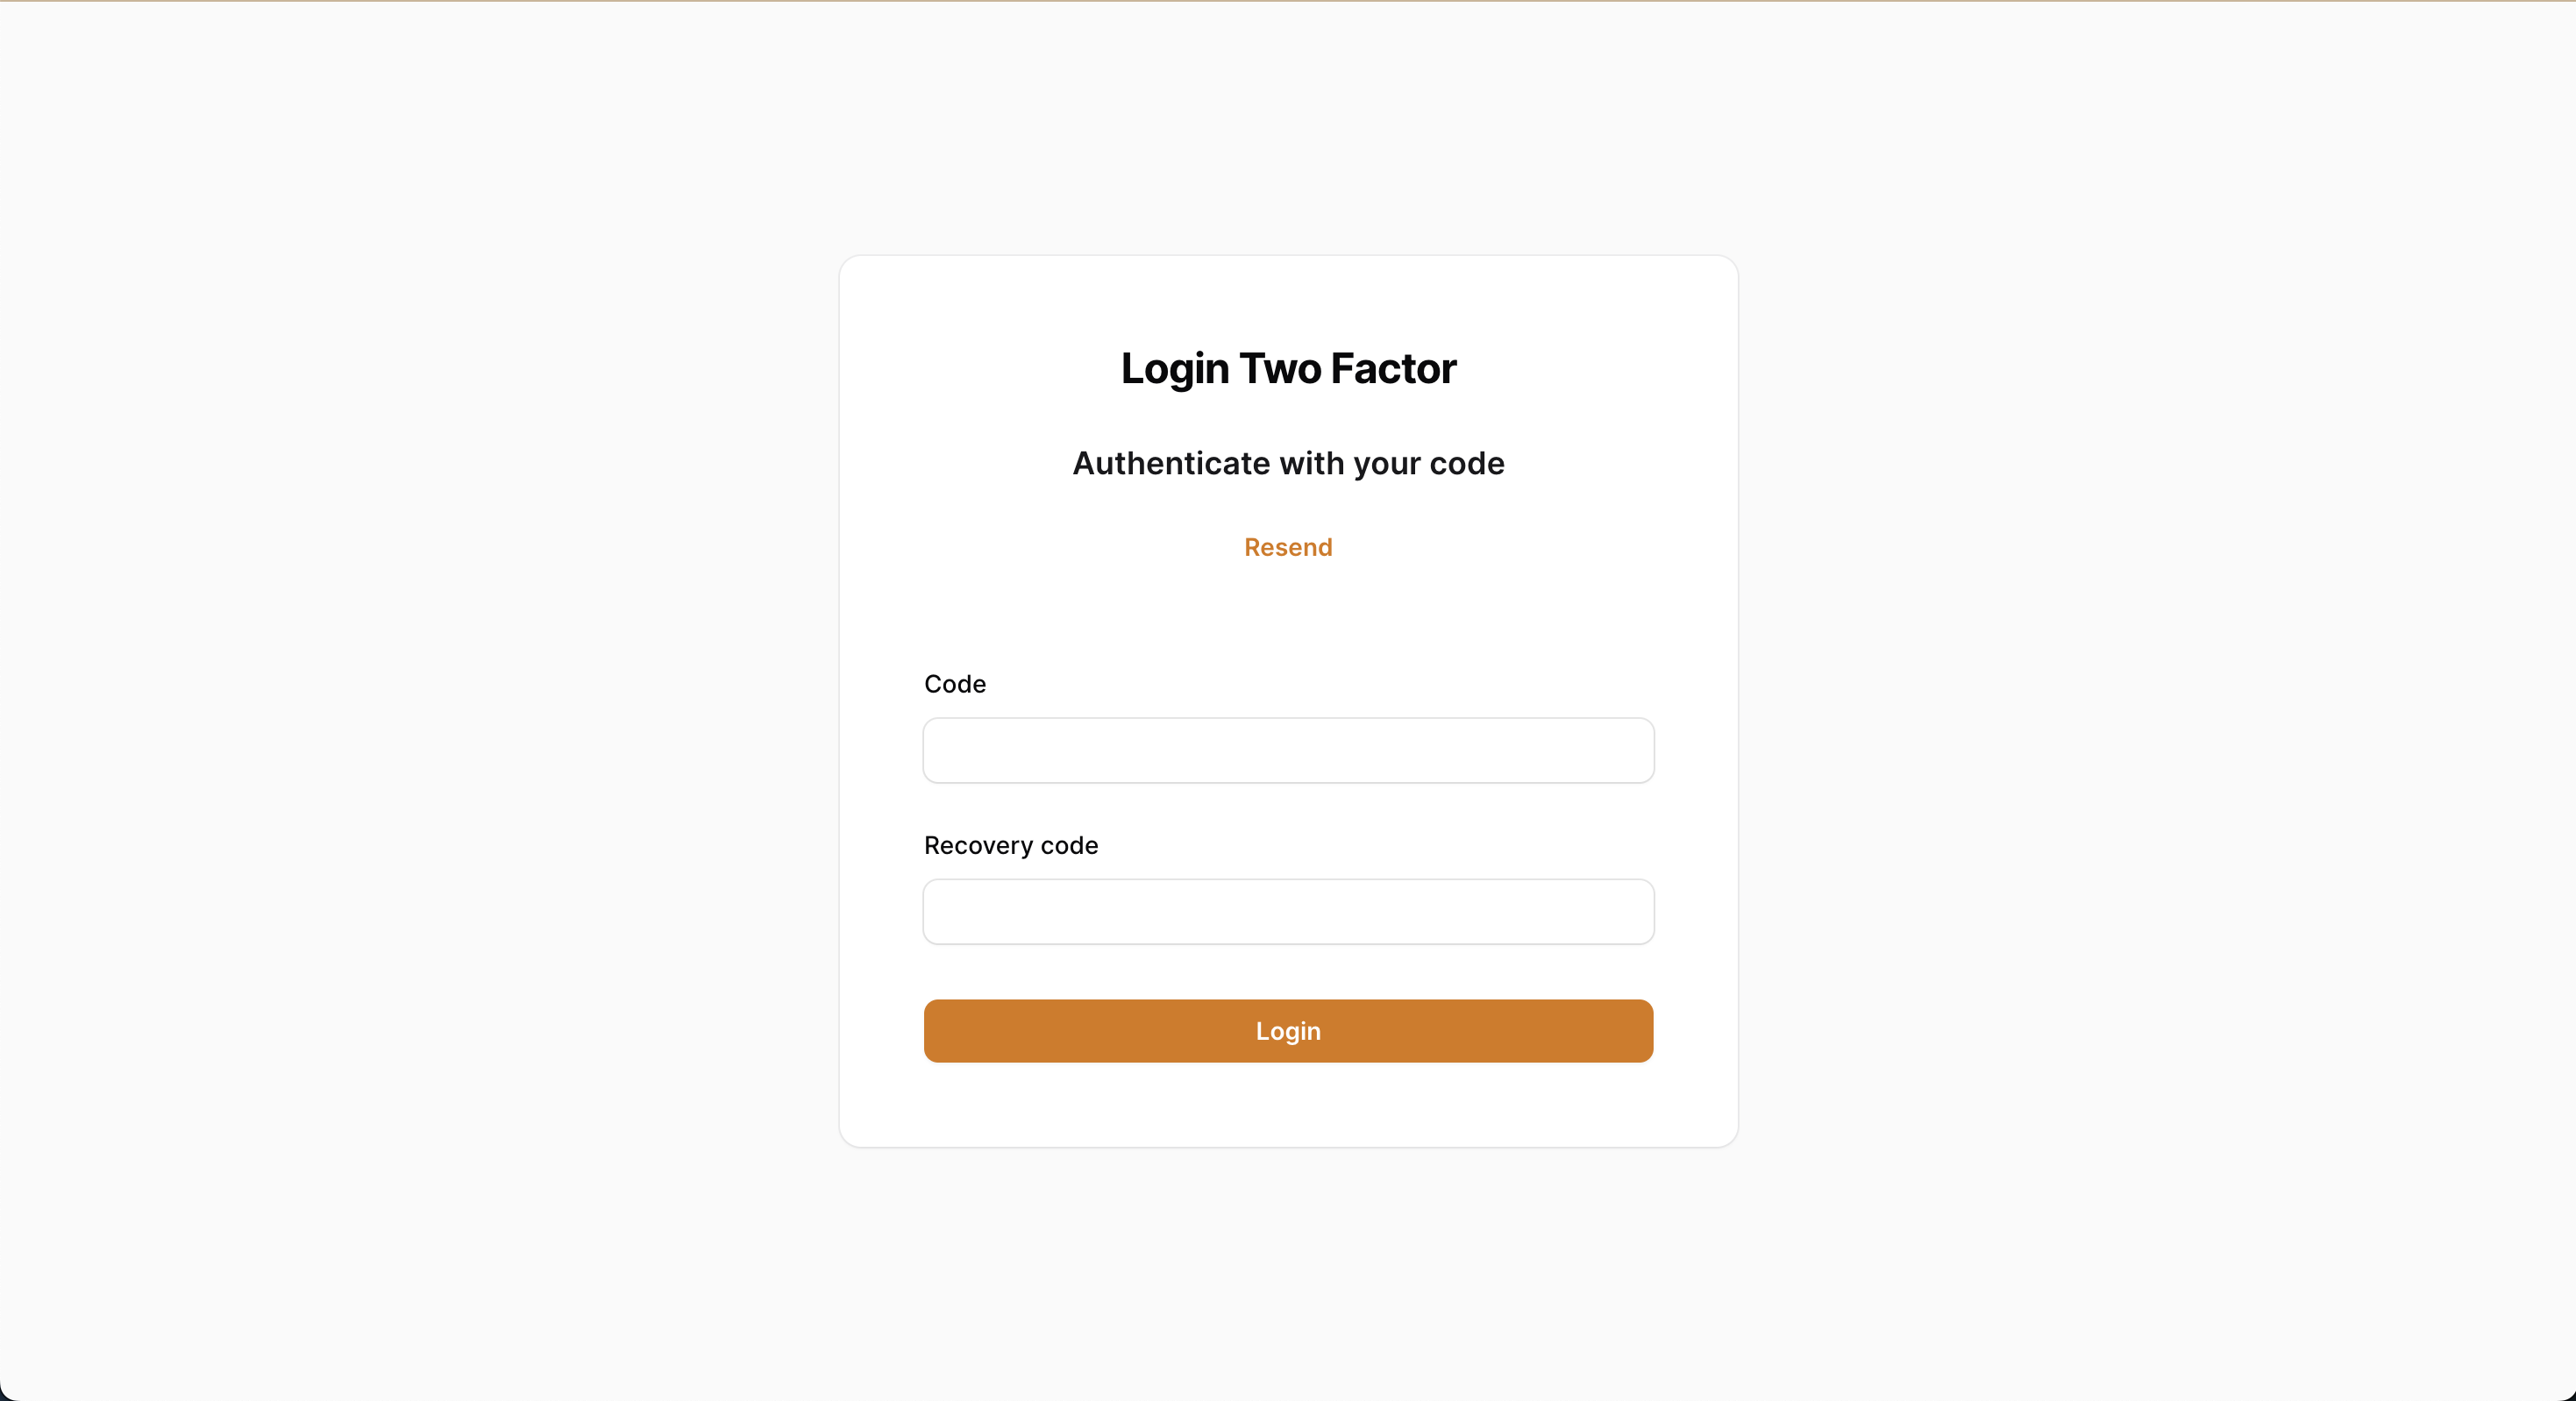
This package adds Two Factor Authentication for your Laravel Filament app, using the first party package Laravel Fortify. We provide the views and logic to enable Two Factor Authentication (2FA) in your Filament app. Possible authentication methods are:
- SMS
- Authenticator app
You can install the package via composer:
composer require vormkracht10/filament-2faIf you don't have Laravel Fortify installed yet, you can install it by running the following commands:
composer require laravel/fortifyphp artisan fortify:installphp artisan migrateYou can then easily install the plugin by running the following command:
php artisan filament-two-factor-auth:installThen add the plugin to your PanelProvider:
use Vormkracht10\TwoFactorAuth\TwoFactorAuthPlugin;

// ...

->plugin(TwoFactorAuthPlugin::make())
Make sure your user uses the TwoFactorAuthenticatable trait:
class User extends Authenticatable implements FilamentUser
{
    use HasApiTokens, HasFactory, Notifiable, TwoFactorAuthenticatable;
    // ...
}
Also define the two_factor_type cast on your user model:
use Vormkracht10\TwoFactorAuth\Enums\TwoFactorType;

// ...

protected function casts(): array
{
    return [
        'two_factor_type' => TwoFactorType::class,
    ];
}
Warning
When using fillable instead of guarded on your model, make sure to add two_factor_type to the $fillable array.
In case you're using Laravel 11, you need to register the event listener in your AppServiceProvider boot method:
use Laravel\Fortify\Events\TwoFactorAuthenticationChallenged;
use Laravel\Fortify\Events\TwoFactorAuthenticationEnabled;
use Vormkracht10\TwoFactorAuth\Listeners\SendTwoFactorCodeListener;

// ...

public function boot(): void
{
    Event::listen([
        TwoFactorAuthenticationChallenged::class,
        TwoFactorAuthenticationEnabled::class
    ], SendTwoFactorCodeListener::class);
}In case you're not using Laravel 11 yet, you will probably need to manually register the event listener in your EventServiceProvider:
use Laravel\Fortify\Events\TwoFactorAuthenticationEnabled;
use Laravel\Fortify\Events\TwoFactorAuthenticationChallenged;
use Vormkracht10\TwoFactorAuth\Listeners\SendTwoFactorCodeListener;

// ...

protected $listen = [
    TwoFactorAuthenticationChallenged::class => [
        SendTwoFactorCodeListener::class,
    ],
    TwoFactorAuthenticationEnabled::class => [
        SendTwoFactorCodeListener::class,
    ],
];
If you want to customize the views (including email), you can publish them using the following command:
php artisan vendor:publish --tag=filament-two-factor-auth-viewsThe authentication methods can be configured in the config/filament-two-factor-auth.php file (which is published during the install command).
You can simply add or remove (comment) the methods you want to use:
return [
    'options' => [
        TwoFactorType::authenticator,
        TwoFactorType::email,
        // TwoFactorType::phone,
    ],

    'sms_service' => null, // For example 'vonage', 'twilio', 'nexmo', etc.
    'send_otp_class' => null,
];
If you want to use the SMS method, you need to provide an SMS service. You can check the Laravel Notifications documentation for ready-to-use services.
Like the example in the Laravel documentation you need to create the toVonage() method in your notification class. That's why we recommend creating a custom notification class that extends the original SendOTP class from this package:
<?php

namespace App\Notifications;

use Vormkracht10\TwoFactorAuth\Notifications\SendOTP as NotificationsSendOTP;
use Illuminate\Notifications\Messages\VonageMessage;

class SendOTP extends NotificationsSendOTP
{
    /**
     * Get the Vonage / SMS representation of the notification.
     */
    public function toVonage(mixed $notifiable): VonageMessage
    {
        return (new VonageMessage)
            ->content('Your OTP is: ' . $this->getTwoFactorCode($notifiable));
    }
}
You can get the two factor code for the user by calling the getTwoFactorCode method on the notification class.
Then you need to set the send_otp_class in the config/filament-two-factor-auth.php file:
return [
    // ...

    'sms_service' => 'vonage',
    'send_otp_class' => App\Notifications\SendOTP::class,
];
Note
Make sure your user or notifiable model has a routeNotificationForVonage method that returns the phone number. Please check the documentation of the SMS service you're using for more information.
If you want to fully customize the pages, you can override the classes in the config/filament-two-factor-auth.php file:
return [
    // ...

    'login' => Login::class,
    'register' => Register::class,
    'challenge' => LoginTwoFactor::class,
    'two_factor_settings' => TwoFactor::class,
    'password_reset' => PasswordReset::class,
    'password_confirmation' => PasswordConfirmation::class,
    'request_password_reset' => RequestPasswordReset::class,
];
Make sure you extend the original classes from the package.
If you're using Filament in a multi-tenant setup, you need to set the tenant option to true in the config/filament-two-factor-auth.php file. You also need to set the userMenuItems in your panel config. Take a look at the example below:
use Vormkracht10\TwoFactorAuth\Pages\TwoFactor;

// ...

->userMenuItems([
    // ...
    'two-factor-authentication' => MenuItem::make()
        ->icon('heroicon-o-lock-closed')
        ->label(__('Two-Factor Authentication'))
        ->url(fn(): string => TwoFactor::getUrl(['tenant' => auth()->user()->organization->getRouteKey()])),
])If you want to force users to enable Two Factor Authentication, you can add this to your PanelProvider:
->plugins([
    TwoFactorAuthPlugin::make()->forced(),
])
Warning
When you're using the forced method, make sure to set the multi_tenancy option to true in the filament-two-factor-auth.php config file when you're using a multi-tenant setup. Otherwise, the forced setting will not work. We cannot check the tenant in the PanelProvider because the user is not authenticated yet.
If you want to customize the forced message, you can publish the language file:
php artisan vendor:publish --tag="filament-two-factor-auth-translations"Then you can customize the message in the lang/vendor/filament-two-factor-auth/en.json file. You should change the following keys:
{
    "Your administrator requires you to enable two-factor authentication.": "Your custom message here.",
    "Two-Factor Authentication mandatory": "Your custom title here."
}composer testPlease see CHANGELOG for more information on what has changed recently.
Please see CONTRIBUTING for details.
Please review our security policy on how to report security vulnerabilities.
The MIT License (MIT). Please see License File for more information.