BONUS: WiFi card installation
WiFi installation is considerably more difficult than installing WiiMini SDRST kit. It's recommended for more advance modders. If you don't have experience working with SMD components, do not attempt this mod. There is a bigger risk of bricking your console.
| Designator | Name | Digikey part number | Notes |
|---|---|---|---|
| RA20 | 0402 4-resistors array 100 Ohms | S41X083101JPCT-ND | |
| RA212, RA213 | 0402 100 Ohms resistor | 311-100LRCT-ND | |
| CONN | Molex RCPT connector, 20POS | WM24007CT-ND | |
| C136 | 0402 ceramic capacitor 10nF 16V, X7R | 490-6326-1-ND | |
| C139 | 0402 ceramic capacitor 0.1uF 16V, Y5V | 1276-1004-1-ND | |
| C138 | 0603 ceramic capacitor 10uF 10V, X5R | 490-14372-1-ND | |
| FIL50 | 0402 ferrite bead 120 Ohms | 490-12578-2-ND | it's not required, you can solder bridge it or put 0 Ohm resistor |
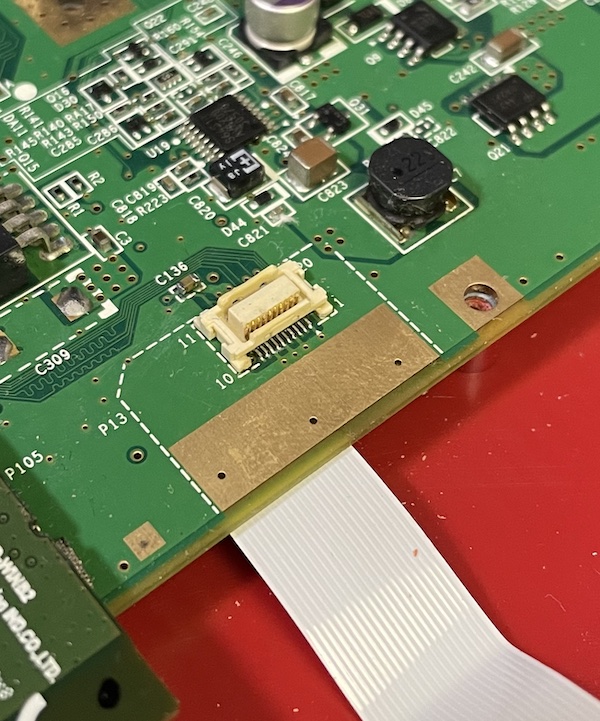
You can start with the top of motherboard where WiFi module connector is located. There is also C136 capacitor nearby that you need to solder:
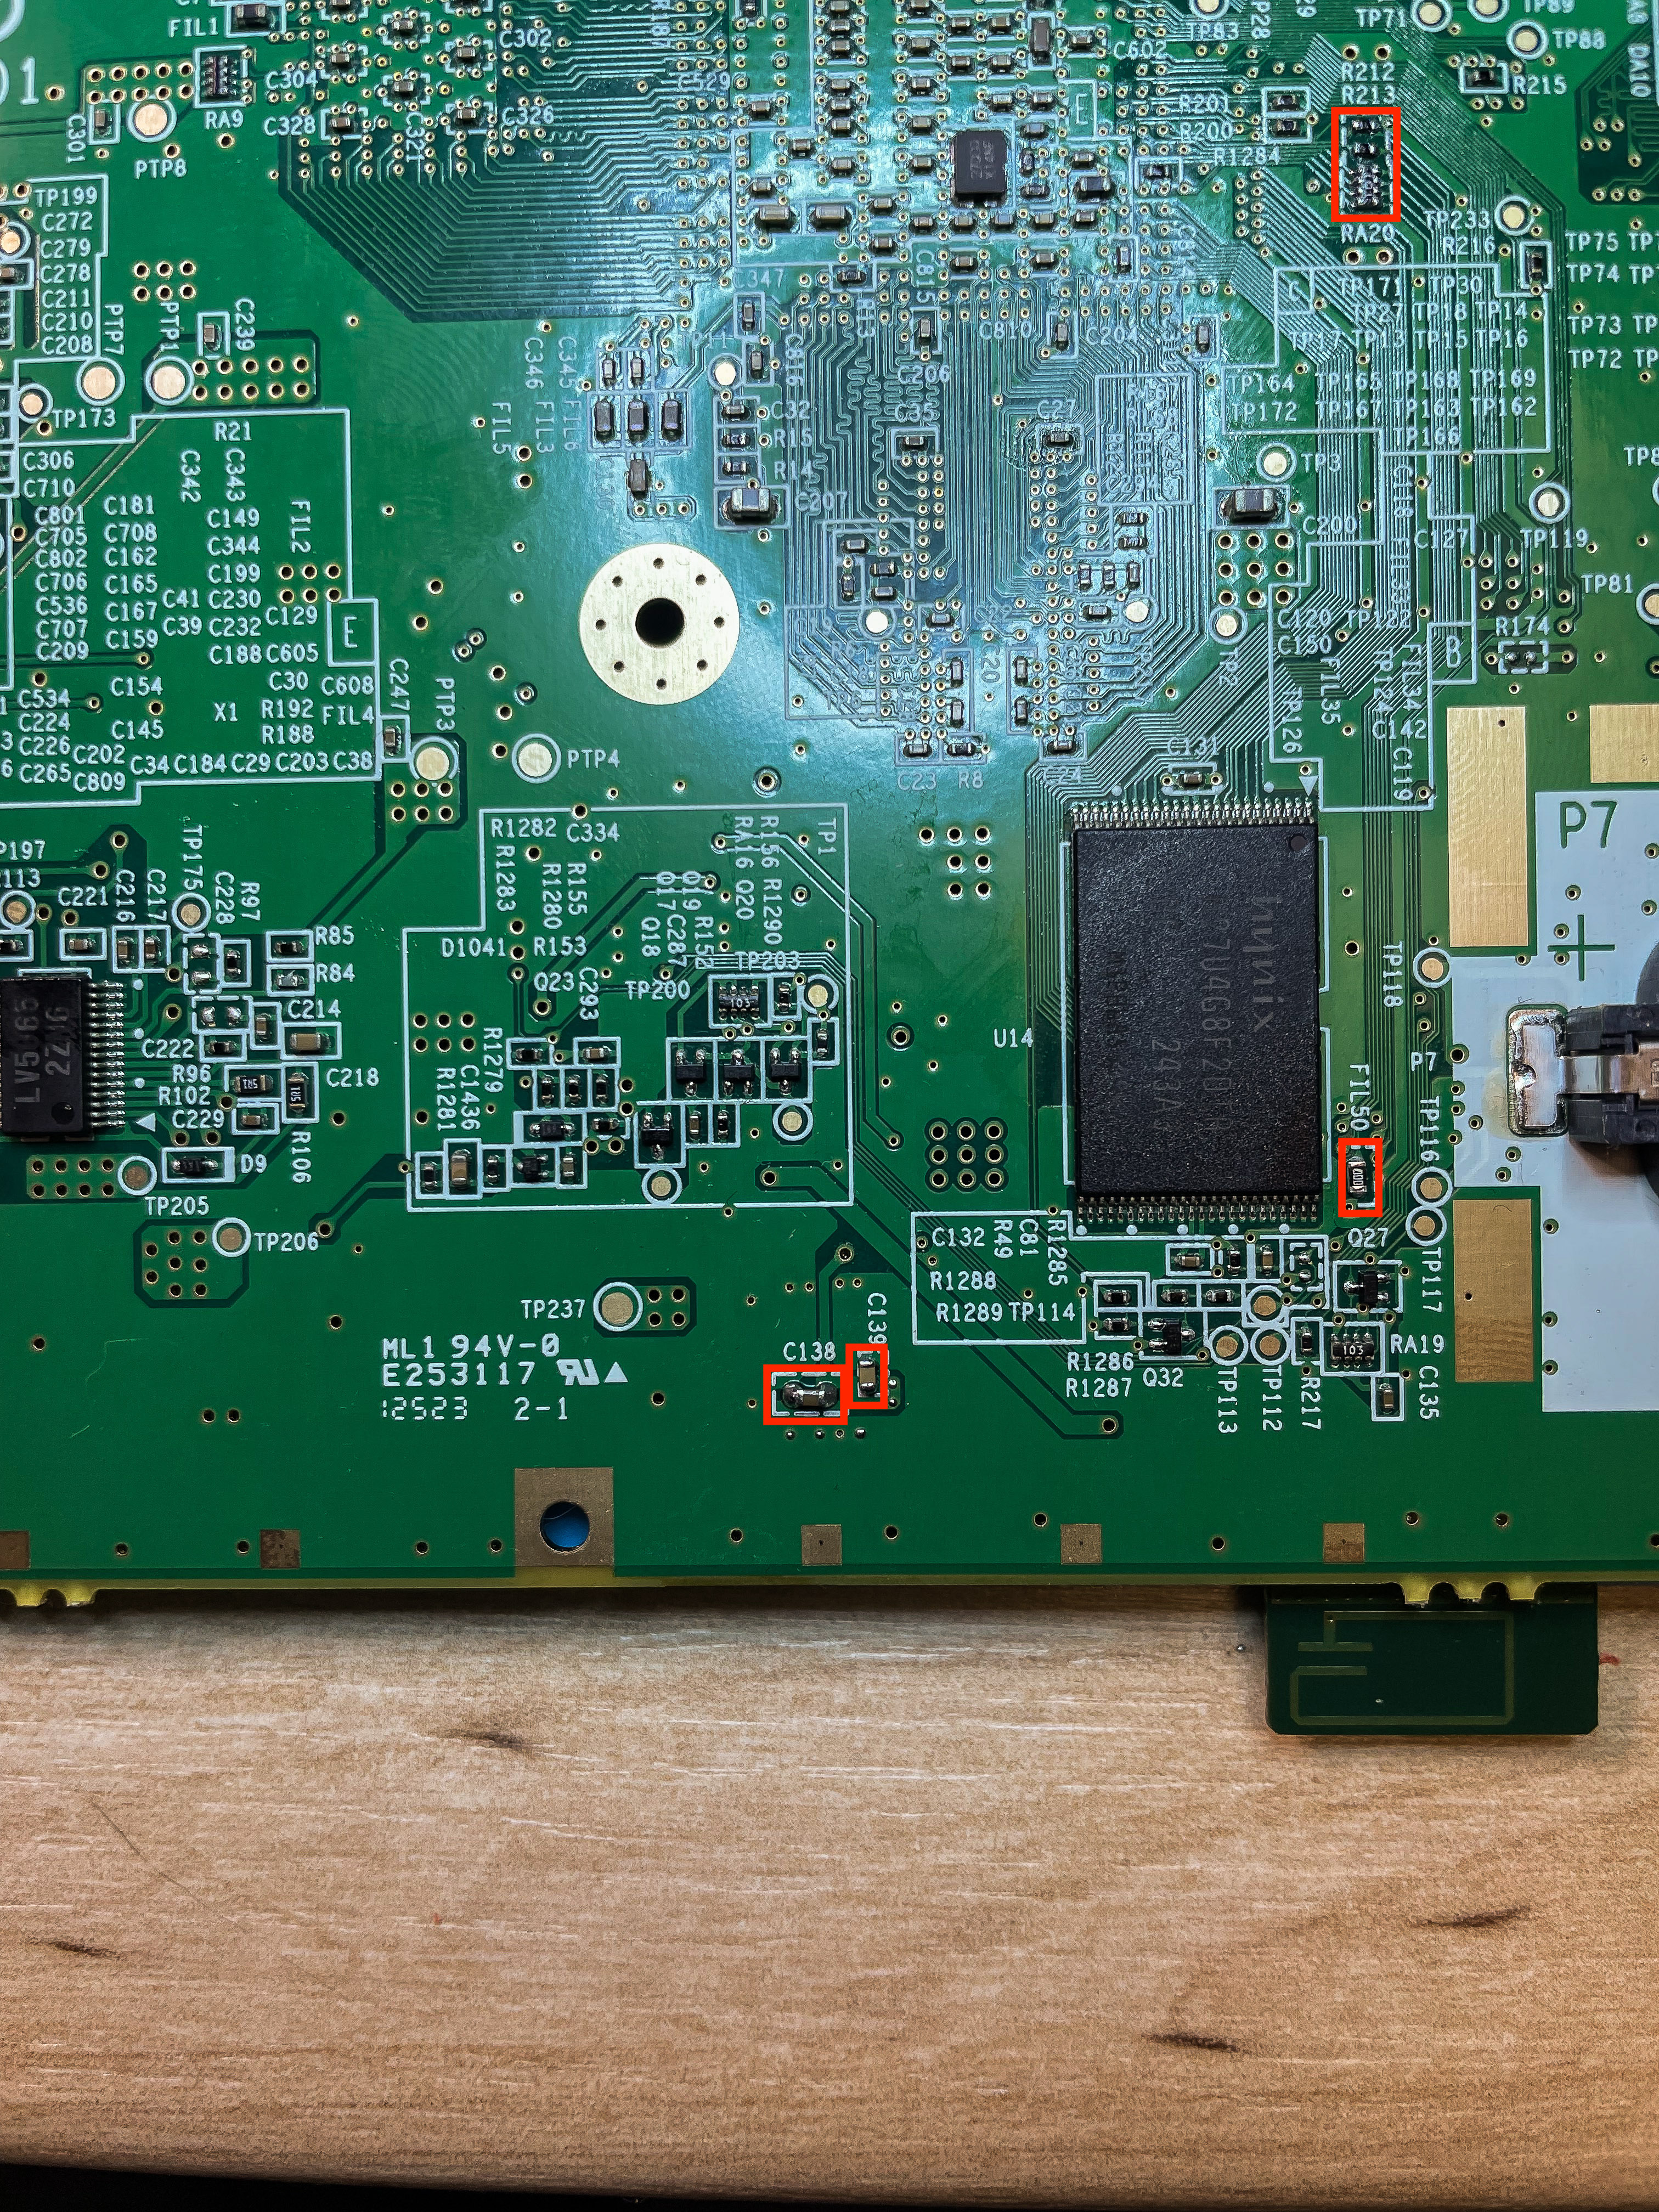
Turn the motherboard and add other passive components according to the BOM above. All components you need to solder are marked with red border:
After making sure everything is soldered correctly and there are no solder bridges, especially between the connector legs, you can focus on the bottom case where you need to stick 2 antennas:
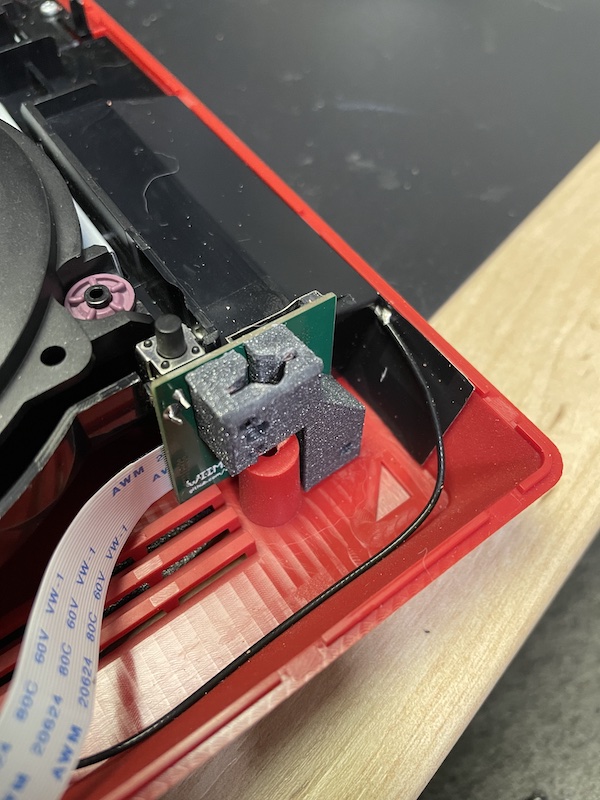
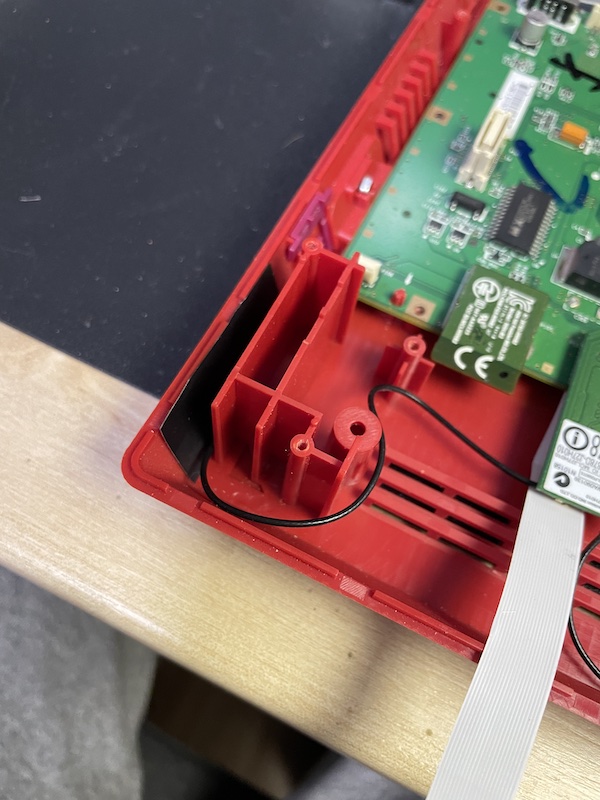
Connect both antennas to the WiFi card, it's not really important which antenna connects where. Make sure antenna cables are not tangled up and you can easily route them away from SDRST flex cable.
Once ready you can connect WiFi module to the motherboard. It's done, you can now assemble the console fully and focus on doing changes in the software of your Wii Mini.