-
Notifications
You must be signed in to change notification settings - Fork 257
举例分析FlexLib是如何提高iOS界面开发效率的
今天以一个实际的页面编写过程来介绍一下这个库究竟是如何提高iOS界面开发效率的。

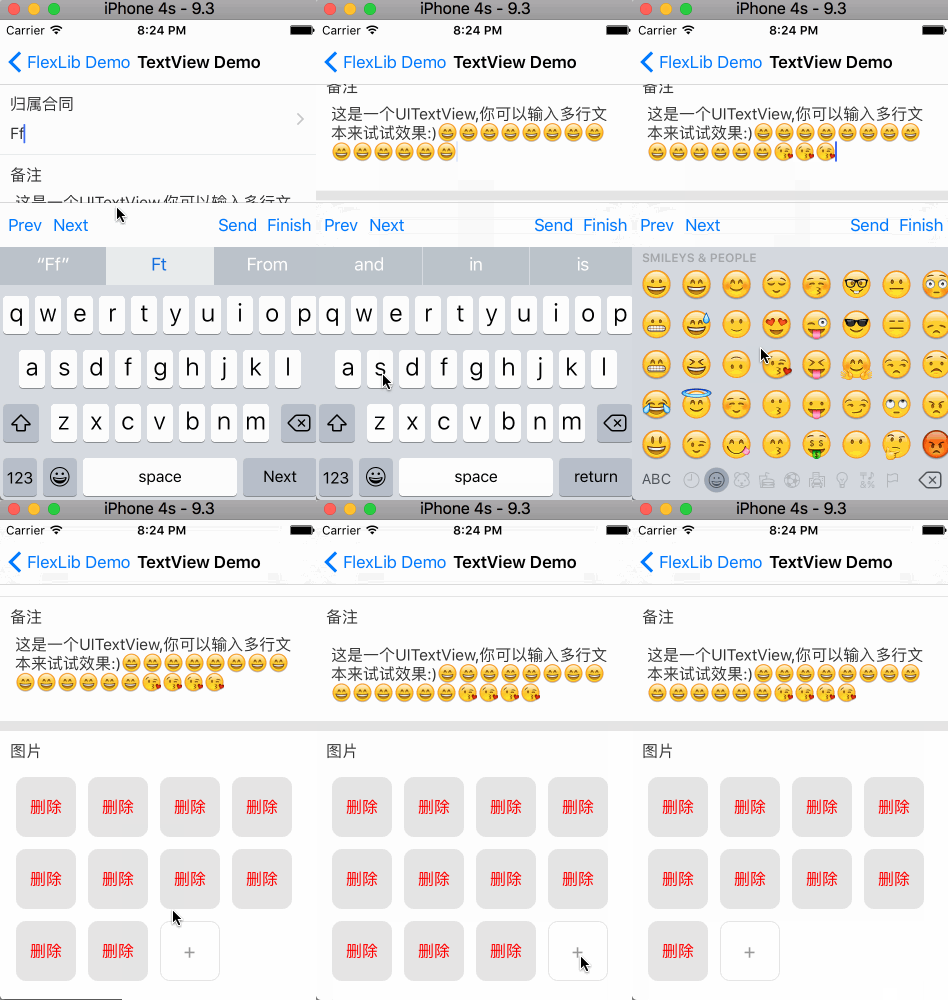
该页面内容很少,但有如下几个特点:
- 中间的TextView输入区域可以随着文字的输入动态调整高度,同时有一个最大的高度限制和一个最小的高度限制
- 下面的图片区域可以动态添加矩形方框,同时可以删除
- 当高度增大到超出一屏幕的时候,可以拖动页面进行滚动
- 当进行输入时,可以通过键盘上的工具栏来切换输入焦点,如果输入框不在屏幕范围内,能够自动滚动让其处于显示范围内
上述这些特点也是很多项目中非常常见的,读者可以想象一下自己实现这些功能需要多少行代码😀
<?xml version="1.0" encoding="utf-8"?>

<FlexScrollView name="scroll"  layout="flex:1" attr="bgColor:white,vertScroll:true,vertIndicator:true">
    <UIView layout="flexDirection:row,alignItems:center,margin:10">
        <UIView layout="flex:1">
            <UILabel attr="fontSize:16,color:#333333,text:归属合同"/>
            <UIView layout="height:10"/>
            <UITextField layout="width:100%" attr="placeHolder:请输入本次收款金额,fontSize:16,color:#333333"/>
        </UIView>
        <UIImageView layout="height:20,width:20" attr="source:arrow_right.png"/>
    </UIView>

    <UIView layout="height:1" attr="bgColor:#e5e5e5"/>

    <UIView layout="flexDirection:row,alignItems:center,margin:10">
        <UIView layout="flex:1">
            <UILabel attr="fontSize:16,color:#333333,text:备注"/>
            <UIView layout="height:10"/>
            <FlexTextView layout="width:100%,minHeight:30,maxHeight:95" attr="fontSize:16,color:#333333,text:这是一个UITextView\,你可以输入多行文本来试试效果:)"/>
        </UIView>
    </UIView>

    <UIView layout="height:10" attr="bgColor:#e5e5e5"/>

    <UIView layout="margin:10">
        <UILabel attr="fontSize:16,color:#333333,text:图片"/>
        <UIView layout="height:10"/>
        <FlexContainerView name="_imgParent" layout="flexWrap:wrap,flexDirection:row,">
            <FlexTouchView onPress="onAddImage" layout="width:20%,margin:2%,aspectRatio:1,justifyContent:center,alignItems:center" attr="borderRadius:10,borderWidth:1,borderColor:#e5e5e5,underlayColor:#e5e5e5">
                <UILabel attr="text:+,fontSize:20,color:#999999"/>
            </FlexTouchView>
        </FlexContainerView>
    </UIView>
</FlexScrollView>
FlexScrollView是FlexLib提供的核心类之一,该类能够自动计算子view的宽和高并设置contentSize,并且当子view隐藏或者改变宽、高时能够自动更新其contentSize,并且布局也会自动刷新。
FlexTextView是另外一个系统提供的类,能够自动根据输入的文字调整其高度,且保证其高度不会超出最小和最大高度。
为了便于理解,没有把属性放在独立的样式文件中,导致看起来略显凌乱。在实际的项目中,推荐将样式放到独立的样式文件中,这样程序中多个页面可以重复利用样式而不需要重新设置。
// TextViewVC.h
@interface TextViewVC : FlexBaseVC
@end

// TextViewVC.m
#import "TextViewVC.h"

@interface TextViewVC ()
{
    UIScrollView* scroll;
    UIView* _imgParent;
}

@end

@implementation TextViewVC

- (void)viewDidLoad {
    [super viewDidLoad];

    self.navigationItem.title = @"TextView Demo";
    [self prepareInputs];   //这一行能够自动增加键盘工具栏,帮助切换输入框
}

-(void)removeCell:(UIGestureRecognizer*)sender
{
    UIView* cell = sender.view;
    [cell removeFromSuperview];
    [_imgParent markDirty];
}
-(void)onAddImage
{
    UITapGestureRecognizer *tap=[[UITapGestureRecognizer alloc]initWithTarget:self action:@selector(removeCell:)];

    UIView* cell = [[UIView alloc]init];
    [cell enableFlexLayout:YES];
    [cell addGestureRecognizer:tap];
    [cell setLayoutAttrStrings:@[
                                 @"width",@"20%",
                                 @"aspectRatio",@"1",
                                 @"margin",@"2%",
                                 @"alignItems",@"center",
                                 @"justifyContent",@"center",
                                 ]];
    [cell setViewAttr:@"bgColor" Value:@"#e5e5e5"];
    [cell setViewAttr:@"borderRadius" Value:@"10"];

    UILabel* label=[UILabel new];
    [label enableFlexLayout:YES];
    [label setViewAttrStrings:@[
                                @"fontSize",@"16",
                                @"color",@"red",
                                @"text",@"删除",
                                ]];
    [cell addSubview:label];

    [_imgParent insertSubview:cell atIndex:0];
    [_imgParent markDirty];
}
@end
该实现与传统方式的区别在于,图片区域内容的管理不是通过UICollectionView或者UITableView来进行的,而是简单的通过添加、删除view来实现,因此避免了需要写大量的回调方法,只要线性的添加删除即可,添加完毕后调用markDirty界面布局即自动刷新。
读者可以自行比较传统方式布局与使用该框架在实现上的差异。
对于一些复杂页面,比如tableview的cell中嵌套tableview这种类型的页面更能够发挥该框架的优势,因为里面的高度更新、计算全都是自动完成的。
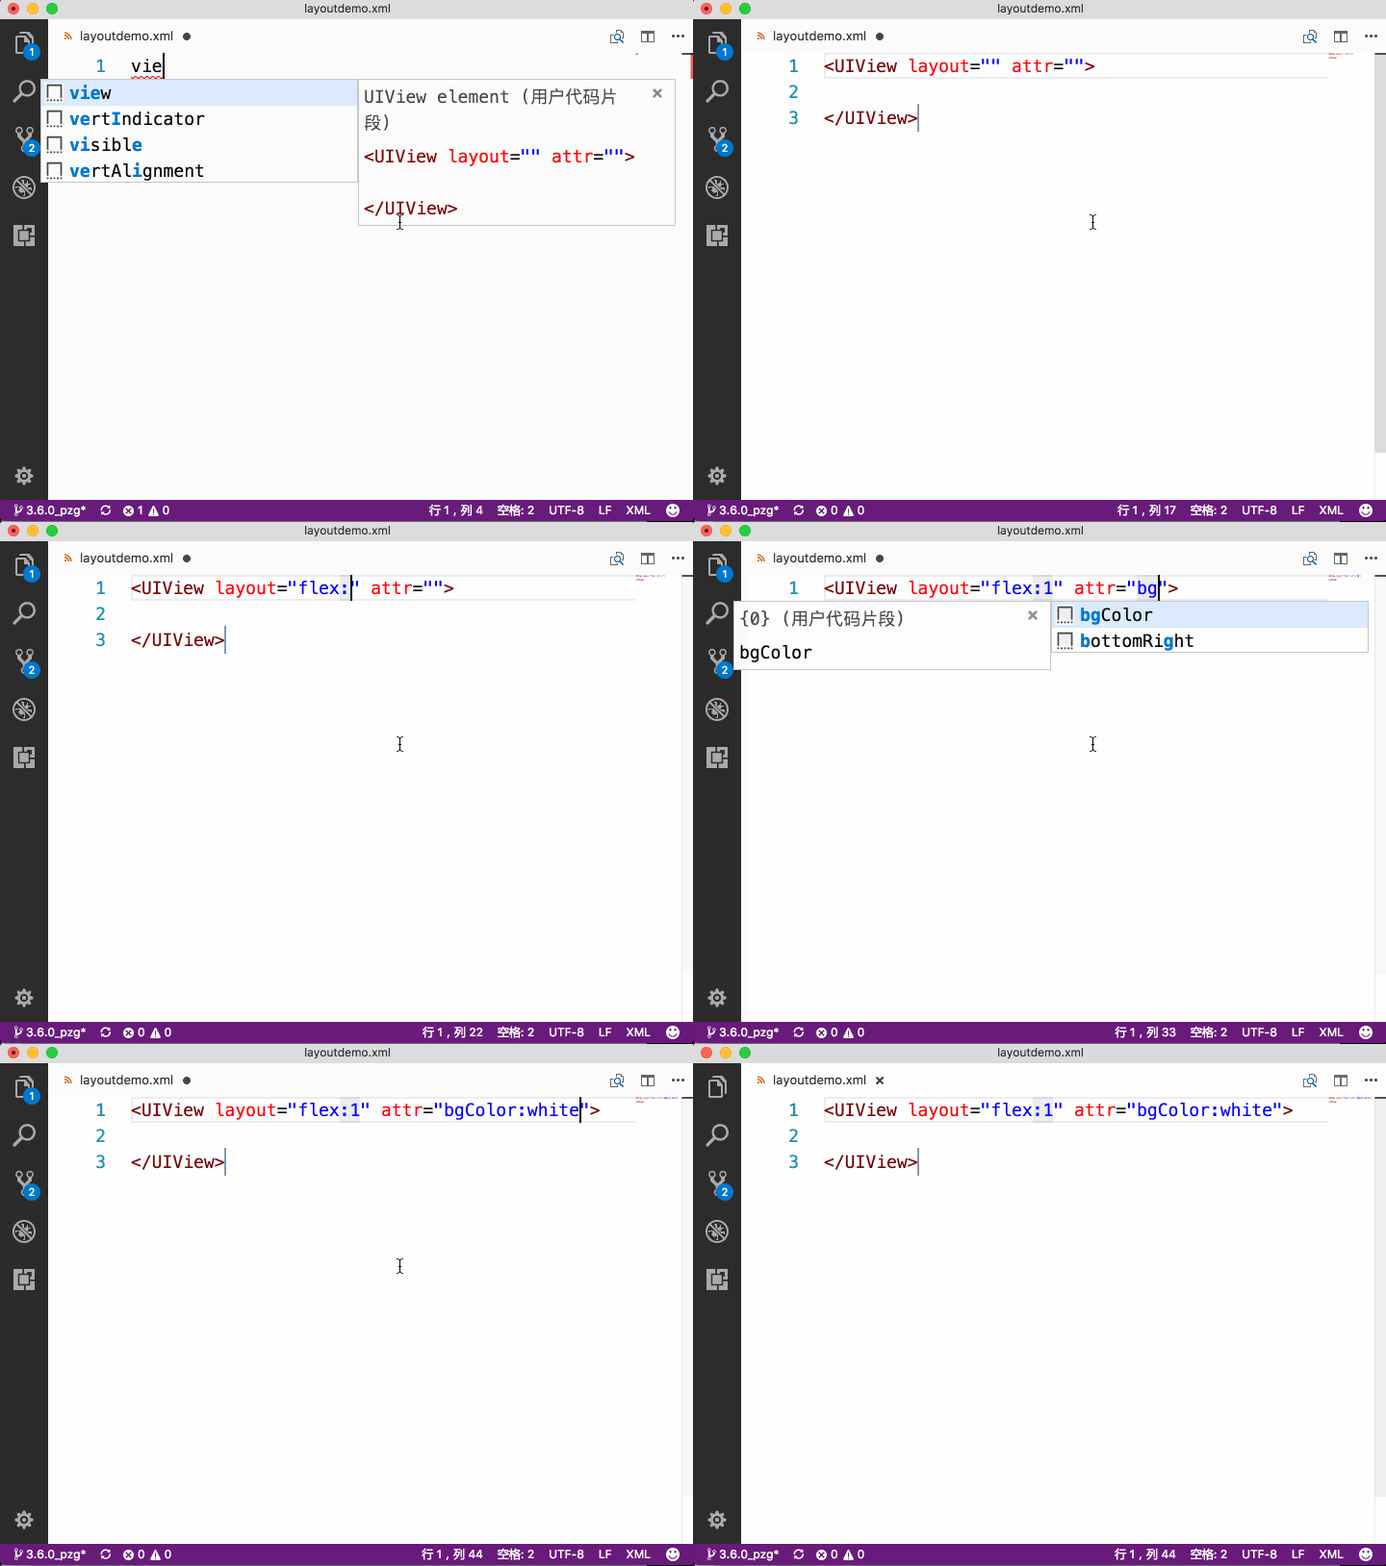
之前很多网友抱怨编辑布局文件时没有智能提示,其实现代的ide基本上都可以通过配置让其支持智能提示。这里推荐使用VSCode编辑器,可以按照这里的步骤设置其智能提示。编辑时智能提示的效果如图:

当然可以,可以一部分页面使用Autolayout,另外一部分页面使用xml。甚至在同一个页面也可以一部分控件使用frame方式布局,另外一部分控件使用xml方式。具体使用方式可以参考这里
Flexbox Introduction & performance (in Chinese)
Tutorial 1: Create View Controller with xml layout
Tutorial 2: Create Table Cell with xml layout
Tutorial 3: Embed xml layout into traditional view hierarchy
Tutorial 4: Use custom view in xml layout
Tutorial 5: Create reusable view using xml layout file