Line drawing and anti aliasing
| Getting Started |
|---|
Here we learn how to render a grid in 3D, and enable multi-sample anti-aliasing (MSAA).
First create a new project using the instructions from the earlier lessons: Using DeviceResources and Adding the DirectX Tool Kit which we will use for this lesson.
In addition to the Direct3D objects we used in Simple rendering, this tutorial makes use of 3D transformations using the SimpleMath library.
In the Game.h file, add the following variables to the bottom of the Game class's private declarations:
std::unique_ptr<DirectX::CommonStates> m_states;
std::unique_ptr<DirectX::BasicEffect> m_effect;
std::unique_ptr<DirectX::PrimitiveBatch<DirectX::VertexPositionColor>> m_batch;

Microsoft::WRL::ComPtr<ID3D11InputLayout> m_inputLayout;

DirectX::SimpleMath::Matrix m_world;
DirectX::SimpleMath::Matrix m_view;
DirectX::SimpleMath::Matrix m_proj;
In Game.cpp, add to the TODO of CreateDeviceDependentResources:
m_world = Matrix::Identity;

m_states = std::make_unique<CommonStates>(device);

m_effect = std::make_unique<BasicEffect>(device);
m_effect->SetVertexColorEnabled(true);

DX::ThrowIfFailed(
    CreateInputLayoutFromEffect<VertexPositionColor>(device, m_effect.get(),
        m_inputLayout.ReleaseAndGetAddressOf())
);

auto context = m_deviceResources->GetD3DDeviceContext();
m_batch = std::make_unique<PrimitiveBatch<VertexPositionColor>>(context);
In Game.cpp, add to the TODO of CreateWindowSizeDependentResources:
auto size = m_deviceResources->GetOutputSize();

m_view = Matrix::CreateLookAt(Vector3(2.f, 2.f, 2.f),
    Vector3::Zero, Vector3::UnitY);
m_proj = Matrix::CreatePerspectiveFieldOfView(XM_PI / 4.f,
    float(size.right) / float(size.bottom), 0.1f, 10.f);

m_effect->SetView(m_view);
m_effect->SetProjection(m_proj);
In Game.cpp, add to the TODO of OnDeviceLost:
m_states.reset();
m_effect.reset();
m_batch.reset();
m_inputLayout.Reset();
In Game.cpp, add to the TODO of Render:
context->OMSetBlendState(m_states->Opaque(), nullptr, 0xFFFFFFFF);
context->OMSetDepthStencilState(m_states->DepthNone(), 0);
context->RSSetState(m_states->CullNone());
m_effect->SetWorld(m_world);
m_effect->Apply(context);
context->IASetInputLayout(m_inputLayout.Get());
m_batch->Begin();
Vector3 xaxis(2.f, 0.f, 0.f);
Vector3 yaxis(0.f, 0.f, 2.f);
Vector3 origin = Vector3::Zero;
constexpr size_t divisions = 20;
for (size_t i = 0; i <= divisions; ++i)
{
float fPercent = float(i) / float(divisions);
fPercent = (fPercent * 2.0f) - 1.0f;
Vector3 scale = xaxis * fPercent + origin;
VertexPositionColor v1(scale - yaxis, Colors::White);
VertexPositionColor v2(scale + yaxis, Colors::White);
m_batch->DrawLine(v1, v2);
}
for (size_t i = 0; i <= divisions; i++)
{
float fPercent = float(i) / float(divisions);
fPercent = (fPercent * 2.0f) - 1.0f;
Vector3 scale = yaxis * fPercent + origin;
VertexPositionColor v1(scale - xaxis, Colors::White);
VertexPositionColor v2(scale + xaxis, Colors::White);
m_batch->DrawLine(v1, v2);
}
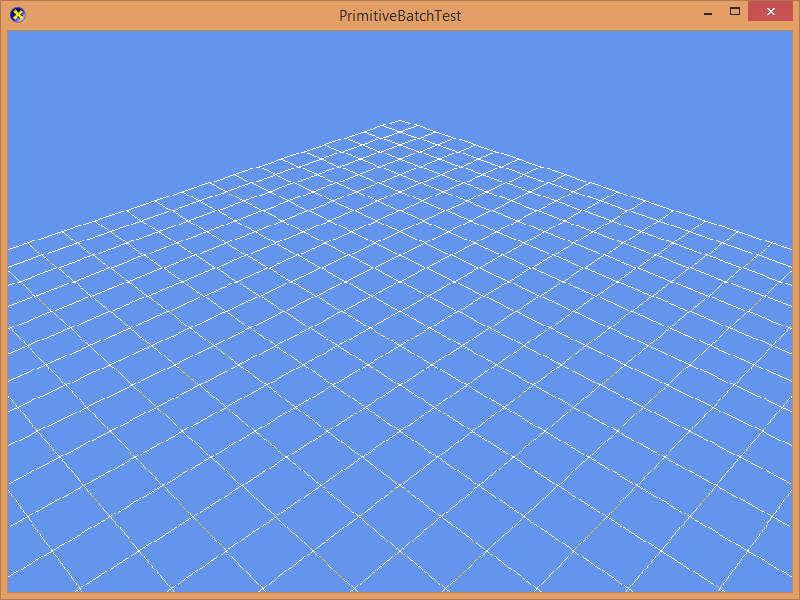
m_batch->End();Build and run to see a 3D grid.
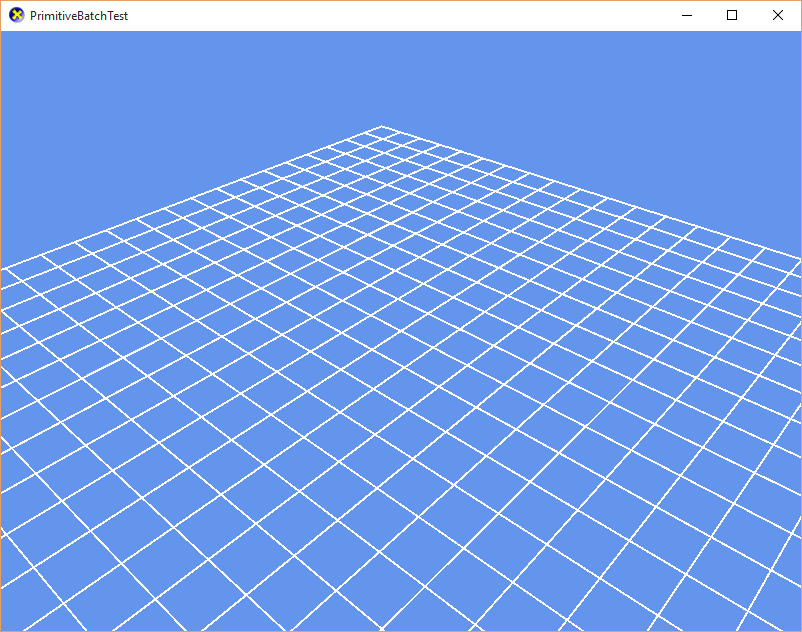
Taking a closer look at the grid in the previous screenshot, you can see the lines are a little thin and jagged in places. To make this more visible, in Game.cpp, add to the TODO of Update:
m_world = Matrix::CreateRotationY(cosf(static_cast<float>(timer.GetTotalSeconds())));Build and run to see the grid spinning, and notice the slight shimmering of the lines--it will be more obvious if you maximize the window size.
There are two approaches to addressing this problem, known as aliasing.
The first is to enable a special anti-aliasing mode specific to line drawing in Direct3D.
In the Game.h file, add the following variable to the bottom of the Game class's private declarations:
Microsoft::WRL::ComPtr<ID3D11RasterizerState> m_raster;In Game.cpp, add to the TODO of CreateDeviceDependentResources:
CD3D11_RASTERIZER_DESC rastDesc(D3D11_FILL_SOLID, D3D11_CULL_NONE, FALSE,
    D3D11_DEFAULT_DEPTH_BIAS, D3D11_DEFAULT_DEPTH_BIAS_CLAMP,
    D3D11_DEFAULT_SLOPE_SCALED_DEPTH_BIAS, TRUE, FALSE, FALSE, TRUE);

DX::ThrowIfFailed(device->CreateRasterizerState(&rastDesc,
    m_raster.ReleaseAndGetAddressOf()));
This creates a raster state that is the same as our standard
CullNonebut withAntialiasedLineEnableset to TRUE andMultisampleEnableset to FALSE.
In Game.cpp, add to the TODO of OnDeviceLost:
m_raster.Reset();In Game.cpp, modify Render, changing:
context->RSSetState(m_states->CullNone());to
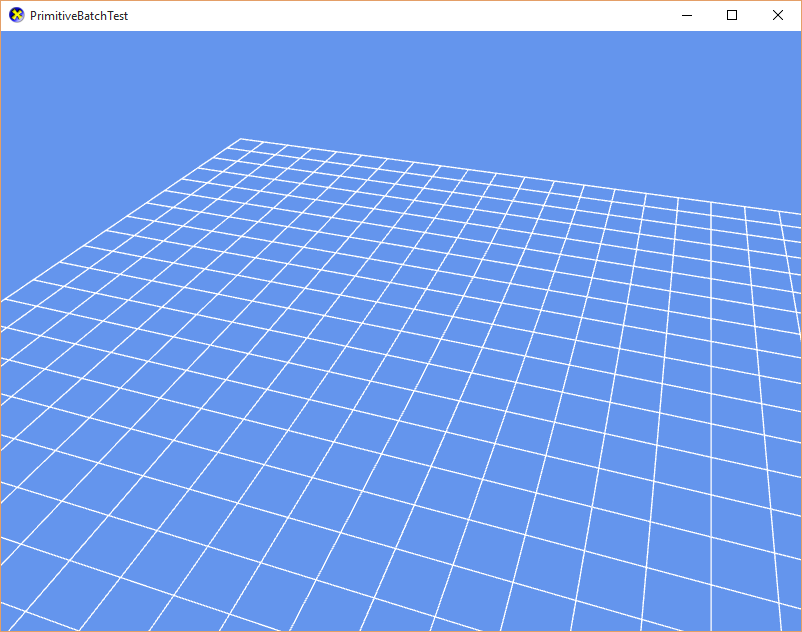
context->RSSetState(m_raster.Get());Build and run to see the shimmering of the lines lessen, although they will appear to be a bit thicker than a single pixel.
A second more general solution is to use Multisample anti-aliasing (MSAA) which uses more video memory and pixel-fill performance to achieve higher quality rendering results. In this case, we will make use of 4x MSAA where the render target and the depth buffer will be 4 times larger. MSAA can be used with all primitives, not just lines.
In the Game.h file, add the following variables to the bottom of the Game class's private declarations:
Microsoft::WRL::ComPtr<ID3D11Texture2D> m_offscreenRenderTarget;
Microsoft::WRL::ComPtr<ID3D11RenderTargetView> m_offscreenRenderTargetSRV;
Microsoft::WRL::ComPtr<ID3D11DepthStencilView> m_depthStencilSRV;
At the top of Game.cpp after the using statements, add:
namespace
{
    constexpr UINT MSAA_COUNT = 4;
    constexpr UINT MSAA_QUALITY = 0;
}
In Game.cpp, modify the constructor:
m_deviceResources = std::make_unique<DX::DeviceResources>(
    DXGI_FORMAT_B8G8R8A8_UNORM, DXGI_FORMAT_UNKNOWN);
We are going to be creating a MSAA depth/stencil buffer, so here we are telling DeviceResources we don't need it to create a depth buffer.
In Game.cpp, modify in the TODO section of CreateDeviceDependentResources:
CD3D11_RASTERIZER_DESC rastDesc(D3D11_FILL_SOLID, D3D11_CULL_NONE, FALSE,
    D3D11_DEFAULT_DEPTH_BIAS, D3D11_DEFAULT_DEPTH_BIAS_CLAMP,
    D3D11_DEFAULT_SLOPE_SCALED_DEPTH_BIAS, TRUE, FALSE, TRUE, FALSE);
This creates a raster state that is the same as our standard
CullNonewhich hasMultisampleEnableset to TRUE.
In Game.cpp, add to the TODO section of CreateWindowSizeDependentResources:
auto device = m_deviceResources->GetD3DDevice();
auto width = static_cast<UINT>(size.right);
auto height = static_cast<UINT>(size.bottom);

CD3D11_TEXTURE2D_DESC rtDesc(m_deviceResources->GetBackBufferFormat(),
    width, height, 1, 1,
    D3D11_BIND_RENDER_TARGET, D3D11_USAGE_DEFAULT, 0,
    MSAA_COUNT, MSAA_QUALITY);

DX::ThrowIfFailed(
    device->CreateTexture2D(&rtDesc, nullptr,
      m_offscreenRenderTarget.ReleaseAndGetAddressOf()));

CD3D11_RENDER_TARGET_VIEW_DESC rtvDesc(D3D11_RTV_DIMENSION_TEXTURE2DMS);

DX::ThrowIfFailed(
    device->CreateRenderTargetView(m_offscreenRenderTarget.Get(),
        &rtvDesc,
        m_offscreenRenderTargetSRV.ReleaseAndGetAddressOf()));

CD3D11_TEXTURE2D_DESC dsDesc(DXGI_FORMAT_D32_FLOAT,
    width, height, 1, 1,
    D3D11_BIND_DEPTH_STENCIL, D3D11_USAGE_DEFAULT, 0,
    MSAA_COUNT, MSAA_QUALITY);

ComPtr<ID3D11Texture2D> depthBuffer;
DX::ThrowIfFailed(
    device->CreateTexture2D(&dsDesc, nullptr, depthBuffer.GetAddressOf()));

CD3D11_DEPTH_STENCIL_VIEW_DESC dsvDesc(D3D11_DSV_DIMENSION_TEXTURE2DMS);

DX::ThrowIfFailed(
    device->CreateDepthStencilView(depthBuffer.Get(),
        &dsvDesc,
        m_depthStencilSRV.ReleaseAndGetAddressOf()));
In Game.cpp, add to the TODO of OnDeviceLost:
m_offscreenRenderTarget.Reset();
m_offscreenRenderTargetSRV.Reset();
m_depthStencilSRV.Reset();
In Game.cpp, modify Clear:
Change this code:
auto renderTarget = m_deviceResources->GetRenderTargetView();
auto depthStencil = m_deviceResources->GetDepthStencilView();
to:
auto renderTarget = m_offscreenRenderTargetSRV.Get();
auto depthStencil = m_depthStencilSRV.Get();
In Game.cpp, modify the end of Render:
...
m_batch->End();

context->ResolveSubresource(m_deviceResources->GetRenderTarget(), 0,
    m_offscreenRenderTarget.Get(), 0,
    m_deviceResources->GetBackBufferFormat());

m_deviceResources->Present();
Build and run to see the shimmering of the lines lessen compared to the first version, and is slightly less thickened than when we used the AA line mode.
Click here for troubleshooting advice
If you get an exception, it may be because your device does not support 4x MSAA--which you can confirm by checking the debug device output at the failure point. Direct3D Feature Level 10.1 or later devices all support 4x MSAA for most render target formats, but some 10.0 and 9.x feature levels do not. You can try setting MSAA_COUNT to 2 if this happens. If you have a Feature Level 11.0 or later device, you can try using 4 or 8 for MSAA_COUNT. See also CheckMultisampleQualityLevels
If you are using a Direct3D Feature Level 9.x device, you will also need to use
DXGI_FORMAT_D24_UNORM_S8_UINTinstead ofDXGI_FORMAT_D32_FLOATas the depth/stencil format.
The ability to create an MSAA DXGI "swap chain" is only supported for the older "bit-blt" style presentation modes, specifically DXGI_SWAP_EFFECT_DISCARD or DXGI_SWAP_EFFECT_SEQUENTIAL. The newer "flip" style presentation modes DXGI_SWAP_EFFECT_FLIP_SEQUENTIAL or DXGI_SWAP_EFFECT_FLIP_DISCARD recommended for Direct3D 11 on Windows 10 and are required for Universal Windows Platform (UWP) apps do not support creating MSAA swap chains--attempts to create a swap chain with SampleDesc.Count > 1 will fail. Instead, you create your own MSAA render target and explicitly resolve to the DXGI back-buffer for presentation as shown here which works for all presentation modes.
In most real-world rendering pipelines, you do not just resolve the MSAA surface and present the single-sample result. Instead you resolve to another render target, perform various post-processing steps, and then eventually present that result. Therefore the "old-style" of creating an MSAA swapchain is really only useful for 'toy' examples in any case.
See this blog series for more information.
-
The MSAAHelper utility can be used to simplify the implementation of the MSAA rendering above.
-
PrimitiveBatch is ideally suited for drawing debug displays such as visualizing bounding volumes, collision data, etc. For more on this, see DebugDraw.
Next lesson: 3D shapes
DirectX Tool Kit docs CommonStates, Effects, PrimitiveBatch, VertexTypes
FXAA
SMAA
Spatial anti-alising