-
Notifications
You must be signed in to change notification settings - Fork 513
Simple rendering
Here we learn how to render a triangle.
First create a new project using the instructions from the first two lessons: The basic game loop and Adding the DirectX Tool Kit which we will use for this lesson.
In order to do a draw operation with Direct3D 11, we need to provide the following objects and settings:
- A vertex buffer containing the vertices of the elements to draw.
- The input layout that describes the memory layout of the vertices in the vertex buffer.
- A primitive topology setting that indicates how to interpret the individual vertices (as a point, a line, a triangle, etc.)
- A compiled vertex shader program
- A compiled pixel shader program
- Set any required state objects for rasterizer state, depth/stencil state, blend state, and sampler state (if using textures)
For this lesson, the BasicEffect object will provide the vertex and pixel shader programs, VertexPositionColor will provide the input layout, CommonStates will provide the 'stock' state objects, and PrimitiveBatch will provide the vertex buffer and primitive topology.
Note that since the input layout is the bridge between the vertex buffer data and the vertex shader program, this Direct3D object is created with information about both.
In the Game.h file, add the following variables to the bottom of the Game class's private declarations:
using VertexType = DirectX::VertexPositionColor;

std::unique_ptr<DirectX::CommonStates> m_states;
std::unique_ptr<DirectX::BasicEffect> m_effect;
std::unique_ptr<DirectX::PrimitiveBatch<VertexType>> m_batch;
Microsoft::WRL::ComPtr<ID3D11InputLayout> m_inputLayout;
In Game.cpp, add to the TODO of CreateDevice:
m_states = std::make_unique<CommonStates>(m_d3dDevice.Get());

m_effect = std::make_unique<BasicEffect>(m_d3dDevice.Get());
m_effect->SetVertexColorEnabled(true);

void const* shaderByteCode;
size_t byteCodeLength;

m_effect->GetVertexShaderBytecode(&shaderByteCode, &byteCodeLength);

DX::ThrowIfFailed(
        m_d3dDevice->CreateInputLayout(VertexType::InputElements,
            VertexType::InputElementCount,
            shaderByteCode, byteCodeLength,
            m_inputLayout.ReleaseAndGetAddressOf()));

m_batch = std::make_unique<PrimitiveBatch<VertexType>>(m_d3dContext.Get());Optional: You can simplify the last part using DirectXHelpers:
m_states = std::make_unique<CommonStates>(m_d3dDevice.Get());

m_effect = std::make_unique<BasicEffect>(m_d3dDevice.Get());
m_effect->SetVertexColorEnabled(true);

DX::ThrowIfFailed(
    CreateInputLayoutFromEffect<VertexType>(m_d3dDevice.Get(), m_effect.get(),
        m_inputLayout.ReleaseAndGetAddressOf()
    );

m_batch = std::make_unique<PrimitiveBatch<VertexType>>(m_d3dContext.Get());
Technical note: The input layout object needs to contain all the correct per-vertex elements needed for drawing. Therefore, it is important that you configure the
BasicEffectbefore you callGetVertexShaderBytecodeso it can return the proper shader. Hence why we calledSetVertexColorEnabledto ensure we getSV_PositionandCOLOR.
In Game.cpp, add to the TODO of OnDeviceLost:
m_states.reset();
m_effect.reset();
m_batch.reset();
m_inputLayout.Reset();
In Game.cpp, add to the TODO of Render:
m_d3dContext->OMSetBlendState( m_states->Opaque(), nullptr, 0xFFFFFFFF );
m_d3dContext->OMSetDepthStencilState( m_states->DepthNone(), 0 );
m_d3dContext->RSSetState( m_states->CullNone() );

m_effect->Apply(m_d3dContext.Get());

m_d3dContext->IASetInputLayout(m_inputLayout.Get());

m_batch->Begin();

VertexPositionColor v1(Vector3(0.f, 0.5f, 0.5f), Colors::Yellow);
VertexPositionColor v2(Vector3(0.5f, -0.5f, 0.5f), Colors::Yellow);
VertexPositionColor v3(Vector3(-0.5f, -0.5f, 0.5f), Colors::Yellow);

m_batch->DrawTriangle(v1, v2, v3);

m_batch->End();
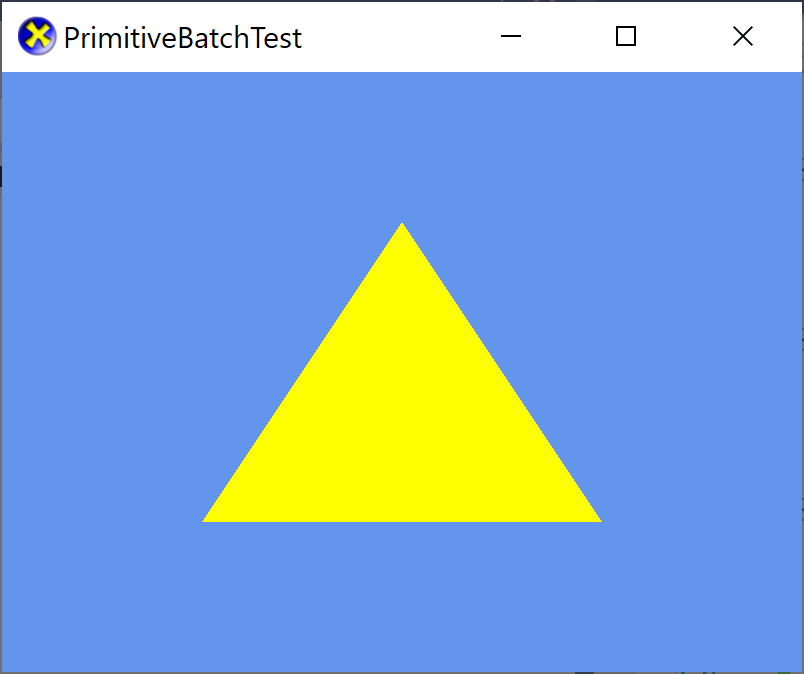
Build and run to see a simple yellow triangle rendered in 2D.
You don't have to use a type alias here like
VertexTypeand you can just useDirectX::VertexPositionColorfor the header andVertexPositionColorin the cpp file directly. I use the alias to simplify the tutorial a bit later on.
The image above is drawn using coordinates that are independent of the screen resolution and range from -1 to +1. Resizing the window will result in the same image scaled to the new window. If instead you want to draw using screen pixel coordinates (which match the coordinate system used by SpriteBatch), then:
In Game.cpp, add to the TODO of CreateResources:
Matrix proj = Matrix::CreateScale( 2.f/float(backBufferWidth),
   -2.f/float(backBufferHeight), 1.f)
   * Matrix::CreateTranslation( -1.f, 1.f, 0.f );
m_effect->SetProjection(proj);
The projection matrix can also be created with
Matrix::CreateOrthographicOffCenter(0.f, float(backBufferWidth), float(backBufferHeight), 0.f, 0.f, 1.f);
In Game.cpp, modify the TODO of Render:
m_d3dContext->OMSetBlendState( m_states->Opaque(), nullptr, 0xFFFFFFFF );
m_d3dContext->OMSetDepthStencilState( m_states->DepthNone(), 0 );
m_d3dContext->RSSetState( m_states->CullNone() );

m_effect->Apply(m_d3dContext.Get());

m_d3dContext->IASetInputLayout(m_inputLayout.Get());

m_batch->Begin();

VertexPositionColor v1(Vector3(400.f, 150.f, 0.f), Colors::Yellow);
VertexPositionColor v2(Vector3(600.f, 450.f, 0.f), Colors::Yellow);
VertexPositionColor v3(Vector3(200.f, 450.f, 0.f), Colors::Yellow);

m_batch->DrawTriangle(v1, v2, v3);

m_batch->End();
Build and run to get the same image, but if you resize the window the triangle will not change in the second version if your window size is 800 by 600.
- The BasicEffect family of shader classes uses shader code built in to the
DirectXTK.libas static data so there's no need to compile shaders at runtime or to load data files from disk. - Internally, both SpriteBatch and PrimitiveBatch make use of a dynamic rather than static vertex buffer object which makes use of special memory shared between the CPU and GPU. Generally, we prefer when possible to use static vertex buffers as they can reside in the video memory directly that is only accessible by the GPU.
- Be sure to call
SetVertexColorEnabledbefore callingGetVertexShaderBytecodeas this impacts which shader permutation is actually used for rendering. See IEffect for more details. - Since we haven't used any textures yet, we don't need to use any sampler state objects.
The use of CullNone for our rasterizer state above allows triangles and quads--which in Direct3D are just two triangles--to be drawn with arbitrary winding order. If you modify Render above as follows:
m_d3dContext->RSSetState( m_states->CullClockwise() );Then build & run you run you will see nothing drawn because the triangle winding order was specified in clockwise order. If you changed it again to:
m_d3dContext->RSSetState( m_states->CullCounterClockwise() );Then build & run you will see the triangle reappear.
For 'closed' objects, you typically use backface culling to speed up rendering which can quickly reject triangles that are not facing the viewer and avoids the need to run the pixel shader for those pixels.
The culling mode does not affect points or lines.
Start by saving rocks.jpg into your project's directory, and then from the top menu select Project / Add Existing Item.... Select "rocks.jpg" and click "OK".
In the Game.h file, add the following variable to the bottom of the Game class's private declarations:
Microsoft::WRL::ComPtr<ID3D11ShaderResourceView> m_texture;In Game.cpp, add to the TODO of CreateDevice:
DX::ThrowIfFailed(
    CreateWICTextureFromFile(m_d3dDevice.Get(), L"rocks.jpg", nullptr,
    m_texture.ReleaseAndGetAddressOf()));
In Game.cpp, add to the TODO of OnDeviceLost:
m_texture.Reset();Build and run to make sure the texture loads fine. Nothing else should be different yet.
Now go back to your Game.h and modify the VertexType alias we used earlier to use VertexPositionTexture.
using VertexType = DirectX::VertexPositionTexture;Then in Game.cpp modify CreateDevice:
...

m_effect = std::make_unique<BasicEffect>(m_d3dDevice.Get());
m_effect->SetTextureEnabled(true);

// Make sure you called CreateWICTextureFromFile before this point!
m_effect->SetTexture(m_texture.Get());

void const* shaderByteCode;
size_t byteCodeLength;
...
Technical note: Again, the input layout object needs to contain all the correct per-vertex elements needed for drawing. We do not use any per-vertex color so we do not call
SetVertexColorEnabledand instead we callSetTextureEnabled. The resulting input layout includesSV_PositionandTEXCOORD0. You can associate the texture SRV at any point, but we do it here for convenience.
In Game.cpp, modify the TODO of Render:
m_d3dContext->OMSetBlendState( m_states->Opaque(), nullptr, 0xFFFFFFFF );
m_d3dContext->OMSetDepthStencilState( m_states->DepthNone(), 0 );
m_d3dContext->RSSetState( m_states->CullNone() );

m_effect->Apply(m_d3dContext.Get());

auto sampler = m_states->LinearClamp();
m_d3dContext->PSSetSamplers(0, 1, &sampler);

m_d3dContext->IASetInputLayout(m_inputLayout.Get());

m_batch->Begin();

VertexPositionTexture v1(Vector3(400.f, 150.f, 0.f), Vector2(.5f, 0));
VertexPositionTexture v2(Vector3(600.f, 450.f, 0.f), Vector2(1, 1));
VertexPositionTexture v3(Vector3(200.f, 450.f, 0.f), Vector2(0, 1));

m_batch->DrawTriangle(v1, v2, v3);

m_batch->End();
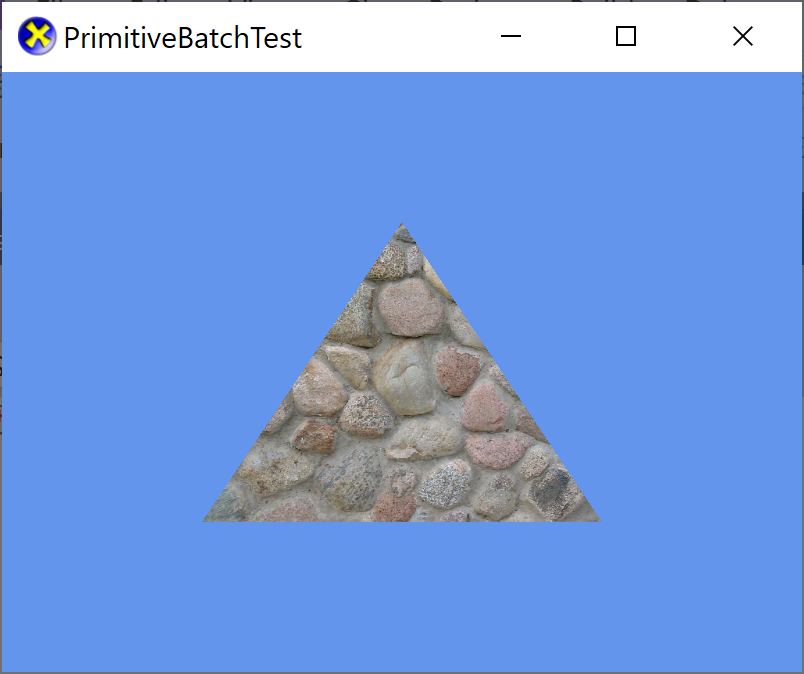
Build and run to see a simple textured triangle rendered in 2D.
- Because we are using a texture, we have to set a sampler state object.
BasicEffectuses slot 0 of the pixel shader samplers by design, so that's the one we need to set. -
PSSetSamplerstakes an array of pointers to sampler interfaces, which is why we have to create a temporary objectsampler.
Start by saving rocks_normalmap.dds into your project's directory, and then from the top menu select Project / Add Existing Item.... Select "rocks_normalmap.dds" and click "OK".
In the Game.h file, add the following variable to the bottom of the Game class's private declarations:
Microsoft::WRL::ComPtr<ID3D11ShaderResourceView> m_normalMap;In Game.cpp, add to the TODO of CreateDevice:
DX::ThrowIfFailed(
    CreateDDSTextureFromFile(m_d3dDevice.Get(), L"rocks_normalmap.dds", nullptr,
    m_normalMap.ReleaseAndGetAddressOf()));
In Game.cpp, add to the TODO of OnDeviceLost:
m_normalMap.Reset();Build and run to make sure this second texture loads fine. Nothing else should be different yet.
Now go back to your Game.h and modify the VertexType alias we used earlier to use VertexPositionNormalTexture.
using VertexType = DirectX::VertexPositionNormalTexture;Also change the type of effect. Since we are using a flat 2D triangle, the lighting is not going to be very interesting so we are going to add some simple normal mapping to give the texture some definition.
std::unique_ptr<DirectX::NormalMapEffect> m_effect;Then in Game.cpp modify CreateDevice:
...

m_effect = std::make_unique<NormalMapEffect>(m_d3dDevice.Get());
m_effect->SetTextureEnabled(true);

// Make sure you called CreateDDSTextureFromFile and CreateWICTextureFromFile before this point!
m_effect->SetTexture(m_texture.Get());
m_effect->SetNormalTexture(m_normalMap.Get());

m_effect->EnableDefaultLighting();
m_effect->SetLightDiffuseColor(0, Colors::Gray);

void const* shaderByteCode;
size_t byteCodeLength;
...
Technical note: We change how the input layout is created one more time. This time we want to ensure we have
SV_Position,NORMAL, andTEXCOORD0. You can associate the texture and normal map SRVs at any point, so we just do it here for convenience. See the BasicEffect for more information on the various shader/input layout configurations.
Then in Game.cpp add to Update:
auto time = static_cast<float>(m_timer.GetTotalSeconds());

float yaw = time * 0.4f;
float pitch = time * 0.7f;
float roll = time * 1.1f;

auto quat = Quaternion::CreateFromYawPitchRoll(pitch, yaw, roll);

auto light = XMVector3Rotate(g_XMOne, quat);

m_effect->SetLightDirection(0, light);
In Game.cpp, modify the TODO of Render:
m_d3dContext->OMSetBlendState( m_states->Opaque(), nullptr, 0xFFFFFFFF );
m_d3dContext->OMSetDepthStencilState( m_states->DepthNone(), 0 );
m_d3dContext->RSSetState( m_states->CullNone() );

m_effect->Apply(m_d3dContext.Get());

auto sampler = m_states->LinearClamp();
m_d3dContext->PSSetSamplers(0, 1, &sampler);

m_d3dContext->IASetInputLayout(m_inputLayout.Get());

m_batch->Begin();

VertexPositionNormalTexture v1(Vector3(400.f, 150.f, 0.f), -Vector3::UnitZ, Vector2(.5f, 0));
VertexPositionNormalTexture v2(Vector3(600.f, 450.f, 0.f), -Vector3::UnitZ, Vector2(1, 1));
VertexPositionNormalTexture v3(Vector3(200.f, 450.f, 0.f), -Vector3::UnitZ, Vector2(0, 1));

m_batch->DrawTriangle(v1, v2, v3);

m_batch->End();
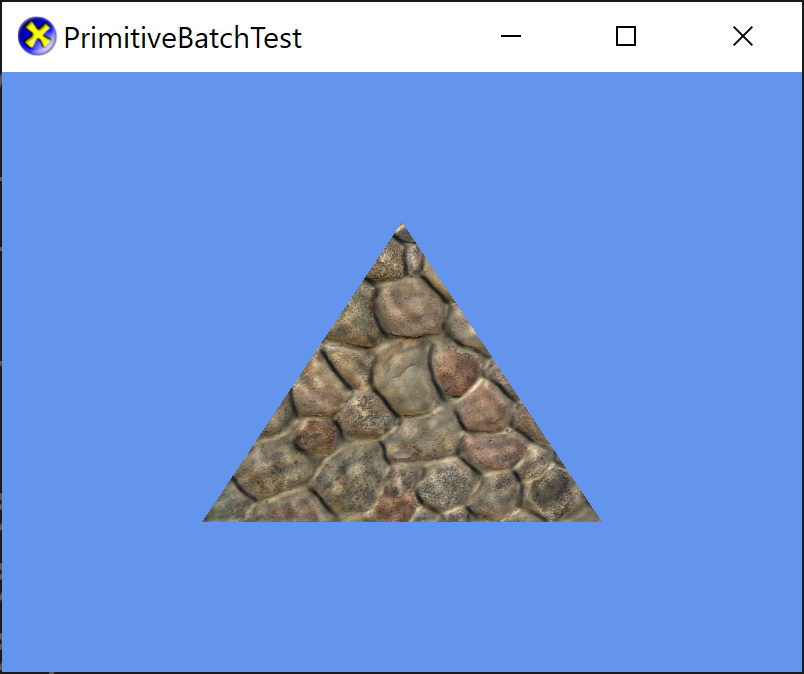
Build and run, and you'll see the 2D triangle drawn with dynamic lighting effects.
- The tangent-space normal map used here was generated from a height map using texconv's
-nmapfeature.
texconv rocks_NM_height.dds -nmap l -nmapamp 4
- Note this last part of the lesson requires Direct3D hardware feature level 10.0 or better hardware.
Next lesson: Line drawing and anti-aliasing
DirectX Tool Kit docs CommonStates, Effects, PrimitiveBatch, VertexTypes
All content and source code for this package are subject to the terms of the MIT License.
This project has adopted the Microsoft Open Source Code of Conduct. For more information see the Code of Conduct FAQ or contact opencode@microsoft.com with any additional questions or comments.
- Universal Windows Platform apps
- Windows desktop apps
- Windows 11
- Windows 10
- Windows 8.1
- Xbox One
- x86
- x64
- ARM64
- Visual Studio 2022
- Visual Studio 2019 (16.11)
- clang/LLVM v12 - v18
- MinGW 12.2, 13.2
- CMake 3.20


