Blogs Import Export
Blogs can be imported / exported in blogML format. Read more about this format here and here.
User should have editor and published roles to import / export blog posts. Import and export button can be found in Site Settings -> Blog -> Posts
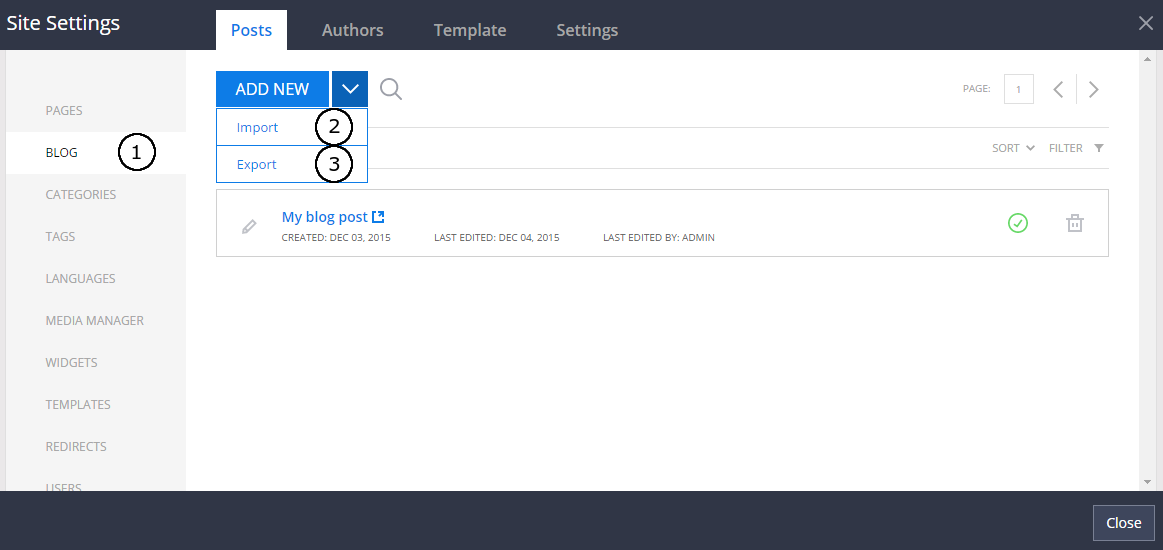
- Blog section in Site Settings.
- Blog posts import option.
- Blog posts export option.
<?xml version="1.0" encoding="utf-8"?>
<blog xmlns="http://www.blogml.com/2006/09/BlogML" xmlns:xs="http://www.w3.org/2001/XMLSchema">
  <authors>
    <author id="A1">
      <title type="text"><![CDATA[Sample Author]]></title>
    </author>
  </authors>
  <categories>
    <category id="C1">
      <title type="text"><![CDATA[Sample Category]]></title>
    </category>
  </categories>
  <posts>
    <post id="34" date-created="2006-09-05T03:19:00" date-modified="2006-09-05T03:19:00" post-url="/CS21/blogs/p/archive/2006/09/05/CS-Dev-Guide_3A00_-Send-Emails.aspx" type="normal" hasexcerpt="true">
      <title type="text"><![CDATA[Sample Blog Post Meta Title]]></title>
      <content type="text"><![CDATA[<p>Sample blog post content</p>]]></content>
      <post-name type="text"><![CDATA[Sample Blog Post Title]]></post-name>
      <excerpt type="text"><![CDATA[Sample blog post intro text.]]></excerpt>
      <categories>
        <category ref="C1" />
      </categories>
      <authors>
        <author ref="A1" />
      </authors>
    </post>
  </posts>
</blog>
-
authors.author.title- author name. If importing author doesn't exist, it's created during import process. -
categories.category.title- category name. If importing category doesn't exist, it's created during import process. -
posts.post.date-created- blog post's live from date. -
posts.post.hasexcerpt- should be set to true, ifposts.post.excerptis set. -
posts.post.post-url- is used only when creating redirects. By default, blog post URL is created from blog post title. -
posts.post.title- blog post's meta title. -
posts.post.post-name- blog post's title. -
posts.post.content- blog post's content (HTML). -
posts.post.excerpt- blog post's intro text.
Only published blog posts and published blog post contents are exported. If any filter is selected or search query is set, all filtering is applied when exporting. Blog posts, which are denied for current user are not exported.
Only BlogML compatible fields are being exported. Such things as tags, CSS, JavaScript, Options, template are not exported.
NOTE: by default BlogML format supports comments. While there is no comments implementation in Better CMS, comments are ignored during import.
Blogs post URLs are created depending on blog post title (e.g. if blog post title is "My first blog post", URL will be "/articles/my-first-blog-post"). If such an URL exists, suffix number will be added (e.g. "/articles/my-first-blog-post-2").
1.First step of import - import file upload:
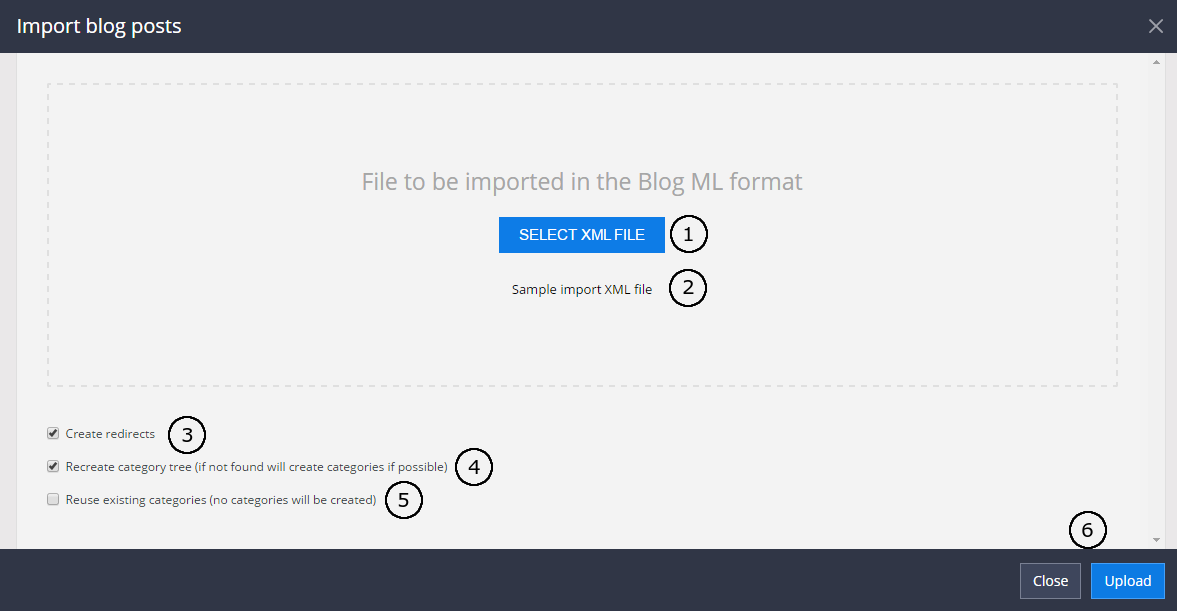
- Browse an XML file from local disc (1). A sample XML file (2) can be downloaded and analyzed before import.
- If checkbox "Create redirects" (3) is checked, redirects will be created. For example, if importing blog post with old url "my-first-blogpost", new URL will be generated ("/articles/my-first-blogpost") and redirect will be created from old URL to new URL. NOTE: If redirect already exists, new redirect creation will be skipped during import process.
- You can decide whether to recreate imported categories or not by selecting one of the checkboxes ((4) or (5)). Only one of them can be selected.
- When file is browsed, press "Upload" (6) to continue.
2.Second step of import - select which blog posts to import:
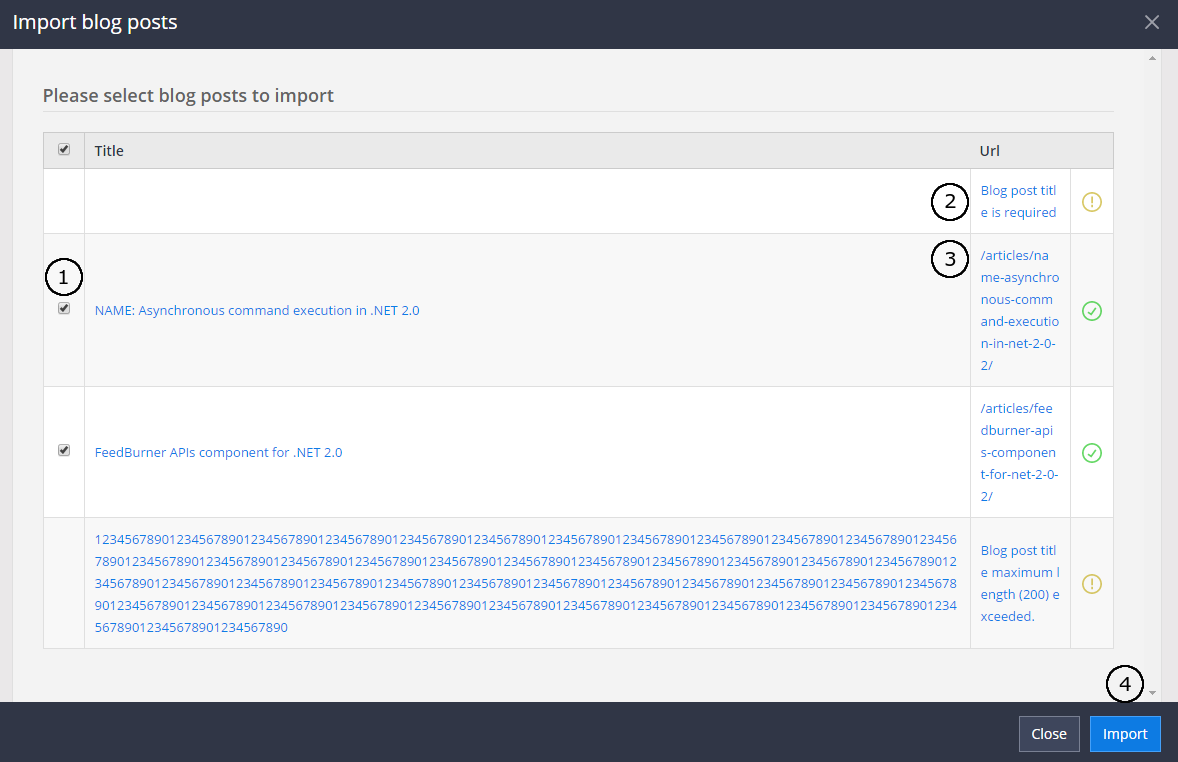
After file is uploaded user is able to select which blog posts to import. This can be done by (un)checking checkboxes (1) and can be done only with blog posts without error (3). Blog posts, having errors (2) cannot be checked and a warning flag is displayed next to them. When blog posts to import are selected, press "Import" (4) to continue.
3.Third step of import - import results:
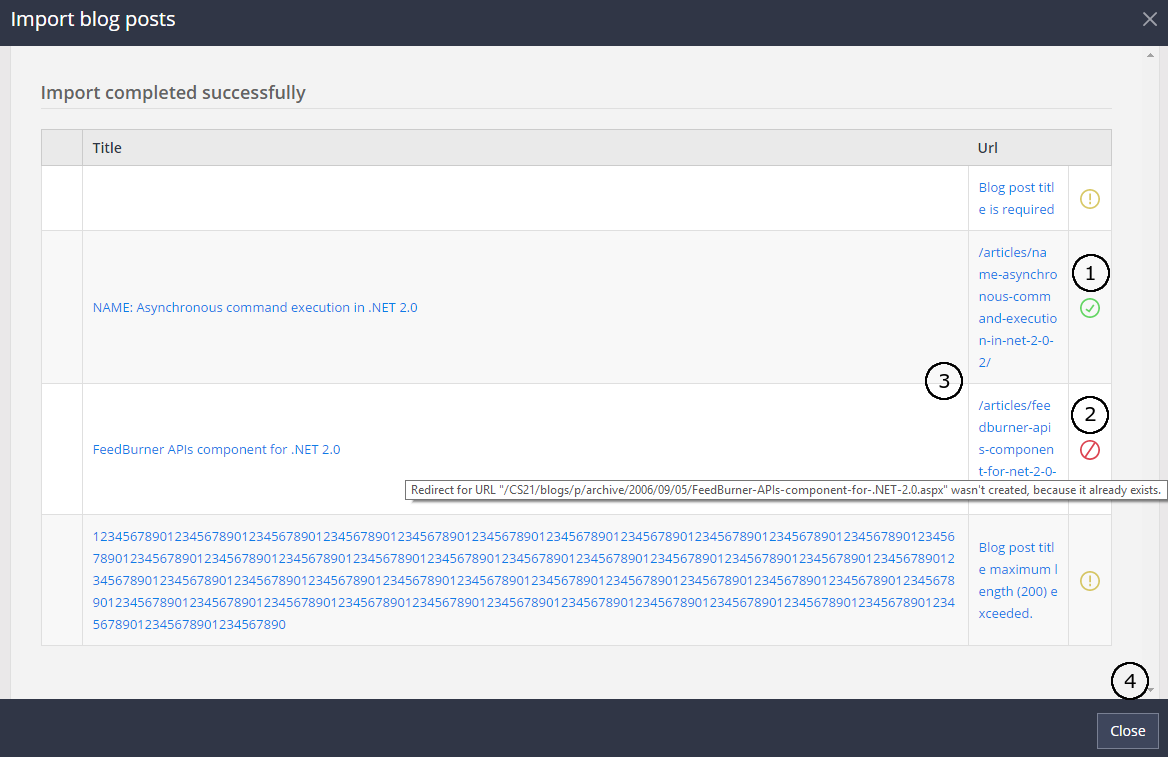
After an import, import results are displayed within the same table. Successful results are displayed with a success flag next to them (1). An error flag (2) is displayed, when there were errors during import process (e.g. redirect wasn't created because such already existed).
After successful import user is able to open created blog post by pressing URL link (3) in the grid. After import is done user can close the form by clicking close button (4).