Managing Navigation (v1.x)
Use the site map control to determine how pages are organized on your website. To access it - click “Site settings” on the side menu and then click “Site Map.”
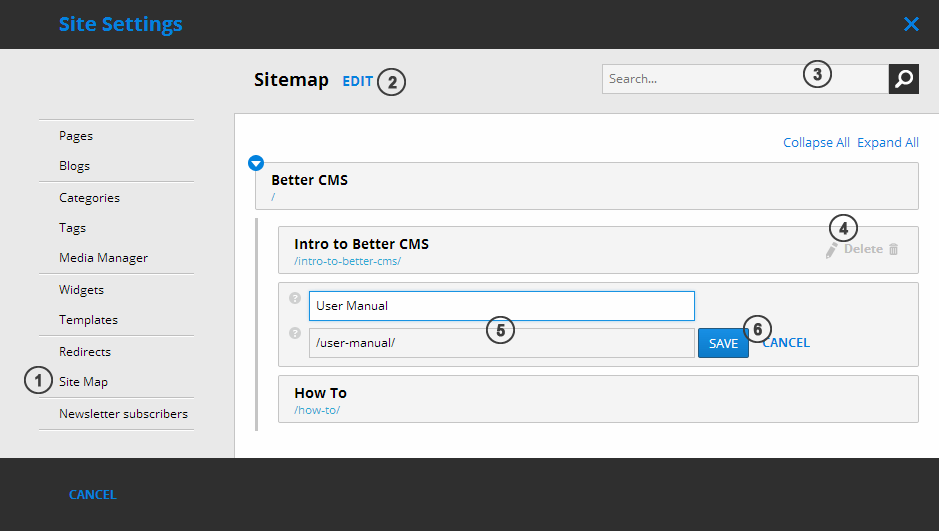
- Site Map menu entry is located at the bottom of Site Settings menu bar.
- Button to enter sitemap restructuring mode.
- Search field for quicker node finding in case your sitemap is very large.
- Hover with the mouse over the sitemap node to access Edit and Delete buttons.
- You can change the title of a page as it is displayed within the sitemap and URL to point to different location.
- Buttons to save or cancel your changes.
To add or nest pages within the site map, click “Edit” next to “Sitemap” at the top of the Site Map page in Site Settings. A list of every page on your website will appear on the left. Click and drag a page in between nodes to add a page at the base level, or click and drag a page onto a node to nest it as a sublevel of that page.
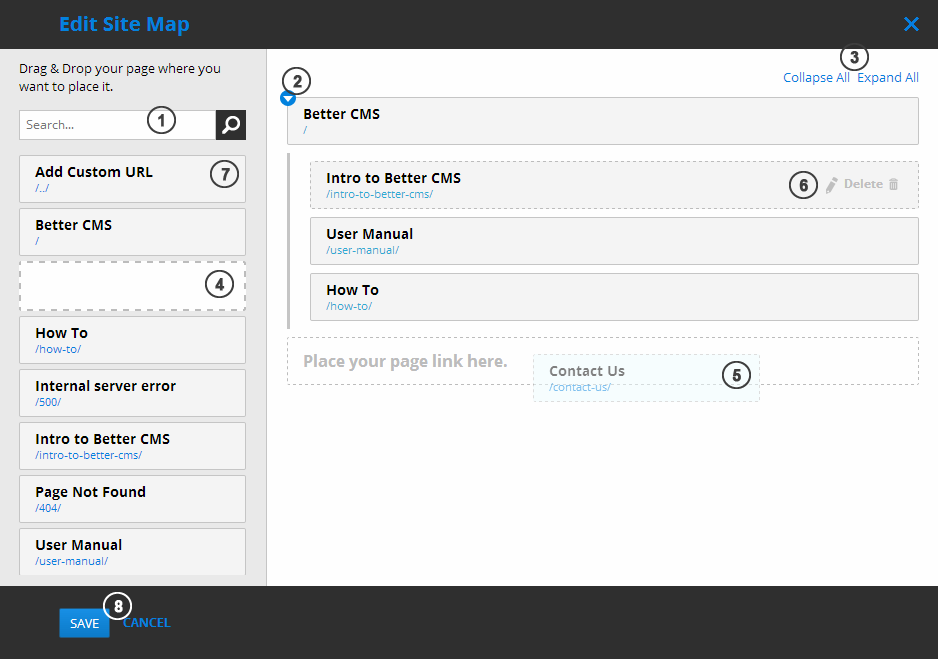
- Search for specific page to place it on the sitemap.
- Button to expand or collapse nested nodes.
- Buttons to collapse or expand all sitemap nodes.
- Click on the page entry to drag it to the map.
- Drag over specific place you want to place the node.
- Hover existing sitemap node to access edit (for title and URL) and delete buttons.
- First entity is for custom links to be placed on the sitemap (ex. for external web pages).
- Buttons to save or cancel all the changes you have made to the sitemap.