Media Manager
Store and organize files and images on your website with Better CMS’ user-friendly Media Manager. To access the Media Manager, click “Site settings” on the side menu and then click “Media Manager.” From here, you can use the controls to add, delete, or rename a folder and easily upload your images and files. Click “File Name” to sort the folders by file name, or click “File Type” to sort the folders by file type. To upload a new image or file, you can browse and upload from your computer, or simply drag and drop the file into the Media Manager. The Media Manager can also be accessed from the WYSIWYG editor to add images or files directly to a webpage or blog post.
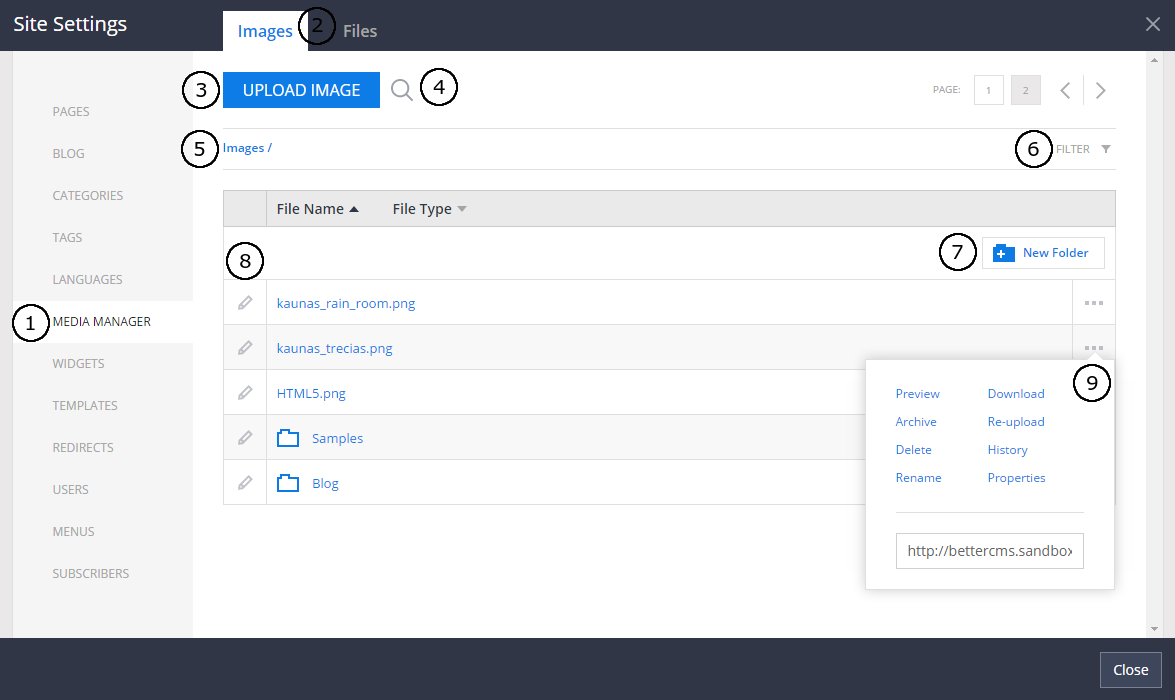
- Media Manager menu item (located in the middle of Site Settings menu).
- Tabs to toggle between the images and files lists.
- Button for image upload.
- Search field for images and / or folders.
- Show the current location within the folders you are in.
- Filter images by tags or categories.
- Button to create a new folder.
- Edit buttons for folder renaming or image editing.
- Context menu with additional actions.
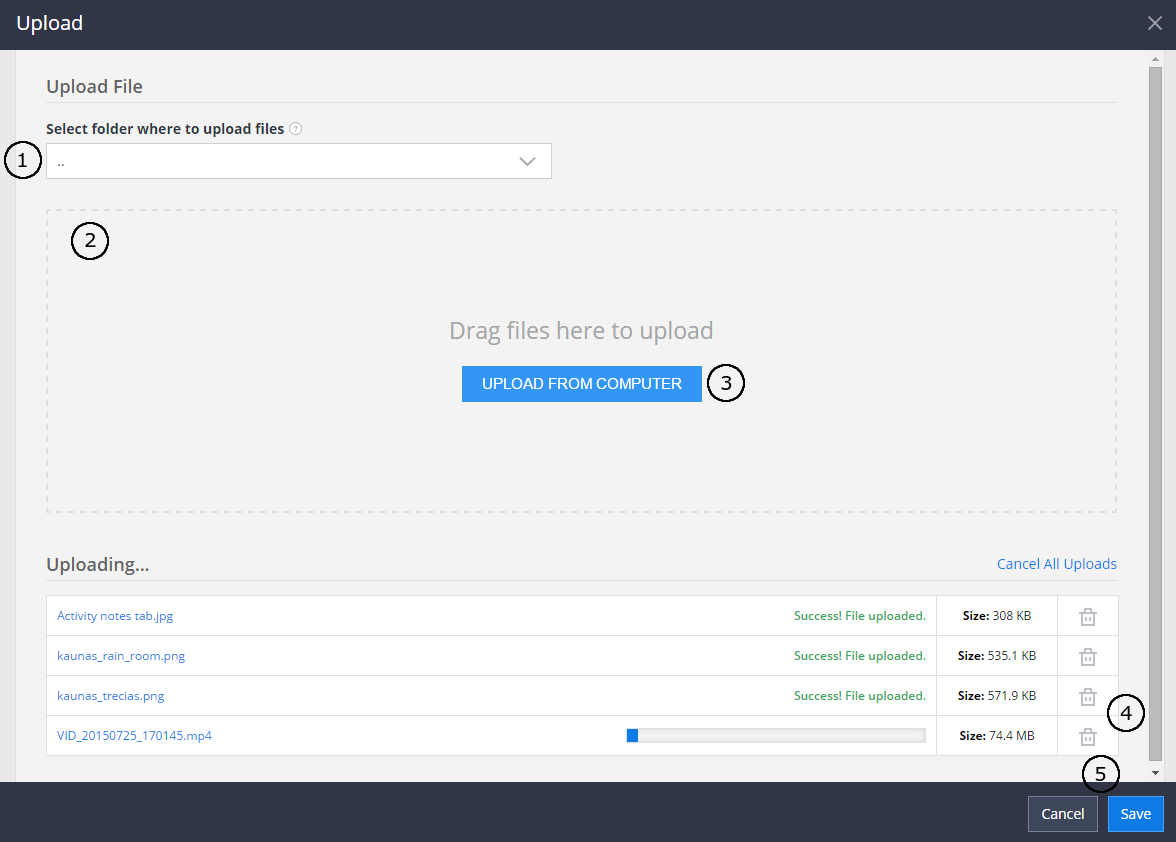
- Folder selection for uploaded files storage.
- Area to drag files you want to upload.
- Button to select files to upload from your computer.
- You can cancel uploading or delete an uploaded file.
- Button to save or cancel file upload.
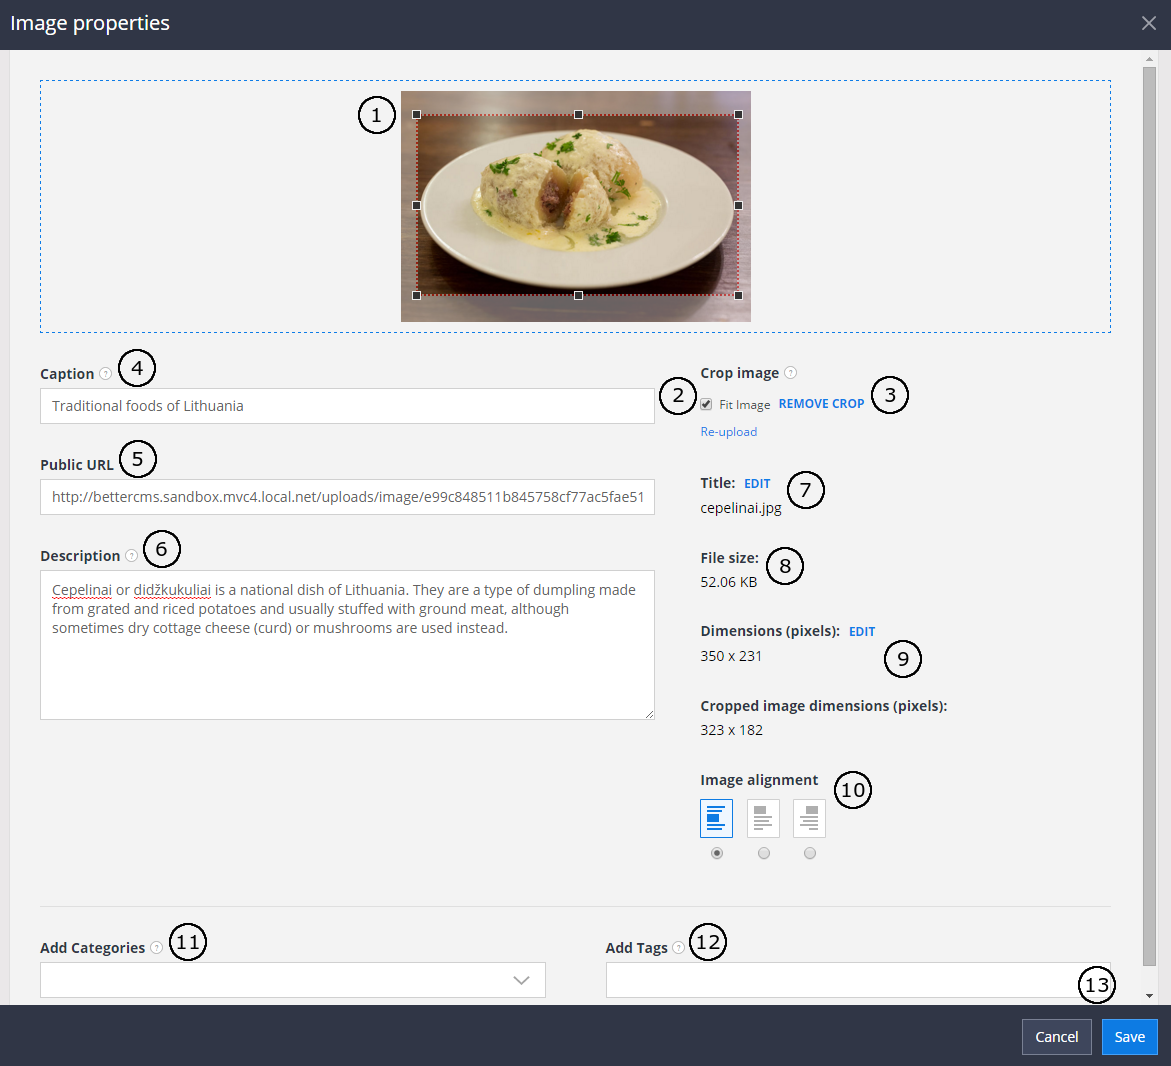
- Click and Drag over the image to select crop area.
- Check box to force image to fit into the screen.
- Button to reset crop area.
- Input for the image caption.
- Direct image url.
- Image description.
- Edit button to change the title.
- Current file size.
- Edit button to resize the image.
- Option to select image position in the text.
- Categorize the image.
- Add some tags.
- Buttons to save or cancel the changes made for the image.
Note: Each time image is resized / cropped, new version of image is stored in file storage. It means, that when image.jpg will be added to content, it will have reference to e.g. image_5.jpg and it will never change. If later image will be cropped or resized, image_5.jpg will be kept on server and new version, e.g.image_8.jpg will be created.

To insert image into the content: in the text editor toolbar click the image icon ( 1 ); in the Insert Image dialog click on the desired image with the left mouse button ( 2 ) and hit Insert ( 4 ). Additionally, if you would like to edit image before insert or insert image with additional parameters, in the Image Insert dialog click the ... button to access submenu to perform additional actions.
Access control can be enabled only for files. Images always are public. File and FTP storages don't support security tokens, so URL are always public. For secured files URLS use Windows Azure storage og Amazon S3 storage.
If access control is enabled, controls for managing access security appear on the bottom of the file properties. User can manage users and / or roles, which can access file. If access level is set to deny, users cannot view the file properties and even will not find a file in the search. If access level set to read only, file properties will be opened in read only mode: form can be viewed, but not saved.
Also, the same form controls appear, when uploading a file.
NOTE: If trying to save file with no one user/role, which have Read&Edit access level, an exception occurs.

- User access control section
- By clicking on one of the links, input field appears and user name or role name can be entered.
-
Read&Edit,Only ReadorNo accessaccess level can be assigned to users/roles.